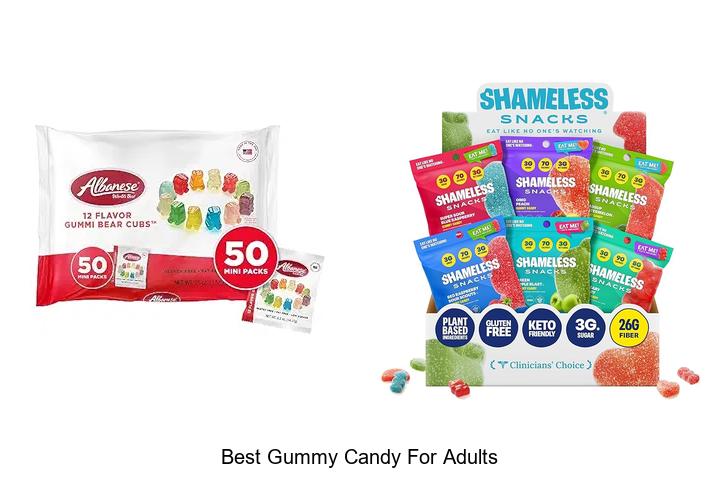
Make Your Own Gummy Candy: Step-by-Step Guide
Creating your own gummy candy at home might sound fun, but if you’ve ever tried, you know it can also be a bit overwhelming. Many people struggle with getting the texture just right or choosing the right ingredients. Don’t worry—you’re not alone, and it’s easier than you think to make delicious, personalized gummies with the right steps.
To make your own gummy candies, start by gathering fresh or natural ingredients like gelatin, fruit juices, sweeteners, and food coloring. Prepare your workspace with the necessary equipment, measure ingredients precisely, and select fun flavors and colors for customization.
Cook the mixture carefully, control heat and timing, then pour into molds to shape your gummies. Add decorations or creative variations to personalize your treats. Keep practicing each step to perfect your gummies—there’s more to uncover if you continue exploring!
Key Takeaways
- Gather high-quality ingredients like gelatin, fruit juice, sweeteners, and natural colorings to get vibrant flavor and appearance. Using good ingredients makes all the difference!
- Prepare your workspace with the necessary equipment such as molds, a saucepan, and measuring tools. Having everything ready helps make the process smooth and fun.
- Follow precise measurements and gently heat the mixture to create a smooth consistency. Pour it into molds for shaping your gummies.
- Add decorative touches like toppings, edible glitter, or molded shapes. These little details really make your gummies look amazing.
- Let the gummies set properly before removing them from the molds. Store them in airtight containers, and don’t be afraid to experiment with different flavors and colors!
Gather the Ingredients for Homemade Gummies
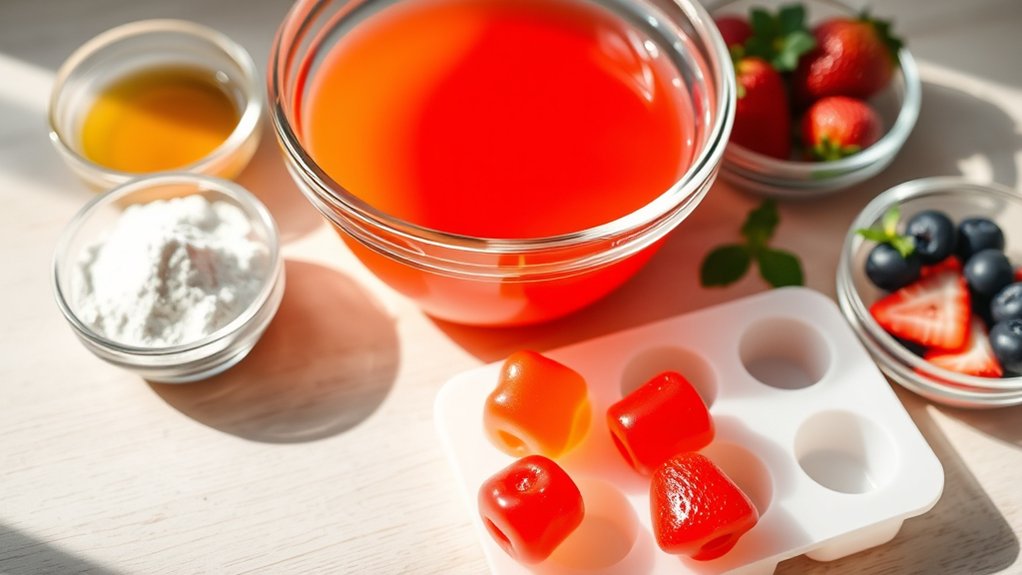
Before you start making your gummies, gather all the necessary ingredients. You’ll need gelatin, fruit juice or flavored extracts, sweeteners like honey or sugar, and a bit of water.
To create appealing flavor combos, choose a variety of fruit juices or extracts that complement each other. Think about mixing citrus with berry or tropical flavors for a vibrant taste.
When selecting ingredients, consider how color mixing techniques can improve your gummies’ look. Using natural fruit juices or food coloring lets you experiment with different shades, blending reds, blues, and yellows for eye-catching results.
Keep in mind that the quality of your ingredients impacts the flavor and texture of your gummies. Opt for fresh and natural options whenever possible.
Once you have everything ready, you’re all set to move on to the next step in your gummy-making adventure.
Set Up Your Equipment for Making Gummies
Before you jump into making gummies, it’s a good idea to gather all your equipment and set up a clean, organized workspace. Having everything in place makes the process way easier and more enjoyable. Make sure you have all the tools on your checklist—things like a saucepan, silicone molds, and a whisk.
A tidy setup not only keeps things running smoothly but also helps you avoid any accidents or mistakes along the way. Plus, it makes the whole experience more fun and less stressful!
Essential Equipment Checklist
To make your own gummy candies, you’ll need a few essential pieces of equipment to guarantee smooth and successful results. Start with a heavy-bottomed saucepan for melting ingredients evenly. A silicone spatula or whisk helps stir the mixture thoroughly.
For shaping, have silicone molds or a simple baking sheet lined with parchment paper ready. A digital thermometer ensures precise temperature control, which is vital for achieving the right gummy texture.
You’ll also want a dropper or squeeze bottle for adding flavors or colors, especially when experimenting with gummy flavor combinations. Finally, consider packaging design tools like small bags or containers for storing your candies.
These tools help you produce professional-looking gummies while maintaining freshness and quality. Proper equipment really makes all the difference in creating delicious, visually appealing gummies.
Proper Workspace Setup
Setting up your workspace properly makes sure your gummy-making process goes smoothly from start to finish. A well-organized space helps you stay efficient and reduces the risk of accidents.
Focus on organizing your workspace by designating specific areas for ingredients, equipment, and cleaning supplies. Keep your tools like spatulas, molds, and measuring cups within easy reach.
Make sure safety precautions are in place. Use heat-resistant gloves when handling hot liquids, keep a fire extinguisher nearby, and clear clutter to prevent spills or falls.
Consider working on a sturdy, non-slip surface that’s easy to clean. Here’s a quick setup checklist:
- Clear countertop for ample working space
- Separate zones for prep and cooking
- Accessible storage for safety gear and utensils
Choose Your Flavors and Colors for Custom Gummies

Choosing the right flavors and colors is key to creating personalized gummy candies that you’ll love. To start, think about flavor pairing—combine fruity, tangy, or sweet tastes that complement each other for a balanced bite.
For example, pairing lemon and raspberry creates a vibrant, invigorating flavor. When it comes to colors, color blending allows you to craft unique shades by mixing food-safe gel or liquid dyes.
Experiment with small amounts first to achieve the desired hue without overwhelming the natural flavor. Bright, contrasting colors can make your gummies visually appealing, while softer shades give a more subtle look.
Keep in mind that colors should match the flavor profile to boost the overall experience. Whether you want a rainbow of gummies or a specific theme, choosing harmonious flavors and colors makes your homemade candies more enticing and personalized.
Measure and Prepare Ingredients for Perfect Results
To make the perfect gummies, it’s all about measuring your ingredients just right. Getting those measurements accurate really makes a difference in the final texture and flavor of your candy. It might seem small, but precise measuring helps ensure everything turns out as delicious as you want.
Taking the time to prepare each ingredient carefully is also super important. When you handle everything with care and pay attention to the details, your gummies will come out with that perfect chew and taste you’re aiming for. So, don’t rush—your patience will pay off with amazing results!
Accurate Ingredient Measurements
Accurate ingredient measurements are essential for guaranteeing your gummy candy turns out perfectly every time. Precise measurements help you achieve the right texture, flavor, and appearance.
When measuring, think about how flavors will blend and how colors will mix to create appealing hues. Use a digital scale for liquids and powders, and measuring cups for smaller amounts to ensure accuracy.
Keep in mind:
- Carefully measure each ingredient to balance flavors and avoid overpowering notes.
- Use a scale to get exact amounts for gelatin, sweeteners, and flavor extracts.
- Mix colors gradually to achieve vibrant, appealing shades without muddying the hues.
Proper Ingredient Preparation
Before you start mixing your ingredients, take the time to measure and prepare each one carefully. Accurate measurements guarantee your gummies set perfectly and have the right texture.
When working with flavor combinations, think about how different extracts or fruit juices complement each other to create a balanced taste.
For coloring, prepare small amounts of food coloring to get your desired hue, blending carefully for vibrant, appealing gummies.
Keep your ingredients organized and within reach to make the process smoother. Proper preparation also means having your molds ready and any extra flavorings or toppings pre-measured.
This attention to detail helps prevent mistakes, saves time, and results in professional-looking, delicious gummies with beautiful color and flavor harmony.
Make Gummies Step-by-Step: A Complete Guide
Making gummies at home is simpler than you might think, and with the right steps, you can create your own flavorful treats from scratch. Start by preparing your gelatin mixture, choosing from endless gummy flavor combinations like citrus, berry, or tropical fruit.
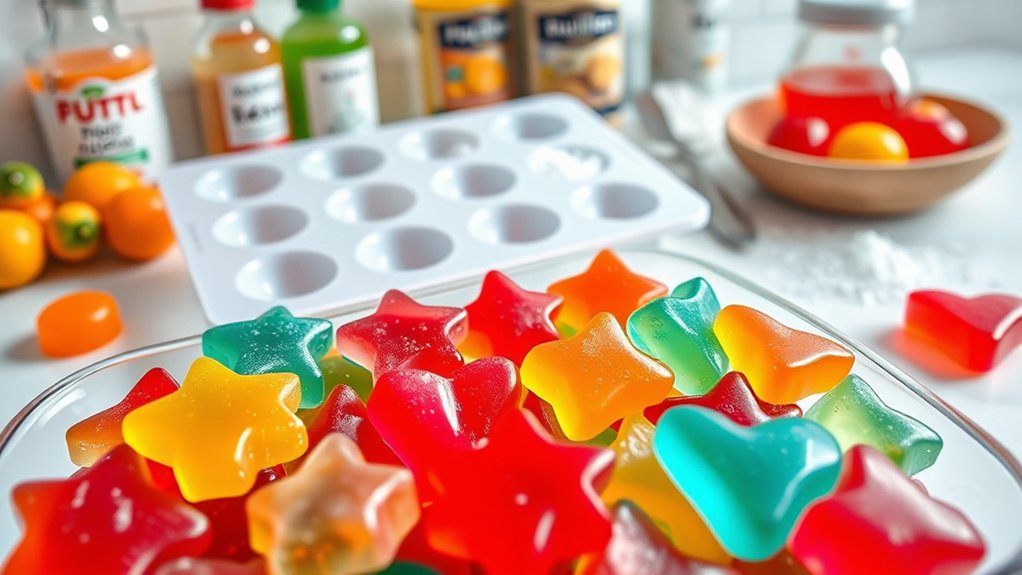
Once your base is ready, pour the mixture into silicone molds, which can be shaped into fun forms or classic rectangles. As you work, consider adding edible glitter options to give your gummies a sparkling, eye-catching finish.
To paint a vivid picture, imagine vibrant gummy shapes shimmering under a light dusting of edible glitter. Bright, fruity flavors blend seamlessly in each bite. Custom molds create unique, personalized treats.
Follow these steps carefully, and you’ll have delicious, visually appealing gummies that reflect your creativity and flavor preferences.
Achieve the Best Texture and Consistency
Getting that perfect gummy texture is all about using the right amount of gelatin and keeping an eye on the heat. If you add too much gelatin, your gummies might turn out tough and rubbery. On the other hand, using too little can make them too soft and not hold their shape. So, being precise with your measurements really makes a difference.
Also, how you control the heat and timing is super important. Keeping the temperature just right helps your gummies set properly, giving them that nice, chewy consistency we all love. A little patience and careful attention to these details will really take your gummies to the next level!
Use Proper Gelatin Ratios
Finding the right gelatin ratio is key to making gummies with the perfect texture. Too little gelatin makes them soft and chewy, while too much makes them rubbery.
To get it just right, consider these tips: Use a balance of gelatin and liquid to get a firm but tender bite. Adjust the gelatin amount based on how chewy or soft you want your candies.
Experiment with flavor combos, but keep in mind that some flavors might change how quickly the gummies set or their overall texture. Visualize your candies as vibrant, glossy, and springy.
Proper gelatin ratios help your gummies hold their shape while staying pleasantly chewy. Remember, tweaking the ratios to suit your recipe boosts both flavor and texture, making your homemade gummies truly irresistible.
Control Heat and Timing
Controlling the heat and timing during the cooking process directly impacts the texture and consistency of your gummies. Proper heat control ensures the gelatin and sweeteners dissolve evenly without overcooking, which can cause a rubbery texture. Use a gentle, steady heat and avoid boiling the mixture vigorously.
Timing precision is just as crucial. Cook just long enough for ingredients to fully combine and reach the desired consistency. Keep a close eye on the mixture and use a timer to avoid overcooking.
Removing the mixture from heat at the right moment preserves the gummy’s chewy texture. By mastering heat control and timing, you’ll achieve gummies that are perfectly firm yet tender, with a smooth, consistent bite every time.
Shape and Decorate Your Gummy Creations
Once your gummy mixture has set and firmed up, it’s time to shape and decorate your creations to make them truly unique. Use different gummy mold techniques to create fun shapes like hearts, stars, or animals, adding a playful touch.
If you prefer freeform shapes, just cut your gummies into squares, strips, or other creative forms with a sharp knife. To make your gummies pop visually, try edible decorations like drizzling melted chocolate, sprinkling colorful sugar crystals, or adding tiny edible glitter.
For a more polished look, dip gummies in edible shimmer or coat them with tinted candy melts. Imagine vibrant, eye-catching candies with personalized touches that reflect your style and preferences.
The key is to be creative, experiment with different molds and decorations, and enjoy transforming simple gummies into edible works of art.
Troubleshoot Common Gummy-Making Problems
Even with careful shaping and decoration, gummy-making can sometimes lead to unexpected results. If your gummies don’t set properly, check that you’re using the right amount of gelatin or agar. Too little can make them sticky and runny, while too much makes them rubbery.
For flavor issues, try experimenting with different flavor combos. Sometimes a small tweak in ingredients or adding a splash of juice can really improve the taste.
If your gummies stick together or mold quickly, focus on proper storage. Airtight containers help keep them fresh and prevent moisture from spoiling them.
Avoid stacking gummies directly on top of each other. Use parchment paper between layers if needed to prevent sticking.
For color inconsistencies, double-check your food coloring measurements. Troubleshooting often just involves adjusting ingredients and how you store your gummies—small tweaks can make a big difference in getting perfect, flavorful candies every time.
Explore Healthy and Creative Gummy Variations
If you’re looking to make gummies healthier and more creative, there are plenty of ways to customize recipes to suit your tastes and dietary needs. You can experiment with different flavor combinations by blending fruits, herbs, or spices to create unique tastes.
Using natural coloring techniques like beet juice, turmeric, or spinach extract adds vibrant hues without artificial dyes. To enhance your gummies, consider combining citrus with mint or berry with basil for invigorating, unexpected flavors.
You can also incorporate superfoods like chia seeds or spirulina for added nutrition. Using natural colorings produces eye-catching shades that appeal to both kids and adults.
These tweaks not only make your gummies more visually appealing but also boost their health benefits. With a little creativity, you can craft a variety of healthy, delicious gummies that stand out from store-bought options.
Store and Package Your Homemade Gummies
Proper storage and packaging are key to keeping your homemade gummies fresh, flavorful, and appealing. Store them in an airtight container, ideally in a cool, dry place away from sunlight.
To keep their texture and taste intact, consider layering your gummies with parchment paper to prevent sticking. When it comes to packaging, choose containers that show off your gummy flavors attractively.
Clear jars or resealable bags are great options because they look appealing and let people see the goodies inside. Custom labels can add a professional touch and make them look extra special.
Keep in mind that different flavors might need separate packaging to prevent flavor transfer. If you’re planning to gift your gummies, opt for decorative boxes or personalized wraps that match your style.
Proper packaging not only helps extend shelf life but also makes your gummies look irresistible. It’s all about presentation—making your treats enjoyable and tempting for everyone.
Frequently Asked Questions
Can I Use Alternative Sweeteners in Gummy Recipes?
Yes, you can use alternative sweeteners in gummy recipes. Popular options include honey, agave syrup, or stevia, which can help you cut down on sugar.
Just keep in mind health considerations, like how stevia might affect blood sugar or leave a slight aftertaste.
Be sure to adjust the quantities carefully, since some sweeteners are much sweeter than sugar.
Experimenting is key to finding the right balance of flavor and texture while making your gummies healthier.
How Long Do Homemade Gummies Typically Last?
Your homemade gummies usually last about one to two weeks if you store them properly—just like those fancy boutique candies.
To make them last longer, keep them in an airtight container in a cool, dark place. Keep them away from fridge humidity, which can make them soggy or moldy.
Are There Vegan-Friendly Gelatin Substitutes Available?
Yes, there are vegan-friendly gelatin substitutes available. You can use plant-based alternatives like agar-agar, carrageenan, or pectin, which work well in gummy recipes.
These options are derived from seaweed or fruits, making them suitable for vegans. When using vegan gelatin, follow specific measurements and melting instructions to get the right texture.
Experimenting with these substitutes lets you create delicious, cruelty-free gummy candies that everyone can enjoy.
What’s the Best Way to Prevent Gummies From Sticking?
Did you know that improper handling causes up to 60% of gummy texture issues? To prevent gummies from sticking, dust them with a light coating of cornstarch or powdered sugar.
Using proper coating techniques like tossing gummies gently creates a barrier that reduces sticking. Store them in an airtight container with a paper towel to absorb moisture, keeping your gummies fresh and non-sticky longer.
Can I Make Gummies Without Using Heat?
Yes, you can make gummies without heat by using gelatin and cold methods. Mix gelatin with fruit juice or flavored water, then pour into molds using candy shaping techniques.
To add flavor variations, incorporate extracts or purees before chilling. Once the mixture firms up in the refrigerator, pop out your gummies.
This method preserves fresh flavors and avoids the need for heating, giving you control over ingredients and texture.
Conclusion
Now that you’ve mastered the art of making your own gummies, you’re ready to create your sweet masterpiece. Each batch is like a canvas, bursting with flavors and colors you’ve crafted yourself.
Think of your kitchen as a playground where creativity blooms, and every gummy becomes a tiny, joyful sculpture.
So, go ahead—dive into this sugary adventure and turn simple ingredients into delightful treasures. Making your own gummy candy is a fun way to satisfy your sweet tooth and impress your friends.