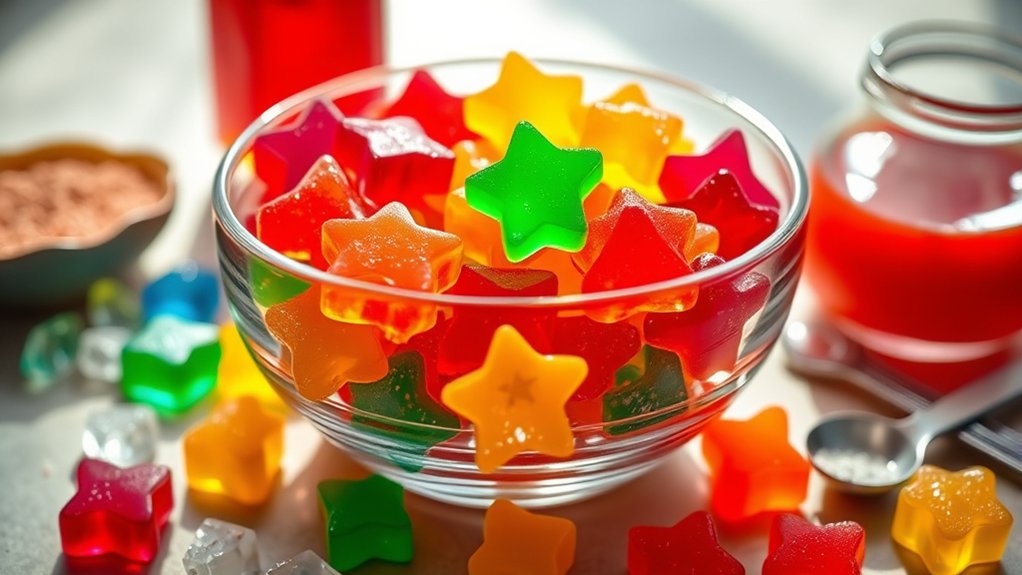
Easy DIY Gummy Candy Recipe for Beginners
Many people love homemade gummy candies but often get overwhelmed trying to get the texture just right or worry about adding too many artificial ingredients. You’re not alone in this struggle—crafting perfect gummies at home can feel tricky without the right tips and techniques.
Making gummy candies at home lets you control ingredients and customize flavors easily. Start with simple recipes using gelatin or vegan alternatives, fruit juice, and natural sweeteners. Use a saucepan, molds, and a whisk to mix and shape your gummies.
Focus on proper measurements and gentle heating for the perfect chewy texture. Experiment with shapes and flavors for fun and tasty treats. Keep exploring for detailed tips to craft your ideal gummies and avoid common mistakes.
Key Takeaways
- Gather essential ingredients like gelatin or vegan alternatives, fruit juice, and natural sweeteners for customizable, healthier gummies.
- Use gentle heat to dissolve gelatin completely without boiling. Then, add flavorings and pour into molds.
- Allow gummies to cool at room temperature, then refrigerate for at least 2 hours until firm and easy to remove.
- Customize flavors and colors with extracts, food coloring, or natural infusions for personalized gummies.
- Store gummies in airtight containers in a cool, dry place to maintain freshness and prevent spoilage.
Why Make Gummy Candies at Home Instead of Buying Store-Bought
Making gummy candies at home lets you control the ingredients and customize flavors, which isn’t always possible with store-bought options. The history of gummy candy dates back to the early 20th century when German candy makers created gelatin-based treats.
Making gummies at home allows for ingredient control and flavor customization, unlike store-bought options.
By making your own, you avoid artificial preservatives, colors, and excessive sugars found in commercial gummies. Plus, homemade gummies can be healthier because you can include natural sweeteners, add nutrient-rich ingredients like fruit purees, and adjust the sweetness to your liking.
Knowing exactly what goes into your candies makes them a better choice, especially if you’re mindful of dietary restrictions or allergies. Creating gummies at home also gives you the chance to experiment with flavors and textures, making the process fun and personalized.
Ultimately, making gummies yourself isn’t just about nostalgia. It’s about using better ingredients, making health-conscious choices, and enjoying the satisfaction of crafting a treat from scratch.
Picking Easy DIY Gummy Recipes for Beginners
When you’re just starting out with gummy recipes, it’s best to pick ones that are simple and easy to follow. Look for recipes that have only a few ingredients and don’t require complicated steps. That way, you won’t get overwhelmed, and making gummies will feel more like a fun experiment rather than a chore.
Also, go for flavors you actually like and feel comfortable customizing. Whether it’s fruit, citrus, or something a bit more unique, sticking to familiar tastes makes the process more enjoyable. Plus, you can always tweak the flavors later on as you get more confident. Overall, choosing straightforward recipes will help you have a stress-free experience and end up with delicious gummies you can be proud of!
Simple Ingredient List
Starting with a simple ingredient list is key to making gummy candies at home, especially if you’re just starting out. The basic ingredients are gelatin, fruit juice or flavored water, and sweetener.
For flavor, you can easily swap out fruit juices or add extracts like vanilla or citrus zest. Ingredient substitutions are flexible—you can use honey or agave instead of sugar, or choose plant-based gelatin for vegan options.
Here’s a quick overview:
| Ingredient | Purpose | Substitutions |
|---|---|---|
| Gelatin | Gummy structure | Agar-agar or vegan gelatin |
| Fruit juice/flavored water | Flavor base | Coconut water or herbal tea |
| Sweetener | Adds sweetness | Honey or agave syrup |
| Lemon juice | Extra flavor and setting | Lime juice or citric acid |
| Flavor extracts | Custom flavor infusion | Essential oils or vanilla |
Keep it simple—your perfect gummy starts with these easy, adaptable ingredients.
Basic Gummy Techniques
If you’re new to making gummies at home, try starting with simple recipes that use straightforward techniques. This can boost your confidence and help you succeed.
Focus on basic gummy-making methods, like gently heating your ingredients and stirring consistently to ensure everything dissolves evenly. Use a reliable mold to shape your gummies and make them easier to remove.
When infusing flavors, begin with small amounts of fruit juice or extracts. Add them during heating for even distribution. Keep your mixture at a gentle simmer and avoid boiling to prevent texture issues.
Pour the mixture carefully into molds, then refrigerate until they set. Mastering these basic techniques makes the process smoother and helps you create tasty gummies with consistent texture and flavor.
Easy Flavor Combinations
Choosing the right flavor combinations can make your homemade gummies both delicious and easy to prepare. Start with simple flavor infusions like fruit juices, extracts, or purees—strawberry and lemon, blueberry and mint, or orange and vanilla work well. These combos are straightforward and require minimal effort.
To elevate your gummies, consider adjusting the texture. You can add a bit of gelatin or pectin for firmness or coconut milk for a softer bite. Mixing flavors in small batches lets you experiment without wasting ingredients.
Keep your recipes simple by sticking to familiar fruit flavors or popular extracts. This makes the process friendly for beginners. With these easy flavor combos, you’ll create tasty gummies that look great and taste fantastic with minimal fuss.
What You Need to Make Gummies at Home
If you’re thinking about making gummies at home, you’ll want to gather a few basic ingredients first. Things like gelatin, your favorite fruit juice, and a sweetener are all you’ll really need to get started. It’s pretty straightforward, and you’ll be surprised how easy it is to whip up a batch!
Of course, you’ll also want to have the right tools on hand. A saucepan is great for melting everything together, along with some mixing bowls for stirring. And don’t forget molds — they’ll give your gummies that perfect shape and make your homemade treats look super professional. Just having these supplies ready will make the whole candy-making process smooth and fun!
Essential Ingredients List
Making gummies at home requires just a few simple ingredients that come together quickly to create tasty treats. First, you’ll need unflavored gelatin, which gives your gummies their chewy texture.
Next, fruit juice or flavored liquid acts as the main flavoring. You can also try different gummy flavorings to make your treats unique.
Sweeteners like honey or sugar enhance the flavor and texture. If you want a healthier version, you can swap in agave syrup or stevia.
These ingredients are versatile, so you can easily adjust flavors and sweetness levels to suit your taste. Keep in mind, the quality of your flavorings impacts the final product, so opt for natural options whenever possible.
With these essentials, you’re all set to make your perfect homemade gummies.
Necessary Kitchen Tools
Having the right tools makes creating gummies straightforward and enjoyable. You’ll need a few essential kitchen tools to get started, like a saucepan for melting ingredients and a silicone mold for shaping your gummies.
A whisk helps mix everything smoothly, making sure ingredients are evenly distributed. A dropper or pipette can be handy for filling molds precisely.
Always handle hot mixtures carefully and keep your workspace clean to stay safe in the kitchen.
If you need ingredient substitutions, a sturdy spatula is great for mixing alternatives.
And don’t forget a measuring cup to ensure accurate proportions, which is key for successful gummies.
With these tools, you’ll make the process easier and create delicious, homemade gummies with confidence.
Step-By-Step Guide to Making Gummy Candies From Scratch
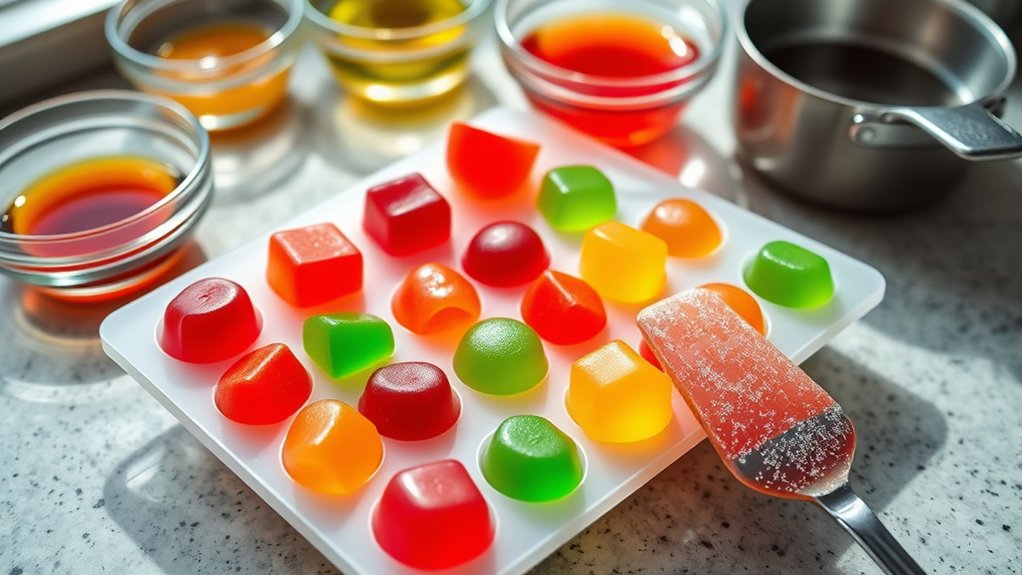
Creating your own gummy candies at home is easier than you might think. Once you have your ingredients and tools ready, just follow these simple steps to make delicious gummies:
- Prepare the mixture: Combine gelatin, fruit juice, and a sweetener in a saucepan. Stir until the gelatin dissolves completely, then add your favorite flavorings for a personal touch. Bring the mixture to a gentle simmer, making sure everything blends smoothly.
- Pour and set: Pour the hot mixture into silicone molds or a baking dish lined with parchment paper. Use a dropper if you want to be precise. Let it cool to room temperature, then refrigerate for at least 2 hours until firm.
- Package your gummies: Once they’re set, remove them from the molds and cut into pieces if needed. Store your homemade gummies in airtight containers, and consider candy packaging options to keep them fresh and appealing.
Tips for Achieving the Perfect Chewy, Firm Texture
Achieving the perfect chewy, firm texture in homemade gummies requires careful attention to the gelatin ratio and cooking process. The gummy texture depends heavily on the amount of gelatin used; too little, and your gummies will be soft and flimsy. Too much, and they’ll be overly stiff.
Use high-quality gelatin and follow the recommended measurements for a reliable texture. When cooking, simmer the mixture gently to fully dissolve the gelatin without overcooking, which can cause a rubbery consistency.
If you want to experiment with ingredient substitutions like agar-agar or pectin, keep in mind these can change the gummy texture a lot. For example, agar-agar sets firmer and more quickly, so adjust quantities accordingly.
Precision in measuring ingredients and careful control of the cooking process are key to achieving a consistently chewy, firm candy. Small adjustments can make a big difference in the final gummy texture.
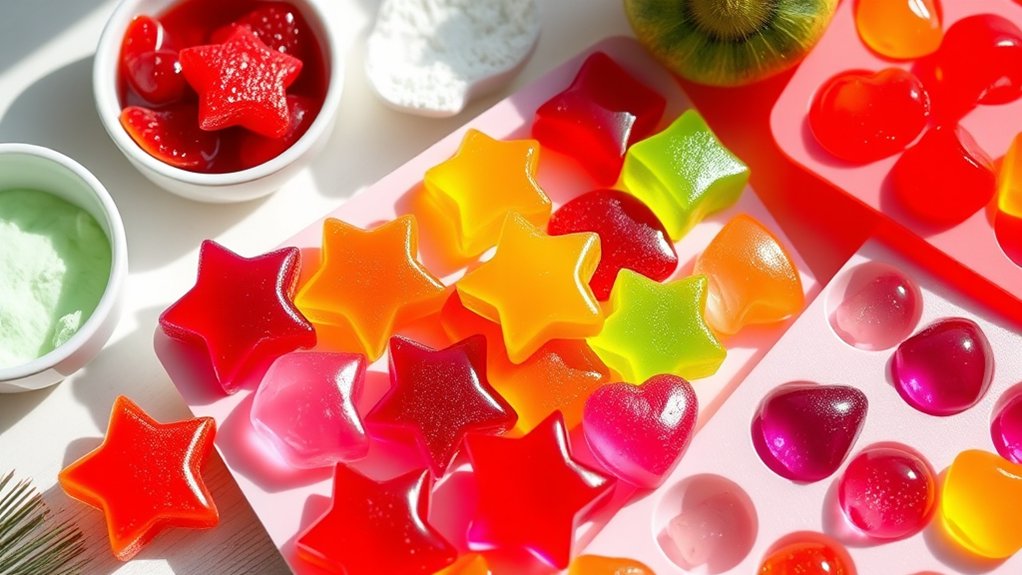
Custom Flavors and Colors to Personalize Your Gummies
Adding your own flavors and colors is a simple way to make your gummies uniquely yours. You can try different flavor infusions to create distinct tastes, like adding fruit extracts or herbal essences.
For colors, blending food colorings lets you customize shades, from vibrant hues to soft pastels, based on what you prefer.
Here are some tips to personalize your gummies:
- Use concentrated flavor infusions for bold, natural tastes. Adjust the amount to get the flavor strength you want.
- Mix different food colorings to create custom hues. Blend primary colors or make pretty pastel shades.
- Add edible powders or extracts to enhance flavor complexity without overpowering the color or texture.
These easy tweaks let you craft gummies that reflect your personality, whether you want a subtle, elegant look or bright, playful colors. Personalizing flavors and colors makes your homemade gummies truly yours.
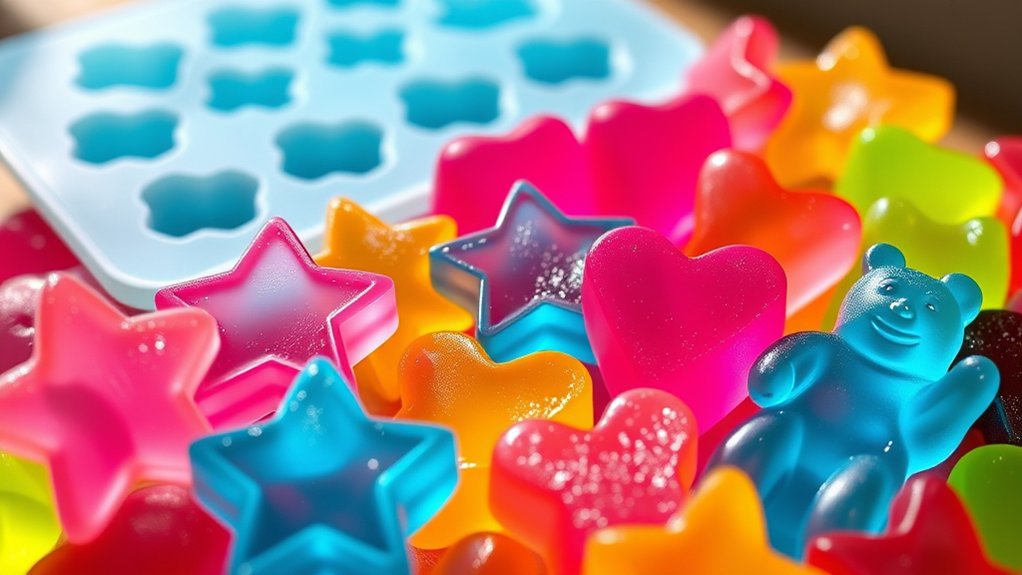
Shaping Your Gummies for Fun and Ease
Once you’ve mixed your flavors and chosen your colors, shaping your gummies is the fun part. The right gummy mold options can turn your treats into anything from classic bears and worms to star or heart shapes.
Shaping gummies with fun molds and creative techniques makes treats visually irresistible and uniquely yours.
Silicone molds are popular because they’re flexible and easy to work with, making removal a breeze. If you don’t have molds, get creative with cookie cutters, small cups, or even ice cube trays for unique shapes.
Creative shaping techniques include pouring the mixture into molds and using droppers for small details or layering different colors to make eye-catching effects. You can also try freehand shaping on parchment paper or use silicone molds to create layered, multi-colored gummies.
The key is to have fun and be inventive. Your gummies will look as good as they taste!
Storing Gummies to Keep Them Fresh and Tasty
Wondering how to keep your homemade gummies fresh and delicious? Proper storage is key to maintaining their texture and flavor. Here are some simple tips to help you out:
Store gummies in an airtight container to keep out air and moisture, which can make them sticky or hard.
Keep the container in a cool, dry place away from direct sunlight, as heat and light can spoil their flavor.
For longer shelf life, consider vacuum-sealing or adding a food-safe desiccant packet to absorb excess moisture.
Common Mistakes to Avoid When Making Gummies
Making gummies at home can be fun, but it’s easy to stumble into common pitfalls that can ruin your batch. One major mistake is not measuring gummy flavorings accurately; too much can overpower the taste, while too little leaves your gummies bland. Be precise with your flavorings to get the taste just right.
Another mistake involves candy mold techniques. If you don’t prepare your molds properly, gummies may stick or break when removing. Greasing molds lightly or using non-stick spray helps prevent this issue. Also, avoid rushing the setting process, as it can lead to uneven textures or incomplete setting.
When melting gelatin or other ingredients, don’t overheat. Excess heat can change the flavor and texture of your gummies. Lastly, neglecting to make sure your mixture is smooth before pouring can result in lumpy gummies. Taking your time with prep and paying attention to these details will help you make professional-looking, delicious gummies every time.
Variations and Dietary-Friendly Gummy Recipes
Experimenting with different variations and dietary-friendly ingredients can turn your homemade gummies into inclusive treats that fit any lifestyle. Gummy candy has a long history of being versatile, and now you can adapt it to meet specific nutritional needs.
Get creative with dietary-friendly ingredients to make personalized, nutritious gummy treats for every lifestyle.
Here are three ideas to get you started:
- Vegan Gummies – Use agar-agar instead of gelatin to create plant-based gummies. They keep the chewy texture and are perfect for vegans.
- Low-Sugar Options – Swap out traditional sugar for natural sweeteners like stevia or monk fruit. This reduces sugar content and adds nutritional benefits.
- Fortified Gummies – Add vitamins or minerals, such as vitamin C or zinc, for a functional treat with extra health perks.
These variations honor the rich history of gummies and make it easier to enjoy guilt-free, nutritious snacks tailored to your lifestyle.
Frequently Asked Questions
How Long Do Homemade Gummies Typically Last Before Spoiling?
Homemade gummies usually last about a week, like a fleeting rainbow in your jar. To keep them fresh, store them in an airtight container in the fridge.
Proper storage tips, such as avoiding humidity and direct sunlight, help prolong their shelf life. If you notice any changes in texture or smell, it’s time to toss them.
Enjoy your tasty treats within this window for the best flavor and safety.
Can I Make Gummies Without Using Gelatin or Animal Products?
Yes, you can make gummies without gelatin or animal products by using vegan gelatin alternatives or plant-based gelling agents. Options like agar-agar, pectin, or carrageenan work well and give that chewy texture.
Just swap out gelatin for these substitutes in your recipe, and tweak the amounts as needed. They’re easy to work with and create tasty, cruelty-free gummies perfect for anyone on a vegan or vegetarian diet.
What Are Some Natural Sweeteners I Can Substitute in Recipes?
You can use sugar alternatives like honey, maple syrup, agave nectar, or coconut sugar for natural sweetness in your gummies. These options add a healthier touch and enhance flavor.
When substituting, remember that natural sweetness varies, so you might need to tweak the amounts to get the right balance. Using these sugar options keeps your gummies tasty and naturally sweetened without refined sugars or artificial additives.
How Can I Make Gummies Without Using Any Specialized Molds?
Imagine squeezing sweet, vibrant gummies directly into your hand, no molds needed. You can pour your mixture into a silicone ice cube tray, small cups, or even a parchment-lined baking dish, then cut into fun shapes once set.
Play with flavor combinations like citrus and berry. Store your homemade gummies in airtight containers such as small jars or resealable bags to keep them fresh and chewy, ready to enjoy anytime.
Are There Any Safety Tips for Working With Hot Liquids in Gummy Making?
When working with hot liquids in gummy making, prioritize kitchen safety by using heat-resistant gloves and long-handled utensils to prevent burns. Always pour hot liquids slowly and carefully to avoid splashes.
Keep a fire extinguisher nearby, and work on a stable, clutter-free surface. Remember to turn off heat once you’re done, and never leave hot liquids unattended.
Proper hot liquid handling guarantees safety and a smooth gummy-making experience.
Conclusion
Now that you’ve mastered making gummies at home, who needs store-bought treats packed with mystery ingredients? Imagine your kitchen transforming into a candy factory, with colorful, chewy delights ready to be devoured.
Just remember, your newfound skill might make those store shelves seem dull. But hey, at least you’ll have control over every gummy’s shape, flavor, and texture.
Who knew that crafting candy at home could turn your kitchen into a sweet, chewy paradise? Making gummies at home is not only fun but also gives you the freedom to create your perfect treats.