10 Simple Steps to Make Sour Gummy Candy at Home
Many candy lovers dream of making their own sour gummy candy at home but feel overwhelmed by the process. You’re not alone—crafting perfect gummies can seem tricky, especially when trying to get just the right sour punch.
Luckily, with a few simple steps, you can create delicious, tangy treats right in your kitchen.
To make sour gummy candy at home, start by gathering ingredients like gelatin, fruit juice, acids, and sweeteners, then prepare your workspace and molds.
Mix and heat your ingredients carefully, stirring until smooth while monitoring the temperature.
Add your favorite flavors and adjust the sourness with acids.
Pour the mixture into molds, let it set properly, then cut and shape your gummies for presentation.
Store them in an airtight container, and if issues arise, there are simple fixes to try.
Keep going to uncover all the step-by-step details!
Key Takeaways
- Gather and measure your gelatin, fruit juice, acids, and sweeteners. Set up a clean workspace with molds and tools ready to go.
- Gently heat the ingredients to the right temperature, stirring constantly until everything looks smooth and glossy.
- Taste and adjust the flavor and sourness by adding extracts and acids gradually. Then, coat your gummies with a sour sugar mixture for that perfect tang.
- Pour the mixture into silicone molds, then let the gummies cool and set fully in a cool, dry place.
- Once they’re ready, store your gummies in airtight containers. If the texture isn’t quite right, you can fix it by adjusting the gelatin levels or heating times.
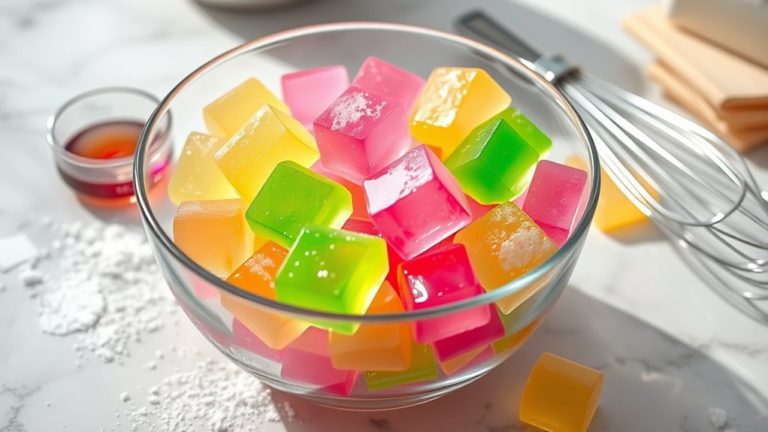
Gather Ingredients for Homemade Sour Gummy Candies
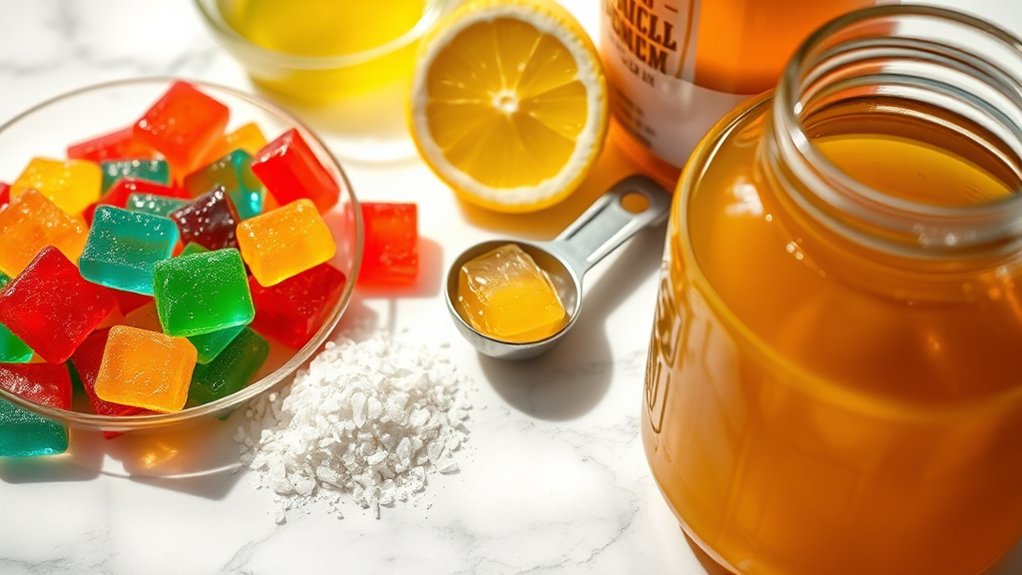
Before you start making your sour gummy candies, make sure you have all the ingredients you need. You’ll want gelatin or agar-agar for that chewy texture, along with fruit juice or flavored extracts for the flavor.
To get that classic sour taste, gather citric acid and extra tartaric acid if you want even more tang. For sweetness, pick honey, sugar, or corn syrup. And don’t forget edible sour sugar or citric acid powder for coating.
For that signature sour punch, gather citric and tartaric acids, plus sweeteners like honey or corn syrup.
While shopping, think about nutrition facts and choose ingredients that fit your dietary needs, like low-sugar options if you prefer. Once your candies are made, store them in an airtight container at room temperature to keep them fresh.
Collecting quality ingredients now makes the whole process easier and helps ensure your homemade sour gummies turn out delicious and safe to enjoy. Being organized and precise from the start makes everything go more smoothly and makes the experience more fun.
Prepare Your Candy Molds and Workspace for Safe Handling
Preparing your workspace and candy molds is key to making sour gummy candies safely and cleanly. Start by thoroughly cleaning your molds to prevent contamination and ensure they’re safe for food use.
Use non-stick silicone molds for easy release and to keep your candies looking perfect. Keep your workspace organized with all your tools within reach to avoid spills and save time.
Cover your work surfaces with parchment paper or a silicone mat to catch drips and spills. Keep ingredients, utensils, and molds separate to prevent cross-contamination.
Wearing gloves and working in a well-ventilated area helps maintain hygiene and keeps you safe. Always handle hot liquids carefully to avoid burns and accidents.
Mix and Heat Ingredients to Create the Perfect Gel
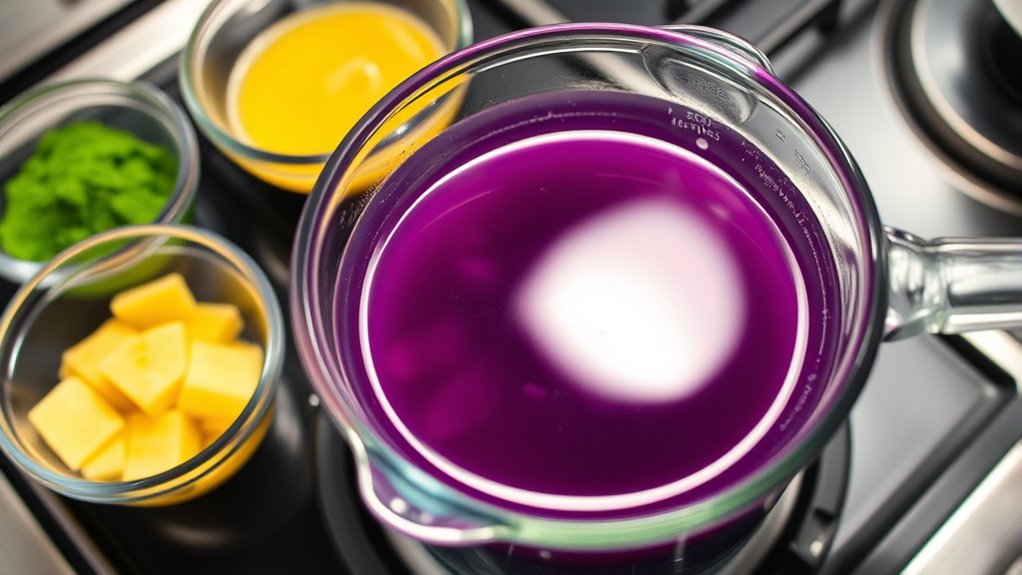
To make the perfect gel, start by measuring your ingredients carefully. Getting the right amounts is key to achieving the perfect texture and flavor. Once you have everything measured out, it’s time to heat things up—but do it gently. Use a low, steady heat to melt everything evenly, making sure you don’t burn or overcook it.
As you heat, keep an eye on the mixture. You want it to become smooth and a little thickened, but not too runny or too firm. When it reaches that just-right consistency, it’s ready. That’s when you know you’ve made a great gummy or gel—smooth, shiny, and perfectly set.
Measure Ingredients Precisely
Accurately measuring your ingredients is key to making the perfect gummy candy gel. Precise measurements give you consistent results and help keep the ingredient proportions right.
When you focus on measuring accuracy, you avoid mistakes that could change the texture and flavor of your gummies. Use a digital scale for dry ingredients and measuring cups for liquids to be exact.
Keep your tools clean and level off ingredients for consistency. Remember, small deviations can affect the gel’s firmness or sourness. Proper scaling means adjusting quantities proportionally, especially when doubling or halving recipes.
By paying close attention to measurements, you create a solid foundation for a successful batch of sour gummy candy. Consistent measurements prevent surprises, and accurate scaling preserves the recipe’s balance.
Using precise tools improves the overall quality, and small adjustments help achieve the perfect texture.
Use Correct Heating Method
Mixing and heating your ingredients correctly is key to forming a smooth, cohesive gel for your sour gummy candies. Always use a double boiler or a heavy-bottomed saucepan to avoid direct heat that can scorch the mixture.
Keep a close eye on the temperature with a reliable candy thermometer. This helps prevent overheating, which can ruin the gel’s texture. Gently stir the mixture as it heats to ensure all ingredients dissolve evenly.
Don’t rush the process by cranking up the heat too quickly. Sudden temperature changes can cause uneven heating or burning. Proper temperature control is essential for achieving the right consistency and avoiding mishaps.
Achieve Desired Consistency
Achieving the perfect gel consistency depends on properly mixing and heating your ingredients. Keep a close eye on the heat and stir constantly to get the right texture. Once your mixture is smooth and glossy, it’s ready for pouring.
Experimenting with flavor combinations adds unique twists to your candies. Try blending fruit extracts or seasonings for interesting flavors. When the gel is just right, think about packaging options like silicone molds or flexible containers to make shaping easier.
Be careful not to over-heat, as this can make your candy too firm. Under-heating, on the other hand, results in a runny texture. To ensure success, use a candy thermometer to monitor temperature and stir continuously to prevent burning.
Test the gel’s thickness before pouring, and choose packaging that preserves freshness and flavor. With these tips, you’ll be able to achieve the perfect gel consistency every time.
Add Flavors and Adjust Sourness to Your Taste
Once you’ve prepared your gummy mixture, it’s time to customize the flavors and sourness levels to suit your preferences. To create appealing flavor combinations, experiment with extracts like lemon, raspberry, or cherry, adding small amounts until you reach your desired taste.
You can also incorporate ingredient substitutions, such as using fruit juices instead of water for a more natural flavor. For sourness, gradually add more citric acid or malic acid, tasting as you go to avoid overdoing it.
Keep in mind that different acids contribute varying sour profiles, so adjust accordingly. If you want a complex flavor, try blending multiple extracts or adding a pinch of salt to improve the taste.
Achieve the Perfect Chewy and Firm Gummy Texture
To get that perfect chewy and firm gummy texture, it’s all about getting the right amount of gelatin. If you add too much, your gummies might turn out too tough; too little, and they won’t hold together well. So, measuring carefully is key!
Also, keep a close eye on the temperature while you’re working. Perfect control makes sure your gummies set just right, avoiding any weird textures. And don’t forget about cooling—proper techniques help keep the right consistency and stop your gummies from becoming too sticky or overly firm.
Optimal Gelatin Ratios
Getting the right gelatin ratio is key to making sour gummy candies that are chewy yet firm. Using the correct gelatin ratios guarantees your candies have the ideal texture, balancing chewiness and firmness.
Too much gelatin makes them tough, while too little results in a soft, squishy candy. Adjusting the gelatin amount also allows for flavor customization, giving you control over how dense or tender your gummies feel.
To get the best results, keep these points in mind: Use precise measurements for consistent texture. Experiment with gelatin ratios to find your perfect chewiness. Balance gelatin with other ingredients for different flavor nuances.
Precise Temperature Control
Maintaining a precise temperature during the candy-making process is key to getting that perfect chewy and firm gummy texture. If the mixture gets too hot, the gummies could turn out too soft or even melt.
On the other hand, if it’s too cool, they might be too hard to bite. Use a candy thermometer to keep a close eye on the temperature.
Proper temperature control ensures the best gel formation, which affects both flavor pairing and texture. When choosing ingredients, go for high-quality gelatin and flavor extracts for consistent results.
| Temperature Range | Resulting Gummy Texture |
|---|---|
| 200°F – 210°F | Chewy and firm |
| 170°F – 180°F | Soft and pliable |
| Below 170°F | Too soft, less structured |
Proper Cooling Techniques
Cooling your gummy mixture properly is key to getting that perfect chewy and firm texture. After pouring the mixture into molds, place the gummies on cooling racks to help with even air circulation.
Make sure they sit at room temperature, away from drafts or direct sunlight, which can mess with the setting process. Proper cooling prevents stickiness and helps keep the texture consistent.
Use cooling racks to improve airflow and avoid condensation. Keep gummies away from heat sources and don’t rush things by refrigerating immediately.
Wait until they are fully cooled before handling or packaging. Following these tips will give you chewy, firm gummies with the right balance of flexibility and structure every time.
Apply Sour Coating: Powder or Sugar-Based Techniques
Applying the sour coating is a simple step that makes your gummy candies irresistibly tangy. You’ll use a powder or sugar-based mixture for this.
Start by preparing your sour coating. Mix citric acid, tartaric acid, or malic acid with sugar or cornstarch, depending on how tart you want them.
For a powder coating, put the dry mixture in a shallow dish. Gently roll or toss your gummies in the coating so they’re evenly covered.
You can also brush or spray the gummies with a flavored sour syrup before dusting with the dry mixture. This boosts the flavor infusion.
Remember to apply the coating quickly while the gummies are still slightly sticky so the sour mixture sticks well.
This step guarantees a consistently tangy bite in every gummy.
Let Your Gummies Set and Harden Properly
Hey, to make sure your gummies set just right, it’s a good idea to use the right molds and keep the temperature steady. Trust me, giving them enough time to dry is super important if you want that firm texture – so don’t try to rush it.
If you pay attention to these little details, your gummies will turn out exactly how you want them. Just be patient, and you’ll end up with perfect, delicious gummies!
Use Proper Molds
Choosing the right molds is key to shaping your sour gummy candies and making sure they set properly. Your mold choice affects how the final candies look and how easy they are to remove.
Silicone molds are a great option because they’re flexible, making it simple to pop out your gummies without breaking them. Pick molds with smooth surfaces to prevent sticking and get clean edges.
Think about the size and shape you want. Smaller molds give you bite-sized treats, while larger ones make fun, shareable candies. Always choose molds that are BPA-free and food-grade for safety.
Maintain Correct Temperature
Ensuring your gummies set and harden at the right temperature is key to getting the perfect texture and shape. If they’re too hot, they’ll stay sticky and might lose their form; if it’s too cold, they could become brittle.
Keep a steady temperature when pouring your mixture into molds, especially when trying out different flavors. This helps prevent uneven setting and ensures consistent results.
Choosing the right mold material also matters. It helps heat transfer evenly and supports proper hardening. Keep your environment cool and avoid moving the molds until the gummies are fully set.
With good temperature control, your sour gummies will develop the perfect firmness and vibrant flavors. This way, you get consistent, professional-looking treats every time.
Allow Adequate Drying Time
Allowing your gummies enough time to dry and set is key to getting the right texture. Proper drying makes sure your candies turn out firm and chewy, not sticky or too soft.
Use good drying techniques, like air drying in a cool, dry place, to help them harden evenly. This step also helps your gummies last longer without mold or breaking down.
Be patient here—skipping or rushing this step can lead to stickiness or cracks later on. Make sure there’s steady airflow and a consistent temperature during drying.
Avoid humid environments, as they can slow down or prevent proper setting. Using parchment paper or a silicone mat can stop your gummies from sticking to surfaces.
Check your gummies regularly to see if they’re firm enough before storing. These steps will help your sour gummies stay fresh longer and have the perfect texture.
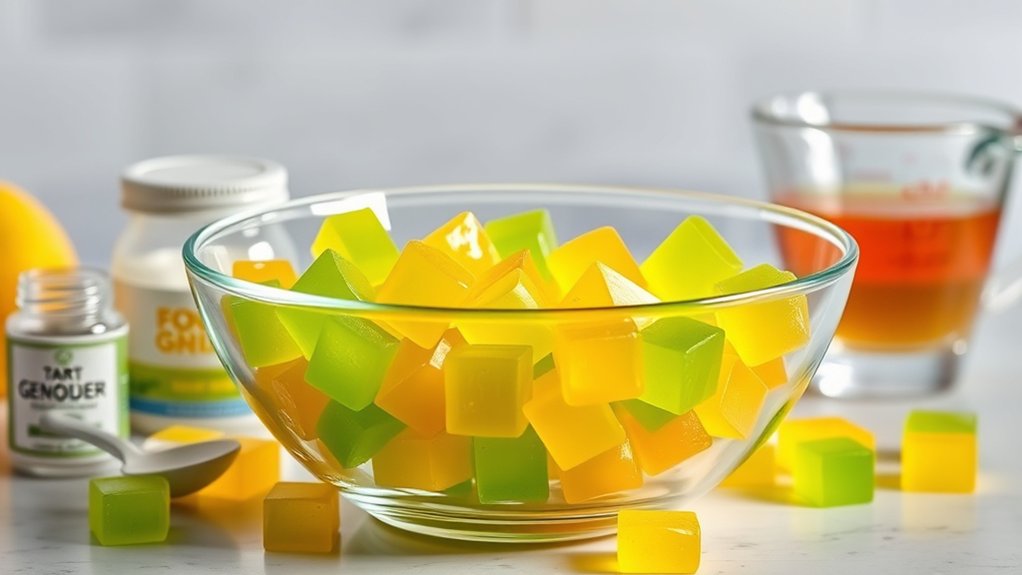
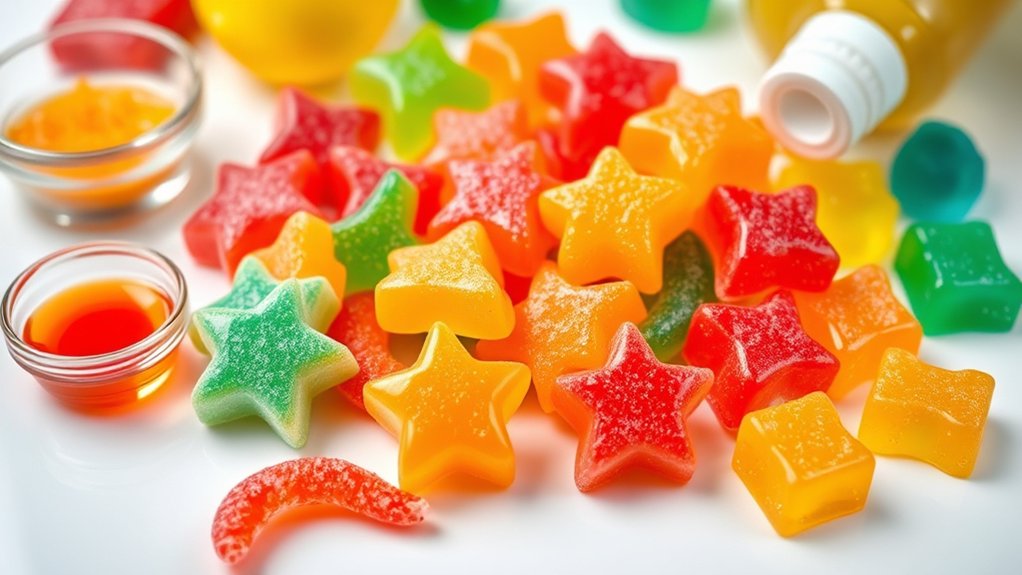
Cut and Shape Your Homemade Sour Gummies for Presentation
Once your sour gummies have set and firmed up, it’s time to cut and shape them for presentation. The gummy texture should be firm but still pliable, making it easy to cut cleanly.
Once set, cut and shape your gummies for a polished, fun presentation.
Use a sharp knife or cookie cutter to achieve neat shapes like squares, circles, or fun designs. Lightly dust your cutting surface with powdered sugar or cornstarch to prevent sticking.
If you want uniform pieces, consider using a silicone mold or a pastry cutter. Take your time to make each piece even, which really boosts the overall look.
For extra visual appeal, you can reshape gummies by hand or use small cookie cutters for themed shapes. How you cut and shape them not only makes them look great but also makes them more fun to eat, showing off your creativity and attention to detail.
Store Your Sour Gummy Candies to Keep Them Fresh and Chewy
After you’ve cut and shaped your sour gummies, proper storage is key to keeping them fresh and chewy. To maximize shelf life, choose airtight packaging to prevent moisture loss and exposure to air, which can make your candies harden or spoil.
Tips include using resealable bags or airtight containers, and lining them with parchment paper to prevent sticking. Keep your gummies in a cool, dry place away from direct sunlight, as heat and light can degrade their texture and flavor.
Make sure to label your storage containers with the date so you can track freshness. Proper storage not only keeps them chewy but also preserves their sour coating and flavor intensity.
Troubleshoot Common Issues When Making Sour Gummies at Home
Making sour gummies at home can sometimes lead to common issues like stickiness, uneven texture, or difficulty setting properly. To fix stickiness, make sure you boil the mixture long enough for proper gel formation. If your gummies are too soft, try adding more gelatin or agar.
For uneven textures, stirring well during cooking helps prevent clumping. When gummies don’t set, check your temperature and aim for around 200°F (93°C). Pair flavors carefully, as some sour ingredients work better together to boost the taste.
When packaging your gummies, use airtight containers to keep moisture out and maintain their chewiness. These simple tips can help you make perfect, delicious sour gummies every time.
Frequently Asked Questions
Can I Use Alternative Sweeteners Instead of Sugar?
Yes, you can use sugar alternatives or natural sweeteners instead of sugar for sour gummy candy. Options like honey, agave syrup, or maple syrup work well and add unique flavors.
You could also try stevia or monk fruit for a lower-calorie option. Just keep in mind that some natural sweeteners might change the texture or sourness a bit.
How Long Do Homemade Sour Gummies Stay Fresh?
Homemade sour gummies usually stay fresh for about one to two weeks if you store them right.
To keep them longer, make sure they’re in an airtight container at room temperature, away from direct sunlight and humidity.
If you want them to last even longer, you can pop them in the fridge for up to three weeks.
Just remember, sealing them tightly and avoiding moisture helps keep their texture and flavor better for longer.
Are There Vegan or Allergy-Friendly Sour Gummy Recipes?
Vegan gelatin alternatives like agar-agar or pectin work like magic to create chewy, sour gummies without animal products. They’re a great way to enjoy the tangy fun while keeping it plant-based.
For allergy-friendly options, swap out common allergens with fruit purees, coconut milk, or allergy-safe thickeners. These ingredient swaps turn your sour gummies into a rainbow of inclusive treats.
Everyone can enjoy these delightful, allergy-conscious candies. Crafting them is easy and fun, ensuring all your friends can join in the tangy, chewy goodness!
What Are the Best Ingredients for Natural Sour Flavor?
To achieve a natural sour flavor, you should use natural flavor extracts like citrus or berry extracts, which provide authentic taste without artificial additives.
Moreover, incorporating fruit juice concentrates such as lemon, lime, or tart cherry concentrates amplifies the sourness naturally.
These ingredients work together to give your gummy candies a vibrant, tangy flavor, ensuring a wholesome and delicious treat without synthetic flavors.
Can I Make Sour Gummies Without a Candy Thermometer?
Yes, you can make sour gummies without a candy thermometer. Just focus on balancing the pH by adding tartaric or citric acid little by little, tasting as you go to get the sourness just right.
Keep an eye on the mixture’s temperature by watching its boiling point and consistency since that affects the gummy texture. Stir constantly so everything mixes well.
Once it reaches the right acidity and consistency, pour it into molds and let it set. No thermometer needed, just a bit of patience and tasting!
Conclusion
Now that you know how to craft your own sour gummy candies, why settle for store-bought treats when you can create personalized, flavorful delights at home?
With these simple steps, you’ll impress friends and satisfy sweet cravings with minimal effort. Isn’t it rewarding to see your tasty creations come to life?
So go ahead, experiment with flavors, and indulge in the satisfying process of making your own sour gummies. Your taste buds will thank you!