DIY Guide to Make Gummy Lego Candy at Home
Making your own gummy Lego candy at home can seem tricky, especially if you’re worried about finding the right ingredients or tools. Many people struggle to create fun, colorful treats that are safe for kids and taste great.
To make gummy Lego candies at home, gather high-quality gelatin, fruit juice, sweetener, and food coloring. Use flexible, food-grade silicone molds designed for detailed shapes.
Pour the mixture into molds, refrigerate until firm, and add vibrant colors or flavors for customization. Make certain proper storage and follow safety tips to keep your candies fresh and safe.
Want to know all the tips and tricks? Keep exploring for a full step-by-step guide.
Key Takeaways
- Gather high-quality silicone molds, gelatin, fruit juice, sweetener, and vibrant food coloring for colorful Lego-shaped gummies.
- Mix and heat gelatin with juice and sweetener, then pour into molds and refrigerate until firm.
- Use food coloring and edible decorations to personalize and enhance the gummies’ appearance.
- Apply a light mold release or oil before pouring to make removal easier.
- Store gummies in airtight containers in a cool, dark place to keep them fresh and prevent sticking.
Gather Ingredients and Tools for DIY Gummy Lego Candies
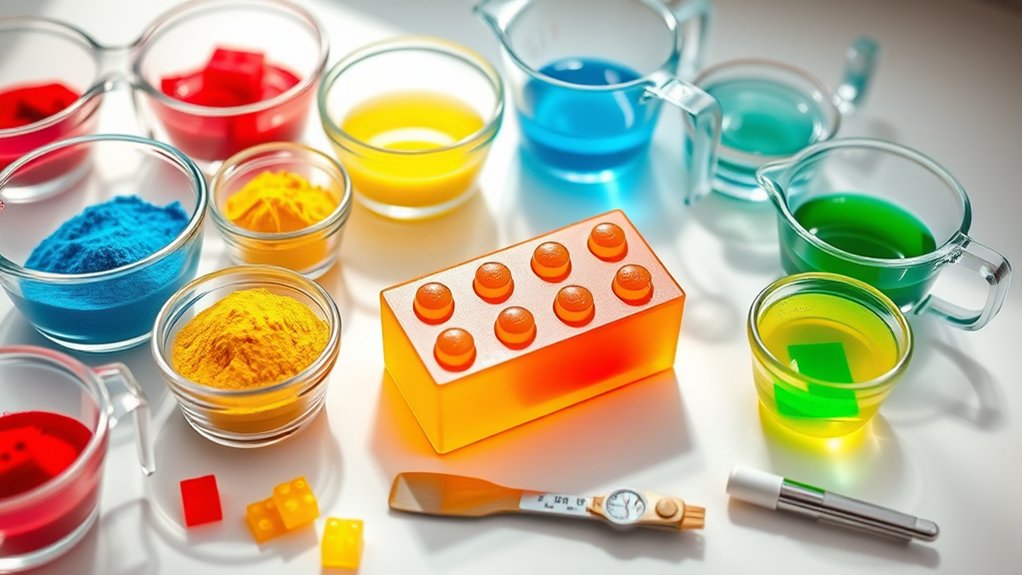
Before you start making your DIY Gummy Lego candies, gather all the ingredients and tools you’ll need. Begin with your gummy base ingredients like gelatin, fruit juice or flavored liquid, and a sweetener.
You’ll also want food coloring to mix vibrant Lego shades. Make sure your workspace is clean and ready, and have the right mold — silicone molds shaped like Lego bricks.
Before using, clean your molds thoroughly to remove any residue that could affect the gummies’ appearance or taste. Prepare small bowls for mixing different colors so you can customize each Lego piece.
Clean molds thoroughly and prepare small bowls for mixing colors to ensure vibrant, tasty Lego gummies.
Keep a spoon or spatula nearby for stirring, and have a dropper or toothpick ready for precise color adjustments. Once everything is set, you’re ready to enjoy the fun part—color mixing and pouring your gummies into the mold.
Knowing your tools are clean and your ingredients are prepared will help you create perfect, colorful Lego candies.
Pick the Best Silicone Molds for Lego-Style Gummies
Choosing the right silicone molds is key to creating clean, detailed Lego-style gummies that keep their shape.
Look for molds made from high-quality silicone that’s durable and won’t crack or warp over time. Durable silicone lets you reuse molds many times without losing detail or flexibility.
Safety is just as important. Make sure to pick food-grade silicone free from harmful chemicals like BPA or phthalates. That way, your gummies are safe to eat and free from contaminants.
Flexible molds make it easier to release your gummies without damage, giving you professional-looking results. Check reviews and product details to confirm the mold’s durability and safety standards before buying.
With the right silicone mold, handling becomes easier, your gummies look better, and you can enjoy peace of mind knowing they’re safe and fun to eat.
Make Your Basic Gummy Lego Recipe Step-by-Step

Making your own basic gummy Lego candies is pretty fun and easy! First, you’ll want to gather some simple ingredients like gelatin, fruit juice, and a sweetener of your choice. Don’t forget to grab a few basic tools too, like a saucepan and silicone molds shaped like Legos.
Once you’ve got everything, start by mixing your gelatin with the fruit juice and sweetener in the saucepan. Heat everything gently over medium heat, stirring constantly until the mixture is smooth and well combined. It’s important not to let it boil, just warm enough to melt everything together nicely.
When your mixture is ready, carefully pour it into your silicone Lego molds. Then, let the molds sit at room temperature for a bit before transferring them to the fridge. Allow the gummies to set for at least 30 minutes or until they’re firm and ready to pop out of the molds.
After they’re set, store your Lego gummies in an airtight container, keeping them in a cool, dry place. To keep them fresh and delicious longer, try to enjoy them within a week or so. And there you go—your homemade gummy Lego candies are all set to enjoy!
Ingredients and Tools Needed
Gathering the right ingredients and tools is key to making your DIY gummy Lego candy. You’ll need gelatin, fruit juice or water, and gummy flavoring to get the taste and texture just right.
Make sure to have a clean silicone mold ready for pouring your mixture. Keep some mold cleaning supplies nearby, like warm soapy water, to keep your molds in top shape.
You’ll also want a mixing bowl, a spoon or whisk, and a saucepan for preparing everything. Precise measurements help get the right consistency, so have a measuring cup handy.
Getting everything set up before you start makes the process much smoother. And remember, clean molds are essential for easy removal and a polished look, so don’t skip cleaning them beforehand.
Mixing and Heating Process
Once you have your ingredients and tools ready, start by pouring the fruit juice or water into a saucepan and gently heating it over low to medium heat. Stir in your gelatin or agar-agar gradually, ensuring it dissolves completely to create a smooth mixture.
This is the perfect time to experiment with flavor combinations—think cherry and lime or berry and pineapple—to make your gummies stand out. Keep stirring until the mixture is uniform and begins to thicken slightly.
Once it’s ready, pour the hot mixture into your silicone molds, like Lego shapes, and let it cool briefly before refrigerating. For packaging, consider wrapping individual gummies in clear plastic or placing them in small resealable bags for easy, attractive storage.
Setting and Storing Tips
After pouring the hot mixture into your silicone molds, let the gummies set undisturbed in the refrigerator for at least 1-2 hours until they’re firm. Proper setting ensures your gummy Lego pieces keep their shape, just like the iconic blocks’ durability.
Once they’re set, store the gummies in an airtight container to keep out moisture, which can affect both the texture and nutrition. Keep them in a cool, dark place away from direct sunlight to preserve their color and flavor.
If you want to keep them longer, refrigeration is the way to go. Remember, understanding Lego history can inspire even more creative shapes. For peak freshness, avoid mixing different flavors or colors in one container.
Proper storage keeps your homemade gummy Lego candies delicious and visually appealing. Here’s a quick guide:
| Storage Tip | Duration | Best Conditions |
|---|---|---|
| Airtight container | 1-2 weeks | Cool, dark environment |
| Refrigeration | Up to 3 weeks | Keep away from moisture |
| Avoid direct sunlight | Ongoing | Preserve color and flavor |
| Separate by flavor | When storing | Prevent color transfer |
Add Bright Colors and Custom Flavors to Your Gummies
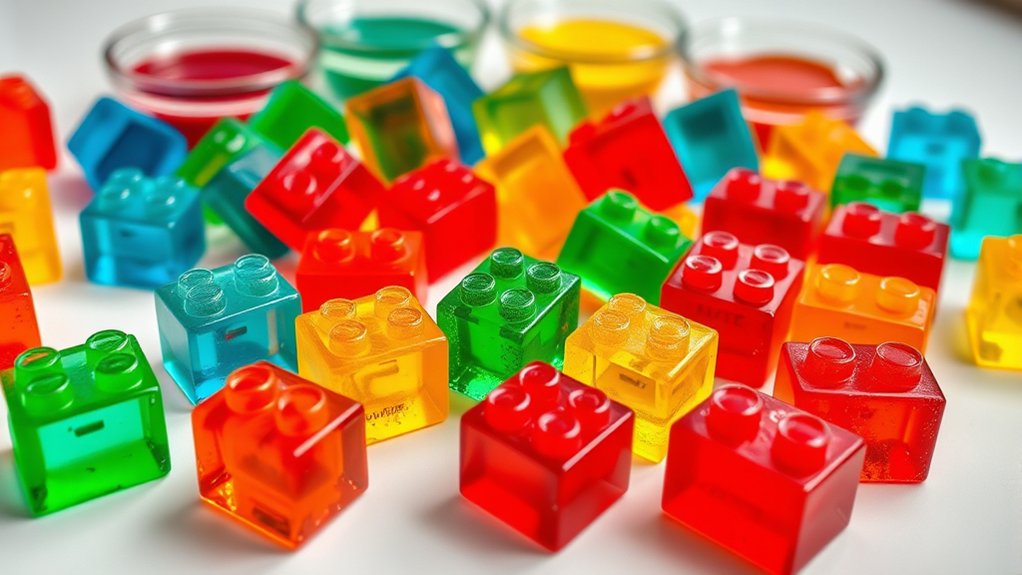
Adding bright colors and unique flavors can make your DIY gummy Lego candies really pop. To get vibrant hues, try blending different food coloring drops—mixing them creates eye-catching shades.
Layering or swirling colors inside the molds adds visual fun and makes your gummies look even cooler. When it comes to flavors, think about pairing contrasting or complementary tastes, like citrus with berry or vanilla with caramel, to keep each bite exciting.
Using natural extracts, like lemon or peppermint, lets you customize flavors safely. Start small and taste-test your mixtures because a little goes a long way. You can also combine multiple flavors in one batch for a more complex taste.
Perfect the Texture and Consistency of Your Gummy Legos
Getting the texture right is key to making your gummy Legos both fun to eat and hold together well. Achieving the perfect gummy texture depends on controlling the consistency—you want a firm yet chewy bite.
To do this, carefully monitor your ingredients, especially the gelatin and sweeteners. A small change can make a big difference in the final result.
Here’s a quick guide:
| Gummy Texture | Key Ingredient | Technique |
|---|---|---|
| Firm & Chewy | Gelatin | Use the right amount and avoid overcooking |
| Soft & Bendy | Corn Syrup | Add gradually for flexibility |
| Smooth & Clear | Water | Use cold water for clarity and control |
With these tips, you’ll be able to perfect your gummy Legos every time!
Decorate and Personalize Your Gummy Lego Candies
Once your gummy Legos have set and cooled, decorating and personalizing them is a fun way to make each piece unique. Use edible markers or food coloring to add details, logos, or favorite characters. This transforms simple gummies into customized treats.
Once cooled, decorate your gummy Legos with edible markers to create personalized, eye-catching treats.
Small candies like sprinkles, colored sugar, or edible glitter can really make them pop. They help improve the appearance and make each candy stand out. For a professional touch, try creating creative packaging that showcases your designs.
Think about custom wrappers or themed boxes that reflect your personality or brand. If you’re selling these gummies, good marketing strategies like eye-catching photos and engaging social media posts can attract more customers.
Personalization not only boosts visual appeal but also adds sentimental value. These gummies become perfect gifts, party favors, or branding tools. Have fun experimenting with different decorations and packaging ideas to turn your gummy Legos into memorable, eye-catching treats.
Troubleshoot Common Gummy Lego Mold and Texture Issues
If your gummy Lego candies keep sticking to the mold, it’s probably a release issue. You can fix this pretty easily by giving the mold a light spray of non-stick spray or dusting it with a bit of powdered sugar. That usually does the trick and makes popping out your gummies a whole lot easier.
Getting the perfect texture can be a bit tricky, though. Sometimes your gummies turn out too soft or too hard. To fix that, try tweaking your boiling time or adjusting the amount of sugar. Making small changes like these can really help you get gummies that are just right—easy to remove and with the right chew. Paying attention to these little details will make a big difference in how your candies turn out!
Mold Release Problems
Mold release problems are a common hurdle when making Gummy Lego candies, often resulting in stuck or damaged pieces. If your gummies are sticking or are hard to remove, it’s probably because of poor mold release.
To prevent this, make sure to apply a light coating of mold release spray or a neutral oil like coconut or vegetable oil before pouring your mixture. Proper mold release helps gummies slide out smoothly without breaking or sticking.
Be careful not to over-oil, as this can make the gummies greasy or cause them to distort. Also, ensure your mold is at the right temperature; chilling it slightly can improve release.
Taking these steps will reduce gummy sticking and make your gummy Lego creation process much easier and cleaner.
Texture Consistency Tips
Achieving the right texture in your Gummy Lego candies really depends on choosing the right ingredients and controlling how you cook them. To avoid issues like stickiness or being too firm, make sure you cook the mixture at the proper temperature and don’t overboil it.
Using the correct amount of gelatin or agar is key to keeping your gummies chewy but still firm. Play around with different flavor combos to boost their appeal, but keep in mind that some flavors can impact texture. For example, too much sugar can make gummies brittle, while too little can make them too soft.
Once your gummies are set, think about packaging ideas that keep them fresh and prevent sticking or melting. Airtight containers or individual wraps are great options to preserve both the texture and flavor, making your homemade Gummy Legos both fun and attractive.
Store Your Gummy Legos to Keep Them Fresh
To keep your gummy Legos fresh and delicious, proper storage is key. Good storage helps preserve their freshness and prevents them from becoming sticky or hard.
After making your gummy Legos, let them cool completely before storing to avoid condensation. Keep them in an airtight container to block out air and moisture, which can cause spoilage.
Allow gummies to cool fully before storing in an airtight container to prevent condensation and spoilage.
Using a resealable plastic bag with a zip closure works well, especially if you squeeze out excess air. Store the container in a cool, dry place away from direct sunlight and heat sources.
Avoid refrigeration, as the moisture can make gummies sticky. If you want to extend their shelf life, consider adding a small silica gel packet to absorb excess humidity.
Regularly check your gummy Legos for freshness, discarding any that become hard or discolored. Proper storage helps your homemade treats stay tasty and ready for your next snack session.
Create Themed or Limited-Edition Gummy Lego Sets
Once your gummy Legos are properly stored and ready to enjoy, you can take the fun a step further by creating themed or limited-edition sets. Drawing inspiration from Lego history, design sets based on popular movies, holidays, or your favorite characters.
Use different colored gummies to represent various elements, and get creative with shapes to mimic iconic Lego pieces. This adds a personalized touch and makes your candy more exciting to share or gift.
Keep in mind, while customizing, think about candy nutrition—balance sweetness with moderation to keep your treats enjoyable. Limited-edition sets can celebrate special occasions like birthdays or seasons, making your gummy Legos unique and collectible.
Experiment with different molds and colors to craft eye-catching, themed constructions. These custom sets boost the fun and creativity of your DIY project, making each bite a delightful, nostalgic experience.
Food Safety Tips for Making Gummy Legos at Home
When making gummy Legos at home, practicing good food safety habits ensures your treats are both delicious and safe to enjoy. Always start with clean utensils, molds, and work surfaces to prevent contamination.
If you or someone else has a food allergy, carefully check ingredient labels for potential allergens like gelatin, soy, or nuts. To accommodate allergies, consider ingredient substitutions such as pectin or agar-agar instead of gelatin.
Be mindful of cross-contact by keeping allergen-containing ingredients separate from others. Store your gummy Legos in airtight containers and keep them refrigerated to prevent spoilage.
Never leave homemade candy out at room temperature for extended periods. If you’re making treats for others, ask about food allergies beforehand.
Following these tips helps ensure your gummy Legos are safe to eat and that everyone can enjoy your creative candy without worry.
Frequently Asked Questions
Can I Use Gelatin Substitutes for Vegan Gummy Lego Candies?
Yes, you can use vegan gelatin alternatives or plant-based gelling agents for vegan gummy Lego candies.
These alternatives, like agar-agar, pectin, or carrageenan, work well to create the chewy texture you want.
Just make sure to follow the specific instructions for each gelling agent, as they may need different boiling times or amounts.
With these options, you’ll get fun, animal-friendly gummy Legos that taste great and hold together nicely.
How Long Do Homemade Gummy Legos Typically Last?
Your homemade gummy Legos usually last about a week or two if you keep them properly stored. Think of shelf life as their ticking clock—once past that, they might lose their chewy charm.
To extend their freshness, store them in an airtight container in a cool, dark place. Avoid humidity and direct sunlight, which can turn your colorful creations into chewy ghosts of their former selves.
Are There Allergy Considerations With Common Gummy Ingredients?
Allergy concerns are important with common gummy ingredients like gelatin, which can cause reactions in some people. You should check labels carefully and consider ingredient substitutions, such as using agar-agar or pectin instead of gelatin for vegan or allergy-sensitive options.
Always be aware of potential allergens like soy, nuts, or food dyes. Tailor your recipe to suit your dietary needs to avoid any adverse reactions.
Can I Make Gummy Legos Without a Microwave?
Yes, you can make gummy Legos without a microwave by simmering your mixture on the stove. Keep the gummy texture smooth by gently heating the ingredients over low heat, stirring constantly.
Use candy coloring to get vibrant colors, and pour the mixture into Lego-shaped molds. Allow it to cool and set at room temperature or in the fridge.
This method avoids microwaves and still gives you delicious, colorful gummy Legos.
What’s the Best Way to Remove Bubbles From the Gummy Mixture?
To remove bubbles from your gummy mixture, gently tap the mold or tray on a flat surface to encourage bubbles to rise.
You can also use a toothpick or skewer to pop bubbles on the surface. Let the mixture settle for a few minutes before pouring to help reduce trapped air.
These bubble-removing tips help create a smoother finish, making your gummy Lego candies look perfect and professional.
Conclusion
As you marvel at your homemade Gummy Lego creations, it’s funny how a simple coincidence—finding that forgotten food-safe mold in your drawer—can turn a casual experiment into a delightful surprise.
With just a little patience and a dash of creativity, you’ve crafted something both fun and delicious.
Remember, the joy of making these candies isn’t just in the end result but in the unexpected moments that make the journey memorable.
And who knows? That leftover mold might inspire your next sweet masterpiece, making your Gummy Lego candy project even more enjoyable.