10 Easy Steps to Make Chocolate Candy With Molds
Many people dream of making beautiful homemade chocolates but get overwhelmed by the process. You’re not alone—crafting perfect chocolate candies with molds can seem tricky at first. With a little guidance, you’ll be creating professional-looking treats in no time.
To make chocolate candy with molds, start by choosing high-quality chocolate and preparing your tools, molds, and release agents. Melt and temper the chocolate properly to get a smooth finish.
Fill the molds carefully, tap them gently to remove air bubbles, and let the chocolates set completely. Unmold with care, store them in a cool, dry place, and consider adding flavor variations or decorations for extra flair.
Keep practicing to master the technique and create professional-looking treats.
Key Takeaways
- Prepare and thoroughly clean your molds, then lightly spray or dust with cocoa powder or release agents.
- Gently melt and temper the chocolate to ensure a smooth, glossy finish and proper firmness.
- Carefully pour or pipe the melted chocolate into molds, tapping to remove air bubbles.
- Let the chocolates set at room temperature or in the fridge so they harden properly.
- Unmold gently by flexing the mold and handle the chocolates with care for a professional look.
Getting Ready: Tools and Supplies for Chocolate Molding
Before you start melting and pouring chocolate, make sure you have all the tools and supplies you need. First, pick your mold material—silicone, plastic, or metal—based on what you prefer. Silicone molds are flexible and easy to work with, making them great for beginners.
Next, choose a high-quality chocolate flavor—milk, dark, or white—depending on your taste. You’ll also need a double boiler or microwave-safe bowl to melt the chocolate smoothly. Keep a spatula or spoon nearby for stirring.
Consider using a piping bag or squeeze bottle for more precise pouring. A thermometer is helpful for keeping the chocolate at the right temperature, so you don’t overheat or burn it. Keep a clean towel or paper towels handy to wipe up spills.
Finally, prepare a cooling surface like a baking sheet to set your candies once poured. With these tools and supplies ready, you’ll be all set for successful chocolate molding.
How to Choose the Best Chocolate for Candy Molds
Choosing the right chocolate is key to getting smooth, glossy candies that keep their shape. When picking chocolate, think about where it comes from—look for high-quality options with fewer additives and a good cocoa percentage. This will give you better flavor and a more professional finish.
Your mold choice also matters. Softer chocolates work better with flexible molds, while firmer chocolates are better for rigid ones. Go for chocolates labeled specifically for confections, like couverture or melting chocolate, because they have more cocoa butter, making your candies shiny.
Always check the ingredients list to avoid extra fillers or additives that could ruin the look. By choosing the best chocolate based on quality and how it works with your molds, you’ll set yourself up for successful candy-making with beautiful, professional-looking results.
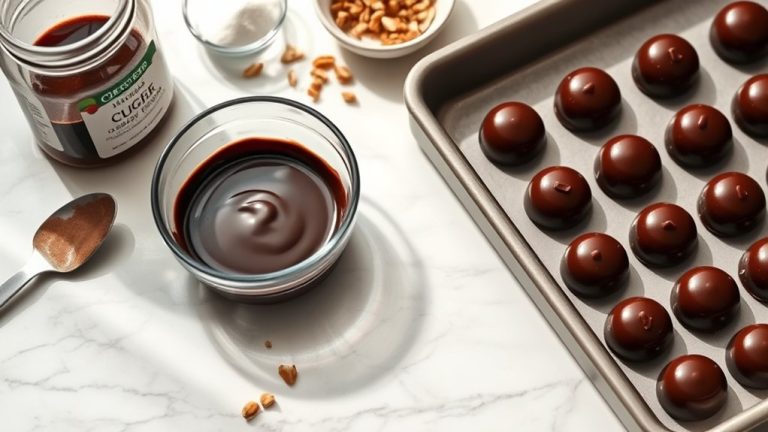
Melting and Tempering Chocolate for a Smooth Finish
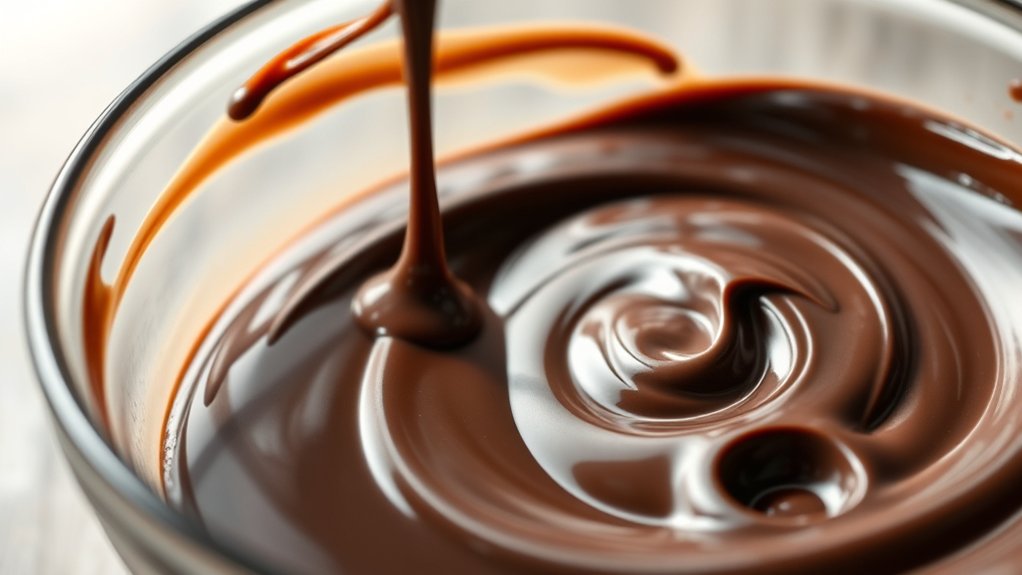
To get a perfectly smooth and shiny finish on your chocolate candies, proper melting and tempering are essential. Start by gently melting your chocolate using a double boiler or microwave, stirring often to avoid burning.
If you’re adding flavorings, wait until the chocolate is fully melted before mixing them in. This helps ensure everything gets evenly distributed.
Tempering involves heating the chocolate to specific temperatures, then cooling it down. This stabilizes the cocoa butter crystals and gives your candies that beautiful shine.
It also helps prevent dullness or bloom on the surface later on. Keep in mind that different mold materials—like silicone or polycarbonate—may need slight adjustments in your tempering process.
Once your chocolate is tempered, pour it into your molds quickly to stop it from cooling too soon. Proper melting and tempering will give your candies a professional, smooth finish that’s irresistible.
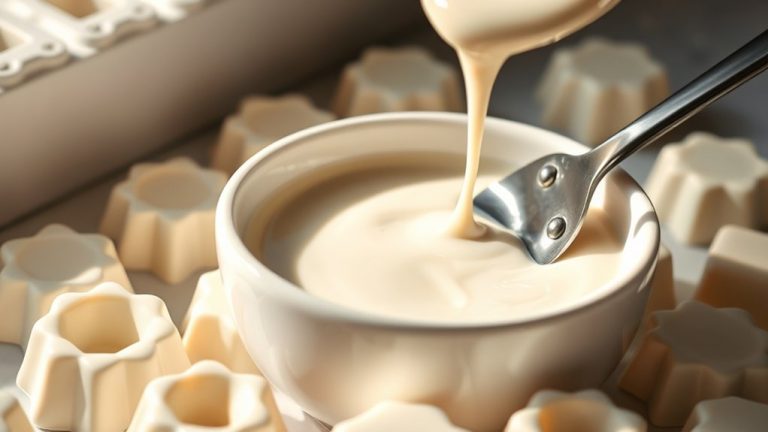
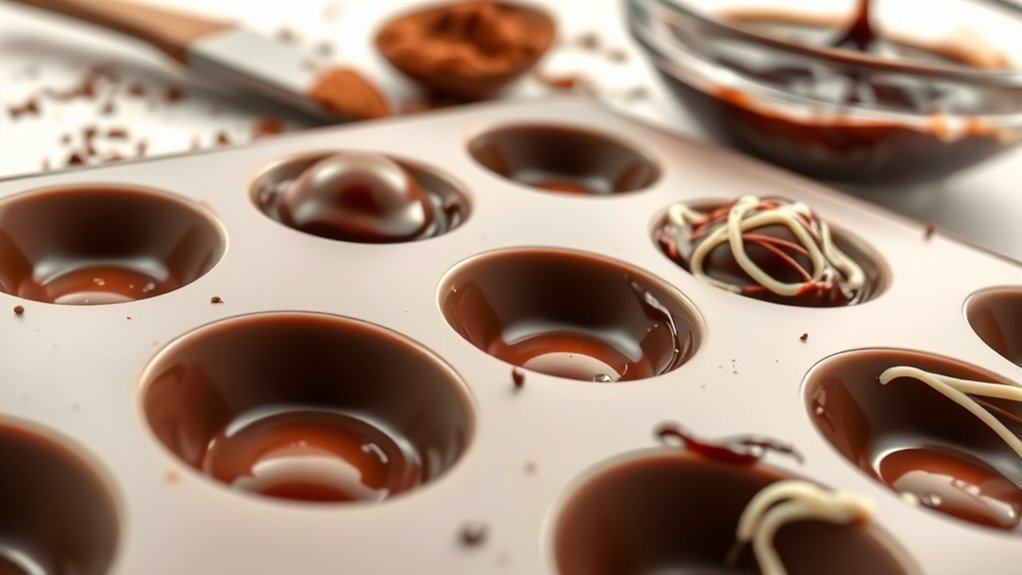
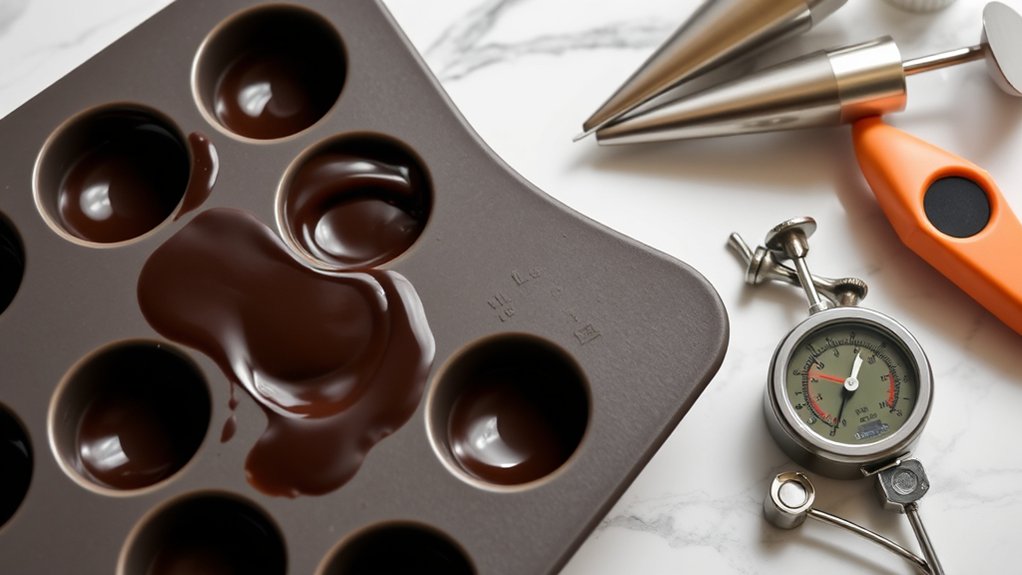
Filling Molds Neatly and Evenly
Pour the melted chocolate into your molds carefully, aiming to fill each cavity without overflows. To keep it neat and even, tap the mold gently on the counter to get rid of air bubbles and settle the chocolate.
Pour melted chocolate into molds carefully, tap to remove air bubbles, and fill evenly for perfect, neat candies.
Here are some tips for filling your molds perfectly: Use a small spoon or piping bag for better control, especially with intricate designs. Fill each cavity just to the top, leaving no gaps for air pockets.
Smooth the surface with a spatula or the back of a spoon for a polished look. You can also decorate by drizzling contrasting chocolate or adding edible embellishments before the chocolate sets. This adds visual flair.
Finally, think about flavor pairings—adding a pinch of sea salt, chili, or espresso powder can make your chocolates even more special. Filling molds neatly and evenly sets the stage for beautiful, flavorful candies.
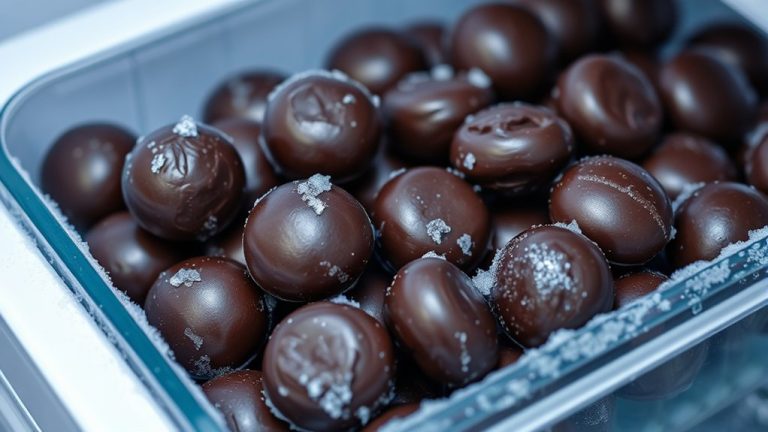
How to Unmold Your Chocolates Without Breaking Them
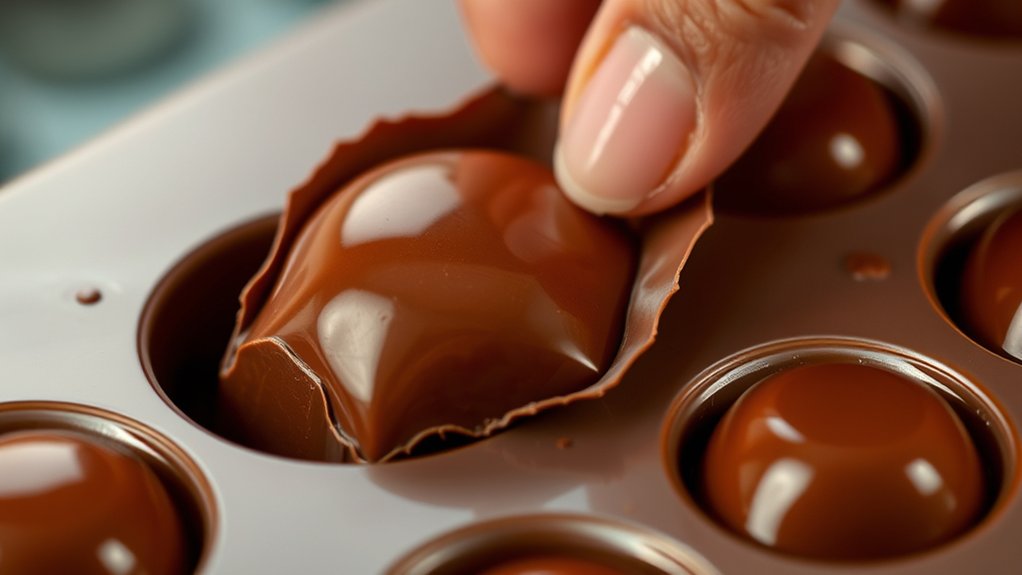
To unmold your chocolates without breaking them, it’s really important to pay attention to a few key things like temperature, handling gently, and giving them enough cooling time. Make sure the mold is at the right temperature so the chocolates don’t stick, and when you’re ready to release them, flex the mold slowly and carefully.
Also, don’t rush the cooling process—give your chocolates plenty of time to cool completely before you try to unmold them. That way, they’ll keep their shape and look great without any cracks or breakage.
Proper Temperature Control
Ensuring your chocolates come out smooth and intact depends a lot on controlling the temperature during unmolding. If the chocolate is too warm, it might stick or break. If it’s too cold, it can crack or deform.
To keep the flavor and protect the mold, follow these steps:
- Chill your molds in the fridge before pouring to prevent sticking.
- Let the chocolate cool gradually at room temperature to avoid sudden temperature shocks.
- Make sure the chocolate reaches around 88-90°F (31-32°C) before pouring.
- When unmolding, gently flex or tap the mold to release the chocolates without using too much force.
Proper temperature management is key to getting flawless chocolates every time.
Gentle Flexing Techniques
Gently flex your mold to release the chocolates without applying too much force, which can cause cracks or breaks. Gentle flexing is key to smooth mold release and keeping your chocolates’ shape intact. Hold the mold firmly but softly, applying slight pressure around the edges or corners.
If the chocolates don’t come out right away, try giving the mold a few gentle taps or wiggles instead of forcing it open. This helps reduce stress on the chocolate and prevents unnecessary damage. Always work patiently; rushing can lead to cracks.
Adequate Cooling Time
Waiting for your chocolates to cool adequately is key to unmolding success. Rushing the process can cause cracks or shapes to get distorted.
Proper cooling helps the chocolate set firmly so it releases easily from the mold. To get the best results:
- Place the mold in a cool, room-temperature spot—skip the fridge unless the instructions say otherwise.
- Wait at least 30 minutes for small molds and up to an hour for larger ones.
- Once cooled, transfer the chocolates to an airtight container for storage.
- Handle them gently—flex or tap the mold carefully to release the chocolates without breaking.
Good storage keeps your candies fresh, and patience during cooling prevents damage. This way, you’ll get perfect unmolds every time.
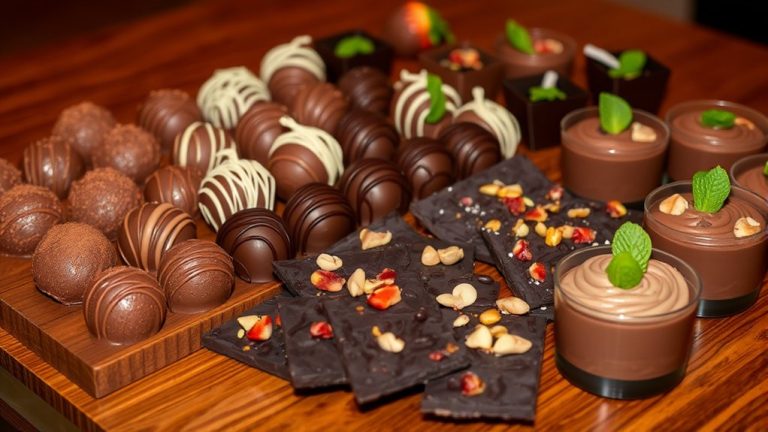
Decorating and Personalizing Your Handmade Chocolates
Once you’ve poured and set your chocolates in the molds, decorating and personalizing them is a great way to add a special touch. It lets you showcase your chocolate artistry and experiment with flavor pairings.
Simple techniques like drizzling white chocolate or dusting with cocoa powder can improve their visual appeal. Using edible gold or colorful sprinkles adds elegance and fun, respectively.
For a personalized touch, try piping intricate designs or initials with contrasting chocolate. It makes each piece uniquely yours.
| Technique | Tool Needed | Effect |
|---|---|---|
| Drizzling | Squeeze bottle or fork | Creates a marbled, artistic look |
| Dusting | Food-safe brush | Adds shimmer and depth |
| Piping | Piping bag | Custom shapes or initials |
| Edible Accents | Edible gold or glitter | Adds sophistication |
These ideas let you get creative and match your decorating to your flavor choices, making each chocolate special.
Troubleshooting Common Molding Problems
If your chocolates are sticking to the mold or just won’t come out easily, chances are you’re dealing with mold release problems. It can be pretty frustrating, but don’t worry—there are simple ways to fix it. Also, air bubbles can sneak in and mess up the appearance, leaving unwanted holes or gaps. Let’s go over a few quick tips to help you troubleshoot these issues and make perfect candies every time.
Common Mold Release Issues
Mold release issues are a common hurdle when making chocolate candies with molds, but understanding the cause can help you troubleshoot effectively. Problems often stem from the mold material or the chocolate consistency. If your chocolate is too thick or too thin, it may stick or not release properly.
Certain mold materials, like silicone or plastic, may require different preparation techniques. To improve release, consider these tips:
- Ensure your mold is thoroughly cleaned and dry before pouring.
- Lightly spray or dust with cocoa powder or a mold release agent suitable for your mold material.
- Adjust chocolate consistency—use a slightly warmer or thinner mixture if needed.
- Avoid overfilling molds to prevent sticking or damage during release.
Fixing Air Bockets
Air bubbles are a common issue that can ruin the smooth appearance of your chocolate candies, but you can often fix them with simple adjustments. To reduce air bubbles, tap the mold gently after pouring to release trapped air.
Make sure your mold is properly coated with mold release. A thin, even layer helps prevent air pockets from forming. Avoid overfilling molds, as excess chocolate can trap air when spreading or tapping.
If air bubbles still appear, use a toothpick to pop them gently before the chocolate sets. Properly prepared molds and careful pouring are key to minimizing bubbles.
With these steps, you’ll achieve smooth, professional-looking chocolates and a more appealing finish.
Best Ways to Store and Package Your Homemade Chocolates
Proper storage and packaging are key to keeping your homemade chocolates fresh, flavorful, and looking great. Good packaging protects your candies from moisture, light, and air, which can cause melting or spoilage.
Use airtight containers to prevent air from getting in and help your chocolates stay fresh longer. Store them in a cool, dry place away from direct sunlight and heat sources.
Layer your chocolates with parchment paper or cupcake liners to stop them from sticking together and keep their shape. Avoid placing chocolates near strong odors, as they can absorb smells and affect the flavor.
Flavor Variations and Add-Ins to Elevate Your Chocolates
Want to make your chocolates really pop? Try adding some unique flavor combos and textures! Toss in fresh or dried fruits for that natural sweetness and a little burst of flavor with every bite. It’s a simple way to give your chocolates a fresh, vibrant twist.
And don’t forget about texture! Mixing in crunchy elements like nuts, crispy rice, or even crushed cookies can take your treats to the next level. The contrast between smooth chocolate and a bit of crunch makes each piece more exciting and satisfying to eat.
Unique Flavor Combinations
Experimenting with unique flavor combinations can turn simple chocolates into memorable treats. Exploring different pairings and infusions helps you go beyond basic recipes.
Here are some ideas to get you inspired:
Infuse dark chocolate with chili or cinnamon for a spicy kick. It’s a fun way to add some heat.
Combine milk chocolate with caramel and sea salt for a perfect sweet-savory balance. It’s a classic combo that never fails.
Use fruit infusions like raspberry or orange zest to give your chocolates a bright, fresh flavor.
Add nuts, dried fruits, or crushed cookies for extra texture and flavor depth.
These variations let you customize your chocolates, impress friends, and develop your palate. So, experiment with different infusions and pairings to make your candy truly unique and delightful.
Incorporating Textures and Crunch
Incorporating textures and crunch into your chocolates instantly boosts their appeal and makes each bite more interesting. To do this, focus on adding ingredients like chopped nuts, crispy rice, or cookie crumbs.
These add-ins create satisfying crunch, providing a delightful contrast to the smooth surface. When choosing ingredients, think about how they’ll complement your chocolate’s flavor. For example, almonds add a nutty texture, while crisped rice offers a light crunch.
Be sure to evenly distribute these elements before pouring the melted chocolate into molds. This ensures each piece has a consistent texture. Adding these textures not only enhances your chocolates but also makes the tasting experience more dynamic and memorable.
Using Fresh and Dried Fruits
Have you ever thought about how fresh and dried fruits can change up your chocolate creations? They bring natural sweetness, texture, and vibrant flavors to the table.
To step up your chocolates, try pairing them with dried fruits like apricots or cranberries. They add concentrated sweetness and a chewy bite.
Fresh berries such as strawberries or raspberries give a juicy burst of flavor and bright notes.
Mix dried fruit with nuts for an extra crunch and richness that makes your chocolates even more interesting.
You can also incorporate fruit purees or zest into the chocolate itself for a more intense fruit flavor.
When using dried fruit, chop it into small pieces so it doesn’t stick and spreads evenly throughout your chocolates.
Feel free to experiment with different fruit pairings to find unique combinations that will delight your taste buds and make your chocolates stand out.
Tips to Perfect Your Chocolate Molding Technique
To achieve flawless chocolate molds, paying close attention to your technique is vital. Mastering chocolate artistry requires precision and patience.
First, make sure your molds are clean and dry to avoid imperfections. When pouring, use a steady hand and fill each cavity evenly to prevent air bubbles.
Ensure molds are spotless and dry, then pour steadily to fill evenly and prevent air bubbles.
Tapping the mold gently on the counter helps release trapped air and smooths out the chocolate surface. Tempering your chocolate correctly is essential for a glossy finish and firm texture.
Remember, molding safety is important. Work in a cool, dry environment, and handle hot chocolate carefully to avoid burns. Use tools like spatulas or brushes to refine details without disturbing the mold.
Practice makes perfect. Don’t rush the process. With consistent technique, you’ll create beautiful, professional-looking chocolates that showcase your chocolate artistry while maintaining safety standards.
Frequently Asked Questions
How Long Does It Take for Chocolates to Set Completely?
You should give your chocolates about 1 to 2 hours to set completely, depending on thickness and room temperature.
During this time, proper chocolate tempering guarantees a glossy finish and snap, while mold flexibility helps you release the candies easily.
Keep the molds in a cool, dry spot, and avoid disturbing them.
For the best results, refrigerate for about 30 minutes after the initial setting to speed things up.
Can I Use Silicone Molds for Other Confections?
Yes, you can definitely use silicone molds for other confections. Silicone molds are known for their durability and flexible nature, making them perfect for a variety of treats like gummies, fondant, or even ice cubes.
Their versatility allows you to explore different recipes without worrying about cracking or breaking. Just be sure to clean them thoroughly between uses, and you’ll enjoy their long-lasting performance for all your creative confections.
What Are Common Mistakes to Avoid When Molding Chocolates?
You might stumble into pitfalls if you neglect proper chocolate tempering or skip mold release.
To avoid cracks or sticky messes, ensure your chocolate is smoothly tempered, like a well-choreographed dance, for glossy, crisp results.
Always apply a light mold release to help your chocolates glide out effortlessly, preventing breakage.
Paying attention to these details keeps your molds from turning into a battleground, ensuring your candies come out perfect every time.
How Do I Clean and Maintain My Molds Properly?
To keep your molds in top shape, clean them thoroughly after each use with gentle techniques like warm water and mild soap.
Avoid abrasive scrubbers that can scratch the surface and cause damage over time.
Store your molds in a cool, dry place to prevent warping or other damage.
Proper storage and consistent cleaning will help your molds last longer and ensure you get perfect chocolates every time.
Are There Vegan or Dairy-Free Chocolate Options for Molding?
Think of vegan and dairy-free chocolate options as the rainbow after a storm—you can find vibrant, delicious choices. Yes, you can mold vegan chocolate and dairy-free options, which often come from plant-based ingredients like cocoa, coconut, or almond milk.
These chocolates melt smoothly and work perfectly for molding. Look for brands labeled vegan or dairy-free to guarantee your treats meet your dietary needs and create beautiful, ethical confections.
Conclusion
Now that you’ve mastered these simple steps, your chocolates will turn out as smooth and shiny as a lake at dawn. Think of each mold as a tiny canvas—your creativity and patience will transform plain chocolate into edible art.
Remember, even the most seasoned chocolatiers hit bumps along the way. With practice, you’ll find that making chocolates becomes as satisfying as unwrapping a sweet gift, revealing a delicious masterpiece you crafted yourself.
Making chocolate candies with molds is a fun and rewarding process. Keep experimenting, and soon you’ll be creating beautiful treats that everyone will love.