How to Make White Chocolate Candy With a Simple Step-By-Step Guide
Making white chocolate candy at home can seem tricky, especially if you’re new to candy-making. Many people struggle with getting that perfect glossy finish or the right texture. But don’t worry—you’re not alone, and with a few simple steps, you can create delicious homemade treats that look as good as they taste.
To make white chocolate candy, start by melting high-quality white chocolate gently using a double boiler or microwave, stirring frequently.
Then, carefully temper the chocolate by cooling it to about 82°F, reheating to 86°F, and stirring continuously for a glossy finish.
Pour into molds or spread on parchment, add your favorite mix-ins or decorations, and let it set.
For detailed steps, tips, and creative ideas, keep exploring—there’s plenty to uncover to perfect your candy.
Key Takeaways
- Melt high-quality white chocolate gently using a double boiler or microwave. Stir frequently to prevent overheating.
- Temper the chocolate by cooling it to about 82°F, then reheating to 86°F. This gives you a glossy, smooth finish.
- Pour the melted chocolate into molds or onto lined surfaces. Spread evenly and tap to remove air bubbles.
- Let the chocolate set at room temperature or refrigerate until it’s firm.
- Decorate with toppings or colors. Once fully set, package in attractive containers.
What Ingredients and Equipment Do You Need to Make White Chocolate Candy
To make white chocolate candy, you’ll need a few essential ingredients and tools. Start with high-quality white chocolate, which you should source carefully to guarantee smooth melting and rich flavor. Look for reputable suppliers or specialty stores to get the best ingredient sourcing.
You’ll also need a double boiler or microwave-safe bowl for melting the chocolate gently, along with spatulas for stirring. A digital thermometer helps you maintain the right temperature, preventing the chocolate from burning or seizing.
For shaping and food presentation, have silicone molds or parchment paper ready. Precision is key so gather measuring spoons and a scale if you want consistent results.
Clean, dry equipment is vital to avoid moisture that can cause the chocolate to seize. With these ingredients and tools, you’ll be set to create beautifully finished white chocolate candies that look as good as they taste.
Understanding White Chocolate and Its Unique Properties
White chocolate is made from cocoa butter, sugar, and milk solids. Unlike dark or milk chocolate, it doesn’t contain any cocoa solids, which gives it a creamy and smooth base. Because of that, it melts really nicely—perfect for melting and mixing into recipes.
It also needs a bit of careful tempering if you want it to have that shiny finish and a satisfying snap when you break it. The flavor is sweet and buttery, and it has this rich, velvety texture that really makes it stand out from other kinds of chocolate.
Composition of White Chocolate
Understanding the composition of white chocolate reveals why it has a distinct flavor and texture compared to other chocolates. White chocolate origins trace back to the desire for a creamy, sweet confection without cocoa solids, relying mainly on cocoa butter.
Its main ingredients include cocoa butter, sugar, and milk solids, which give it a smooth, rich texture. Unlike dark or milk chocolates, white chocolate lacks cocoa solids, making its flavor milder and sweeter.
White chocolate nutrition highlights its high fat and sugar content, providing energy but less antioxidants. Recognizing these components helps you appreciate its unique qualities and guides you in making perfect white chocolate candies.
This composition is key to understanding how it melts, flavors, and pairs with other ingredients.
Melting and Tempering Traits
Because white chocolate contains a high percentage of cocoa butter, it melts at a lower temperature and with less force than dark or milk chocolates. Its origin, rooted in European confectionery traditions, influences its unique melting traits.
Typically, white chocolate’s melting temperature ranges between 86°F and 90°F, making it easier to melt smoothly. But because of its delicate composition, it’s important to melt it gently and avoid overheating.
If you heat it too quickly or at too high a temperature, it can seize or become grainy. Proper melting and tempering help you achieve a glossy finish and the perfect texture.
Understanding these traits helps you handle white chocolate properly, preventing common issues. This way, you can create homemade candies that look professional and have that silky-smooth feel.
Flavor and Texture Profile
The unique melting qualities of white chocolate directly shape its flavor and texture. As it melts smoothly, you’ll notice its mild, buttery taste, which is less intense than milk or dark chocolate.
This subtle sweetness makes it perfect for delicate candies and confections. The candy texture is usually creamy and melts easily in your mouth, giving a luscious, silky feel.
Because white chocolate lacks cocoa solids, it has a smooth, non-gritty consistency. This makes it ideal for creating a refined, luxurious sensation. You can enhance its flavor with vanilla or fruit, but it still remains mild and sweet.
Knowing these properties helps you craft candies with a consistent, appealing texture and a gentle, pleasant flavor that appeals to many.
How to Temper White Chocolate for a Smooth, Shiny Finish
Tempering white chocolate is really the secret to getting that smooth, shiny finish we all love. It’s all about understanding the right way to melt it and keeping an eye on the temperature. When you do it correctly, your white chocolate will not only look gorgeous but will also feel silky smooth when you touch it.
Understanding White Chocolate Tempering
Understanding how to temper white chocolate is key to getting that smooth, glossy finish in your candies. When done right, it makes the white chocolate set with a shiny look and a firm texture.
Proper tempering also helps keep its delicate flavor and vibrant color intact. Plus, knowing about white chocolate’s history can inspire your creations, since it’s been enjoyed for centuries.
To master this, focus on controlling the temperature during heating and cooling. Using a reliable thermometer is really helpful for accuracy.
You’ll also want to know when to cool and reheat the chocolate to get the best results. Recognizing signs of proper tempering, like a glossy sheen, is a good indicator you’re on the right track.
Mastering these steps will help you create beautiful, professional-looking white chocolate candies every time.
Melting White Chocolate Properly
Ever wondered how to melt white chocolate without ruining its smooth, glossy finish? Since white chocolate originated in the 1930s, mastering proper melting techniques is essential.
Use gentle heat, either in a double boiler or microwave, to prevent scorching. Stir frequently to ensure even melting. Be mindful that white chocolate’s delicate fats can seize or burn if overheated, affecting its texture and appearance.
While white chocolate offers some health benefits, like being lower in cocoa solids, it’s also higher in sugar and fats, so moderation is key. Proper melting preserves its natural sheen and smoothness, making your final candy look professional.
Avoid rushing the process; patience ensures a beautifully melted, glossy white chocolate ready for your next step.
Achieving Shine and Smoothness
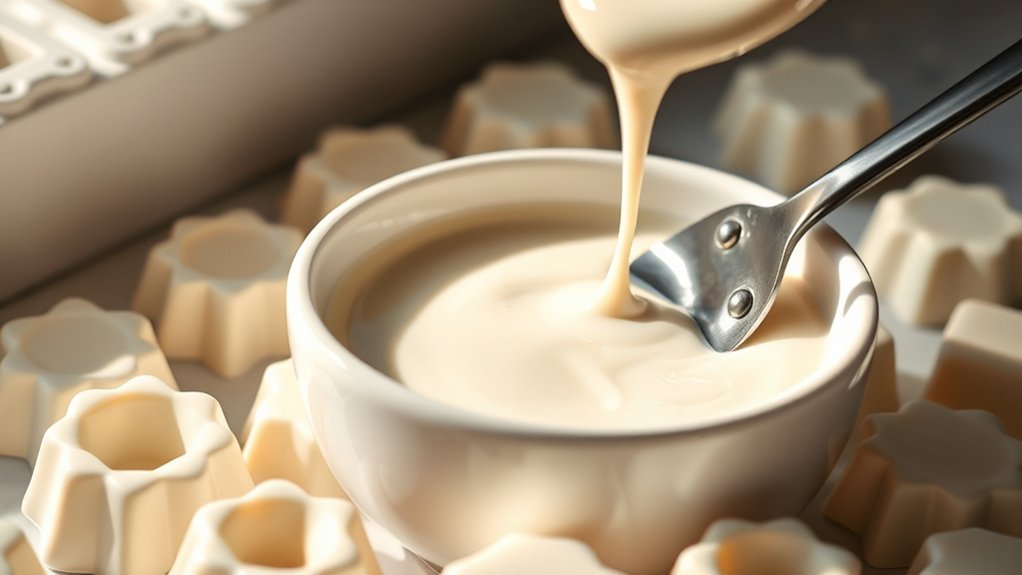
To achieve that beautiful shine and smooth texture on your white chocolate, you need to carefully control its temperature during the cooling process. Proper tempering ensures a glossy finish and a satisfying snap, making your candy look more appealing and enhancing pairing options.
Use a digital thermometer to monitor the temperature precisely. Cool the chocolate to around 82°F (28°C) before gently reheating to 86°F (30°C). Stir continuously during cooling to promote even crystallization.
Pour and spread quickly to prevent dulling or streaks. Following these steps guarantees a professional-looking finish, elevating your white chocolate candy and making it as visually stunning as it is delicious.
Proper tempering not only improves appearance but also extends shelf life.
Step-by-Step: Melting and Mixing White Chocolate
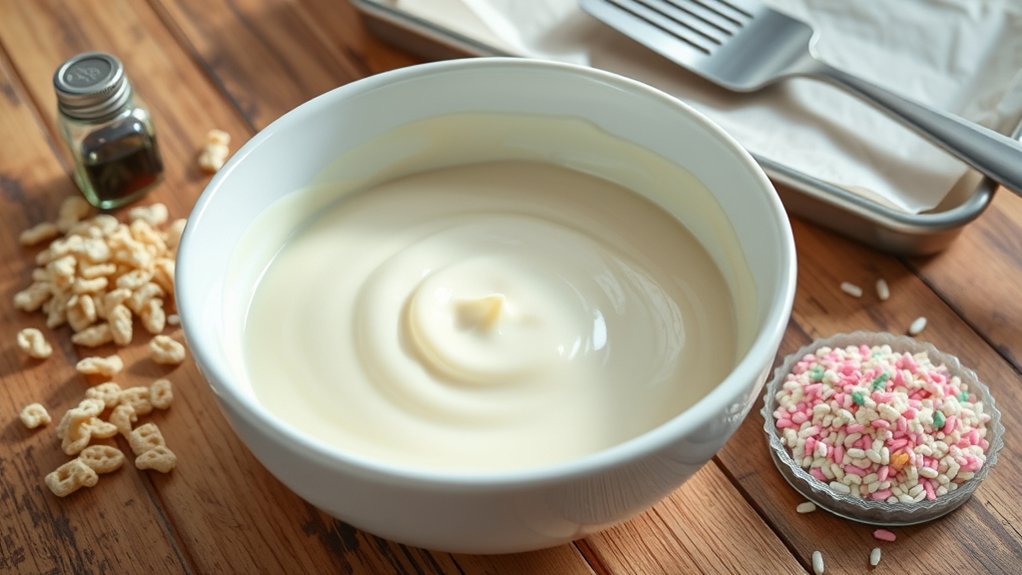
When melting and mixing white chocolate, it’s important to do so gently to avoid burning or seizing the chocolate. Use a double boiler or microwave in short bursts, stirring constantly. This gentle approach helps maintain the smooth, glossy texture you want for your candy.
As you melt, you’ll notice color variations—white chocolate can range from icy white to creamy ivory—so stay attentive to the consistency and appearance. Once melted, mix thoroughly to guarantee an even color and texture.
Keep in mind, white chocolate has different nutritional facts compared to darker chocolates, with higher sugar and fat content, so measure carefully if you’re mindful of dietary goals. Proper melting not only preserves the chocolate’s flavor but also ensures it remains workable for molding or coating.
Patience during this process secures a silky, uniform base for your candy, setting the stage for a perfect final product.
Adding Flavors and Mix-ins to Customize Your Candy
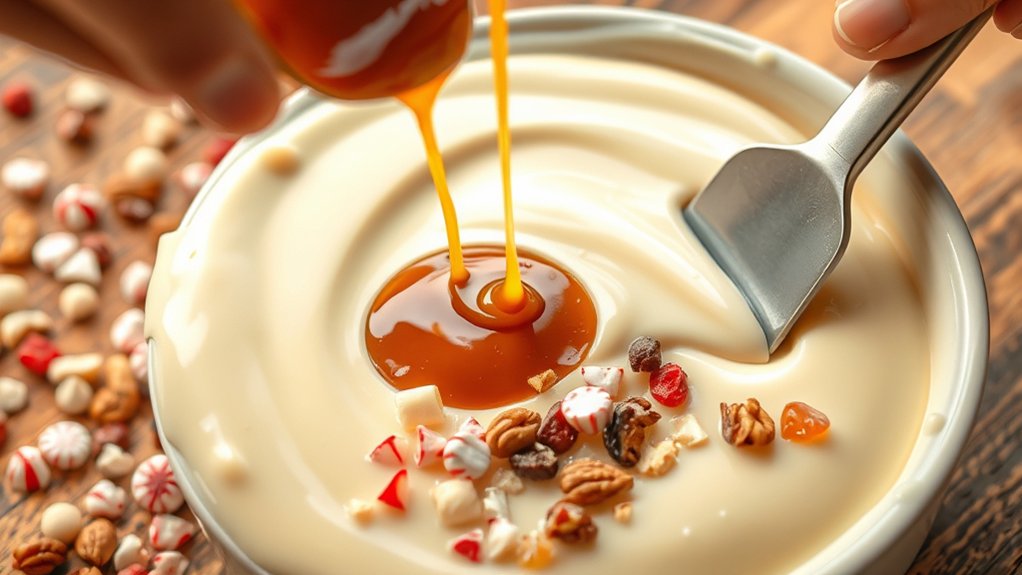
Adding flavors and mix-ins is a fun way to customize your white chocolate candies and make them truly special. When choosing what to add, think about options that complement that creamy sweetness—things like nuts, dried fruits, or even a touch of spice can really elevate your treats.
Just a quick tip: it’s all about balancing those flavors so nothing overpowers the others. You want your candy to taste amazing, not overwhelmed by too many strong ingredients. Have fun experimenting and find combinations that you love!
Choosing Complementary Flavors
Ever wondered how to boost your white chocolate candy with new flavors? Choosing complementary flavors is key to creating a balanced, delightful treat. Focus on flavor pairing to improve taste without overpowering the smooth sweetness of white chocolate.
Incorporate ingredients that add texture, like crunchy nuts or chewy dried fruits, for extra interest. To inspire you, consider these options:
- Raspberries or strawberries for a fruity tartness
- Toasted coconut for a rich, tropical flavor
- Pistachios or almonds for nutty depth
- Citrus zest for a bright, fresh note
Selecting the right combination will elevate your candy, making it more appealing and memorable. Remember, harmony between flavors and textures makes your homemade white chocolate candy stand out.
Selecting Delicious Mix-ins
To truly make your white chocolate candy stand out, choosing the right mix-ins can add exciting flavors and textures that make your treat unique. Think about flavor combos like dried fruits, nuts, or crushed cookies to create interesting taste profiles.
For texture, try adding crunchy elements like pretzels, crispy rice, or toasted coconut. Just make sure your mix-ins complement the flavors without overpowering the smooth, creamy white chocolate.
For example, pairing tart dried cherries with toasted almonds offers a great balance of sweet, tart, and nutty flavors, along with satisfying crunch. Keep your mix-ins fresh and well-prepared so they blend smoothly into your candy.
Carefully selecting flavor combinations and texture upgrades will turn your white chocolate candy into a truly personalized, irresistible treat.
Balancing Sweetness and Taste
Choosing the right mix-ins isn’t just about texture and flavor; it’s also about balancing the overall sweetness of your white chocolate candy. To get that just-right sweetness, think about how different flavors work together or balance out the richness.
You want your additions to enhance the taste without overpowering it. Good flavor pairing is key—consider tart berries, salty nuts, or spicy spices. Balance your sweetness with contrasting or complementary flavors to create a more interesting treat.
Here are some ideas to try: tart dried cranberries or cherries, salty pretzels or roasted nuts, spicy cayenne or cinnamon, and bright citrus zest or flavor extracts.
Pouring and Setting Your White Chocolate Candy
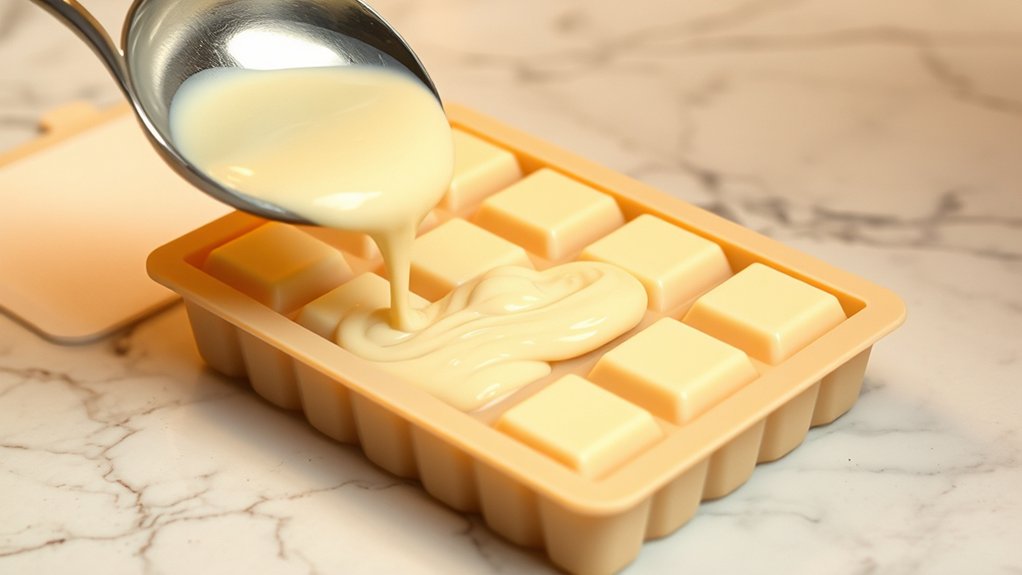
Once you’ve melted your white chocolate to the right consistency, it’s time to pour it into your prepared molds or onto a lined surface. While doing this, think about your color combos—layering or swirling different shades can create really eye-catching designs.
Pour melted white chocolate into molds or onto a surface, then add swirling colors for stunning designs.
If you’re using molds, gently tap them on the counter to get rid of air bubbles and help the chocolate settle evenly. For a smooth finish, spread the chocolate with a spatula if you’re pouring onto a flat surface.
Let the chocolate set at room temperature or pop it in the fridge until it’s firm. While waiting, consider packaging ideas like small boxes, clear bags, or decorative wraps—they’ll make your treats look even more appealing.
Once it’s set, you’re almost ready to move on. Just remember, proper pouring and a bit of patience during the setting process are key to getting professional-looking, delicious white chocolate candies.
How to Cut and Package Your Homemade White Chocolate Treats
After your white chocolate has fully set and firm, it’s time to carefully cut it into your desired shapes or pieces. Use a sharp knife or a pizza cutter for clean, straight edges.
For more decorative cuts, try using cookie cutters or a sharp knife to create fun shapes. Once cut, you can package your treats in clear boxes, cellophane bags, or decorative tins.
Add seasonal decorations like ribbons or themed stickers to make your packaging more attractive. When packaging, include a note suggesting wine pairings to enhance the experience.
If you’re giving the treats as gifts, consider wrapping them with a festive touch to match the season. Proper packaging keeps your candy fresh and makes it more appealing, especially for gifting or serving at gatherings.
Following these steps ensures your homemade white chocolate candy looks as good as it tastes.
Troubleshooting Common White Chocolate Problems
White chocolate can be tricky to work with because it’s prone to issues like seizing, blooming, or not melting smoothly. If your white chocolate seizes, it’s usually because it’s overheated or came into contact with moisture.
To fix this, try adding a little vegetable oil or shortening to smooth it out. Blooming, which causes a dull, grayish surface, happens when white chocolate cools or is stored improperly. While it doesn’t affect taste, it can ruin the appearance.
To prevent blooming, store your white chocolate in a cool, dry place and avoid temperature fluctuations. If you experience persistent problems or have allergies, consider white chocolate allergies or use white chocolate substitutes like dairy-free or vegan options.
These alternatives can help you avoid issues altogether while still achieving a creamy, delicious result. Troubleshooting these common problems guarantees your candy turns out perfect and enjoyable.
Creative Ideas for Decorating and Variations
Decorating white chocolate candies offers endless opportunities to get creative and personalize your treats. You can experiment with colors, textures, and designs to make each piece unique. Incorporate creative packaging ideas like fancy boxes or decorative wrappers to make your candies even more appealing.
For flavor infusion, try adding extracts, spices, or crushed candies into the white chocolate before molding. To elevate your presentation, sprinkle edible glitter or colorful sprinkles on top for a fun touch. Using piping bags, you can create intricate patterns or simple designs like swirls and dots.
You can also dip candies in contrasting colors to achieve a marbled effect or embed nuts, dried fruit, or edible flowers for added visual interest. These easy decorating tips allow you to craft beautiful, mouthwatering candies perfect for gifts, parties, or just personal indulgence.
Let your imagination run wild to turn simple white chocolate into stunning, customized treats.
Storing Your White Chocolate Candy for Freshness
Once your white chocolate candies are decorated and ready, proper storage helps keep them fresh and looking great. Use airtight containers to prevent moisture and keep their texture intact.
Store decorated white chocolate candies in airtight containers in a cool, dry place to keep them fresh and beautiful.
For extra protection, try wrapping each candy with wax paper before placing them in the container. This prevents sticking and flavor transfer between candies.
Choose a cool, dry spot away from direct sunlight, which can cause discoloration or melting. White chocolate is sensitive to temperature changes, so avoid warm areas.
Label your containers with the date so you know when to enjoy them while they’re still fresh. Regularly check your candies for signs of spoilage like blooming or texture changes.
Frequently Asked Questions
Can I Use Milk or Dark Chocolate Instead of White Chocolate?
You can definitely use milk or dark chocolate instead of white chocolate for your candies.
Just keep in mind that changing the type of chocolate will affect the flavor. Milk chocolate adds creaminess, while dark chocolate gives a richer, more intense taste.
You might want to adjust the sweetness a bit, especially if using dark chocolate. Melt them carefully to get the best results.
Trying different chocolates is a great way to create unique treats that suit your taste.
How Long Does White Chocolate Candy Typically Last?
White chocolate candy, when stored properly, can last about two to three weeks.
Keep it in an airtight container, away from direct sunlight and humidity, to stay fresh.
Over time, you might notice a slight change in texture or flavor—that’s a sign it’s nearing its end.
Enjoy it within this timeframe to get the best creamy sweetness.
What Are Some Gluten-Free or Allergy-Friendly Options?
You can make white chocolate candy allergy-friendly by using gluten-free ingredients like certified gluten-free white chocolate or dairy-free options.
For allergy-sensitive needs, substitute traditional ingredients with allergy-friendly options such as coconut oil or plant-based milk.
Always check labels to ensure products are free from common allergens. These options let you enjoy delicious white chocolate candy while accommodating gluten-free and allergy-friendly needs effortlessly.
Is It Possible to Make White Chocolate Candy Vegan?
Yes, you can make vegan white chocolate candy by using plant-based substitutes and dairy-free options. Look for ingredients like cocoa butter, coconut milk, or almond milk instead of dairy.
You can also find vegan white chocolate chips made from cocoa butter and plant-based milk. Simply melt these ingredients together, add your favorite flavorings, and pour into molds.
It’s a tasty, cruelty-free treat that everyone can enjoy!
How Do I Prevent White Chocolate From Melting During Handling?
Think of white chocolate as delicate ice. Once melted, it risks losing its shape if not handled carefully.
To prevent melting during handling, focus on tempering the chocolate and keeping it at a stable temperature to stay firm.
Store your candy in a cool, dry place, ideally in airtight containers, to prevent heat from softening it.
Proper tempering and smart storage are your best tools to keep white chocolate from melting and maintain its perfect form.
Conclusion
Now that you’ve mastered the art of making white chocolate candy, you’re equipped with a recipe that’s simple and delicious.
With your new skills, you can create decadent treats that impress everyone and turn ordinary moments into special memories.
So go ahead—head into your kitchen and craft confections that feel truly magical.
Your homemade white chocolate candies will delight taste buds and brighten days, proving that home-cooked goodness is truly legendary.