Make Hard Candy at Home in 7 Simple Steps
Making hard candy at home can seem daunting, especially if you’ve ever struggled to get that perfect, glossy finish. Many people find the process intimidating or worry about safety in the kitchen. But don’t worry—you’re not alone, and with a few simple steps, you can create delicious homemade candies effortlessly.
To make hard candy at home in 7 simple steps, start by gathering basic ingredients like sugar, corn syrup, water, and flavorings. Prepare your kitchen with the right tools—like a saucepan, thermometer, and silicone molds—and focus on safety.
Boil your mixture carefully to the hard crack stage, then pour, shape, and cool the candy quickly. Add flavors and colors for a personalized touch.
For tips on troubleshooting and storing, keep exploring to master your homemade treats.
Key Takeaways
- Gather and measure basic ingredients like sugar, corn syrup, water, and flavorings. Organize your tools so everything’s within easy reach.
- Use a heavy-bottomed saucepan and a candy thermometer. Make sure to sanitize your workspace and tools to keep things safe.
- Cook the sugar mixture to the hard crack stage, which is 300°F, while stirring constantly and keeping an eye on the temperature.
- Pour the hot mixture into molds or onto silicone mats. Shape your candies quickly before they start to cool and set.
- Let the candies fully cool and harden. Store them in airtight containers layered with parchment paper to keep them fresh.
Gather the Right Ingredients for Hard Candy
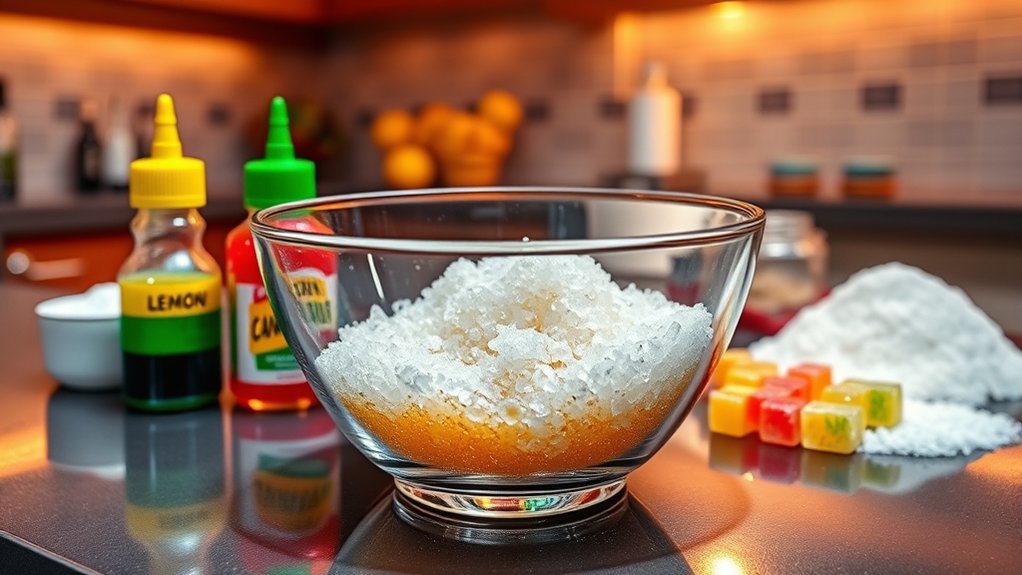
Before you start making hard candy, it’s important to gather all the ingredients you’ll need. The basics are sugar, corn syrup, water, and flavorings. These form the foundation of your candy and influence its texture and flavor.
Gather key ingredients like sugar, corn syrup, water, and flavorings before starting your homemade hard candy.
When choosing flavor combinations, think about popular options like citrus and mint, or try experimenting with fruit extracts and essential oils. If you want to swap out ingredients, honey or glucose syrup can replace corn syrup for a different twist.
You can also replace artificial flavorings with natural extracts like vanilla, lemon, or peppermint. Just keep in mind that different ingredients may slightly change the texture or setting point, so you might need to adjust.
Having all your ingredients ready before you begin helps make the process smoother. With the right flavors and thoughtful substitutions, your homemade hard candies will be tasty and personalized.
Prep Your Kitchen and Equipment for Candy-Making
First things first, gather all the tools you’ll need—things like a heavy-bottomed saucepan, a candy thermometer, and a silicone spatula. Having everything ready to go makes the whole process a lot smoother.
Next, take a moment to tidy up your workspace. Clean and clear the area so you have plenty of room to work safely and comfortably. It’s always easier to focus when your space isn’t cluttered.
Finally, organize your ingredients and equipment so they’re within easy reach. This way, you won’t have to scramble around when you’re in the middle of making your candy. It’s these little prep steps that really help everything go smoothly!
Gather Necessary Tools
To make hard candy at home, you need to gather the right tools and set up your kitchen for candy-making. Start with a sturdy saucepan for boiling sugar and a candy thermometer to keep track of the temperature precisely.
A silicone spatula or heat-resistant spoon is great for stirring the mixture without sticking. You’ll also want a candy mold to shape your candies and tongs or gloves for handling hot items safely.
Keep flavor extracts nearby so you can add a personalized touch once the mixture hits the right temperature. Having a clean work surface and measuring cups ready will make the process smoother.
These essential tools will help you craft perfect, professional-looking candies with ease and safety.
Clean and Prepare Workspace
Having your workspace clean and well-prepared sets the stage for a smooth candy-making process. Proper cleanliness and sanitation are key to preventing contamination and ensuring safety.
Start by clearing your countertops of clutter to create a dedicated area for candy-making. Then, wash all surfaces thoroughly with hot, soapy water and disinfectants.
Sanitize your tools and equipment, including pots, spoons, and thermometers, to keep everything hygienic. Keep a clean towel nearby for quick cleanups and handling hot utensils.
Maintaining a clutter-free, sanitized environment helps you avoid accidents and keeps your ingredients pure. A tidy workspace not only promotes safety but also helps you stay organized and focused on creating perfect hard candies.
Organize Ingredients and Equipment
Before you start cooking, make sure to organize all your ingredients and equipment. Gather your sugar, corn syrup, flavorings, and any substitutions you might use.
Set out your heat-safe saucepan, candy thermometer, and silicone molds or baking sheet. Check that everything is clean and in good condition for accurate readings and safety.
If you don’t have a specific tool, find suitable substitutes so you can keep things moving smoothly. Arrange everything within easy reach to avoid interruptions once you begin cooking.
Having your ingredients and tools organized helps you stay focused and prevents mistakes. This way, your hard candy will turn out perfect every time.
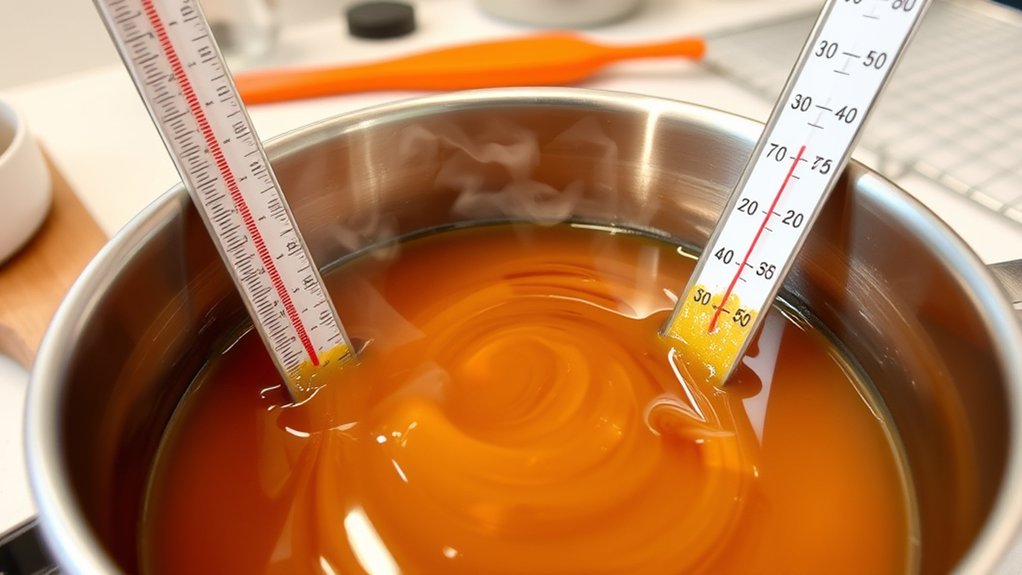
How to Safely Boil Sugar to the Perfect Temperature
To boil sugar safely, it’s really important to keep a close eye on the temperature using a good candy thermometer. That way, you’ll know exactly when it reaches the right stage without guessing.
And don’t forget to wear oven mitts — sugar boiling can get hot fast, and you definitely want to protect your hands. It’s best to work in a clean, clutter-free area so you won’t be distracted or accidentally bump into anything.
Staying alert throughout the process is key. That way, you can stop at just the right moment and avoid burns or overcooking your sugar.
Monitoring Temperature Precisely
Monitoring the temperature precisely is crucial when boiling sugar for hard candy because it affects the final texture and success of your treat.
To do this well, focus on accurate thermometer techniques. Here are four tips to help you master temperature control:
- Use a digital or candy thermometer for accurate readings.
- Attach the thermometer securely so you get reliable results.
- Keep a close eye on the thermometer while boiling; don’t just rely on visual cues.
- Remove the sugar from the heat immediately once it hits the target temperature.
Using Proper Safety Measures
Since boiling sugar involves high temperatures and hot syrup, it’s important to stay safe to avoid accidents, burns, or fires. Always wear safety goggles to protect your eyes from splashes, and put on heat-resistant gloves to shield your hands from burns.
Keep your workspace clean and organized, free of clutter. Never leave boiling sugar unattended, and use a sturdy, long-handled spoon or spatula to stir the mixture, avoiding direct contact with the hot syrup.
Be careful when adding ingredients or adjusting the heat because hot syrup can bubble up quickly. Keep a bowl of cold water nearby in case of accidental splashes or burns.
Following these safety tips helps you focus on making perfect candy without risking injury.
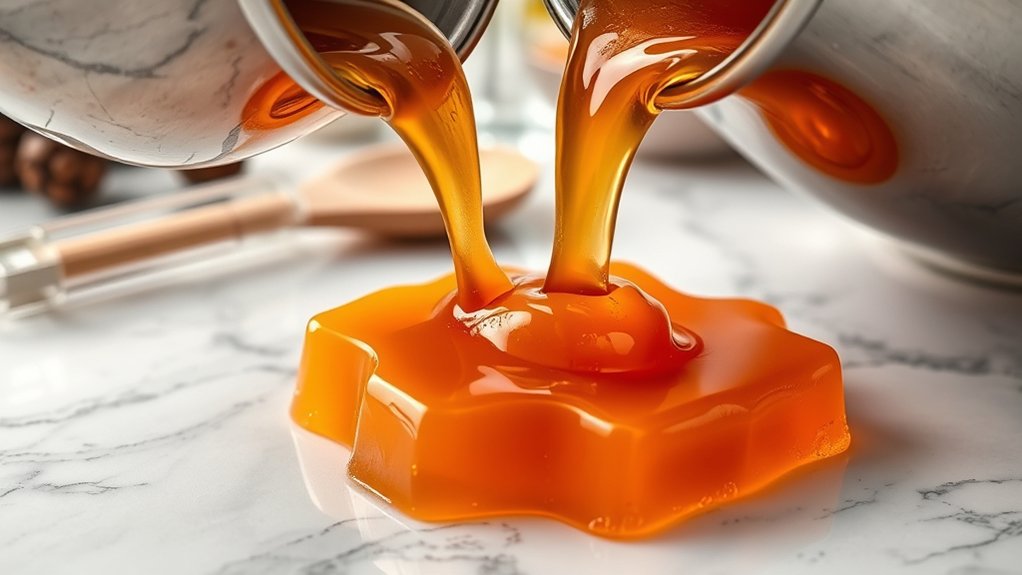
Pour, Shape, and Cool Your Hard Candy
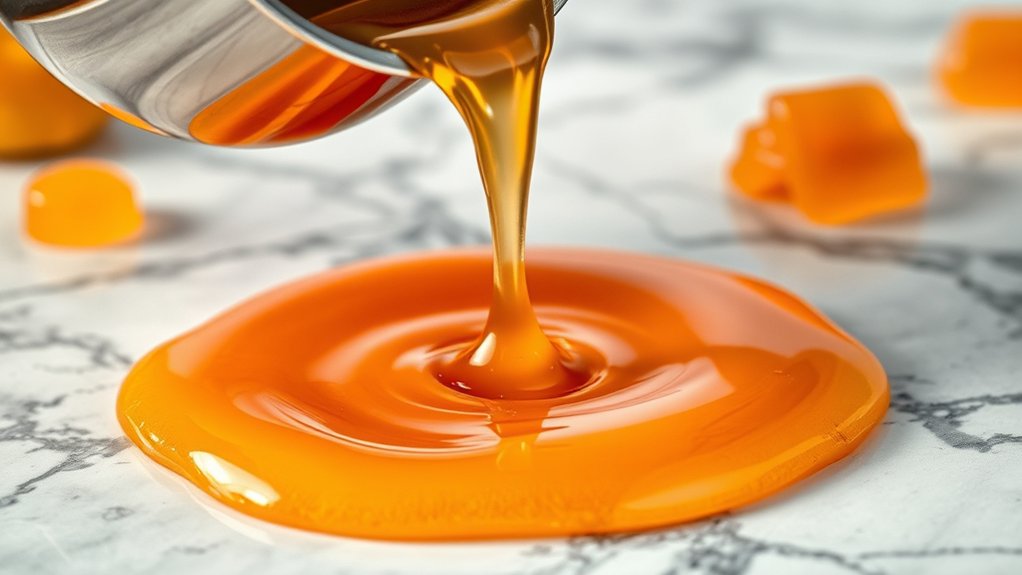
After pouring the hot candy mixture into your prepared molds or onto a silicone mat, quickly work to shape it if desired since it cools rapidly. Use a candy mold for uniform shapes or pour onto the mat for free-form candies.
Once cooled enough to handle, carefully remove the candy from the mold or break it into pieces if poured on the silicone. To give your candies an attractive finish, consider wrapping each piece with decorative wrapping. This keeps them fresh and appealing.
Here are four key steps to follow:
- Pour carefully to avoid spills or bubbles.
- Use a candy mold for consistent shapes or pour onto a silicone mat for more organic forms.
- Work quickly to shape the candy before it hardens completely.
- Wrap immediately with decorative wrapping to preserve freshness and presentation.
This process guarantees your candies are perfectly shaped and ready for packaging or sharing.
Add Flavors and Colors to Customize Your Candy
Once your candy has cooled and taken shape, adding flavors and colors lets you personalize your treats and make them truly unique. To do this, stir in a few drops of flavor extracts—like peppermint, cherry, or lemon—to create exciting flavor combinations.
Be careful not to add too much at once. Start with a small amount and adjust to taste. For colors, use gel or liquid food coloring, and experiment with blending shades to get your perfect hue.
Mixing different colors can produce vibrant, eye-catching candies. Keep in mind that colors may deepen as the candy cools, so start with a lighter tint if you want a softer shade.
This step lets you craft candies that reflect your favorite flavors and color schemes. Take your time experimenting to find the perfect combination that suits your taste and style.
Troubleshoot Common Hard Candy Issues
Hard candy making can sometimes lead to common issues, but many are easily fixable with a little troubleshooting. If your candy turns out too soft or sticky, it’s probably because of incorrect cooking temperature or humidity. Make sure your thermometer is accurate and cook the sugar to the proper hard crack stage.
If your flavor isn’t consistent or tastes off, double-check your ingredients and mixing process to avoid contamination or uneven flavor distribution. Here are four tips to troubleshoot common problems:
- Candy too soft or sticky: Increase cooking time slightly or verify your temperature.
- Uneven texture: Stir the mixture constantly during boiling for uniform heat.
- Flavor inconsistency: Use fresh ingredients and evenly distribute flavors before pouring.
- Cracks or brittleness: Confirm the sugar reaches the hard crack stage without overheating.
Store and Enjoy Your Homemade Hard Candy
To keep your homemade hard candy fresh and in perfect condition, proper storage is essential. First, make sure your candies are completely cooled and hardened before storing.
Use airtight storage containers to prevent moisture and air from affecting the candy’s texture and flavor. Glass or plastic containers with tight-fitting lids work well.
If your candies have flavorings, avoid storing them near strong-smelling foods, as they can absorb unwanted odors. For added freshness, consider layering the candies with parchment or wax paper to prevent sticking.
Store your candies in a cool, dry place away from direct sunlight, which can cause discoloration or soften the candy. When you’re ready to enjoy your treats, open the container and take out as many candies as you like.
Proper storage keeps your homemade hard candy delicious and crunchy, ready whenever you want a sweet snack.
Frequently Asked Questions
Can I Use Alternative Sweeteners Instead of Sugar?
Imagine a colorful array of candies, but you want to skip sugar. Yes, you can use sugar alternatives and natural sweeteners like honey or maple syrup for your hard candy.
Keep in mind, these may change the texture or color slightly, so experiment carefully. Some natural sweeteners caramelize differently, so adjust your method accordingly.
With a little creativity, you’ll craft delicious, healthier candies tailored to your taste.
How Do I Prevent the Candy From Sticking to the Pan?
To prevent your candy from sticking to the pan, start by lightly greasing it or lining it with parchment paper. This simple step makes a big difference when you’re ready to transfer the candy.
Make sure to cook the mixture to the right temperature so it sets properly. This helps keep the candy from sticking and gives it that perfect texture.
Stir gently and avoid overcrowding the pan. Being gentle and not rushing the process helps your candy stay smooth and shiny as it cools.
What Are Some Natural Flavoring Options for Hard Candy?
Think of your candy as a blank canvas, ready to be painted with natural flavors. You can use natural extracts like vanilla, almond, or peppermint to add depth.
Or try fruit infusions such as citrus zest, berry purées, or chopped dried fruits. These options bring vibrant, authentic tastes to your hard candy.
They make your treats both simple and flavorful. Just add your favorite natural ingredients during the flavoring stage.
How Long Does Homemade Hard Candy Last?
Homemade hard candy usually lasts about 2 to 3 weeks if you store it right. Keep it in an airtight container or candy jar, away from moisture and direct sunlight.
Proper storage helps prevent the candy from becoming sticky or picking up unwanted flavors. For the best freshness, try to enjoy it within that timeframe.
Always check your candy for signs of mold, softness, or texture changes before eating. That way, you’ll know it’s still good to enjoy.
Is It Safe to Microwave Sugar for Candy Making?
Microwave safety for melting sugar is like walking a tightrope—you need balance and caution. You can microwave sugar for candy making, but make sure to use a microwave-safe container and heat in short bursts.
Stir often to prevent overheating and uneven melting. Remember, sugar heats up fast, so keep a close eye on it to avoid burns or accidents.
Using proper techniques makes your homemade candy safe and delicious. Just stay cautious, and you’ll be fine!
Conclusion
Now that you know the simple steps to make hard candy at home, imagine all the fun possibilities—bright colors, bold flavors, and perfect textures.
But be careful—one mistake can turn your sweet project into a sticky mess. Are you ready to master candy making and wow everyone with your homemade treats?
Gather your ingredients, follow each step carefully, and soon you’ll discover the delicious surprise that’s waiting.
Your perfect hard candy is just a few simple steps away.