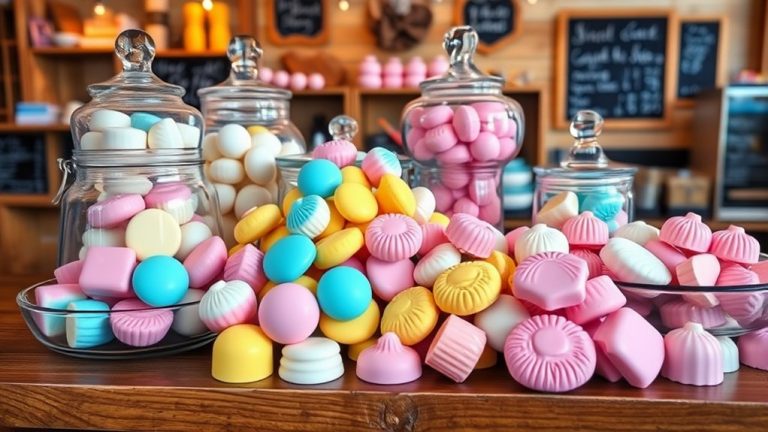
How to Know When to Melt Candy Chocolate
Many people struggle with melting candy chocolate perfectly, and you’re not alone. Getting that smooth, glossy finish can be tricky, especially if you’re new to baking or candy making. But don’t worry—once you know the right signs, melting chocolate becomes a lot easier.
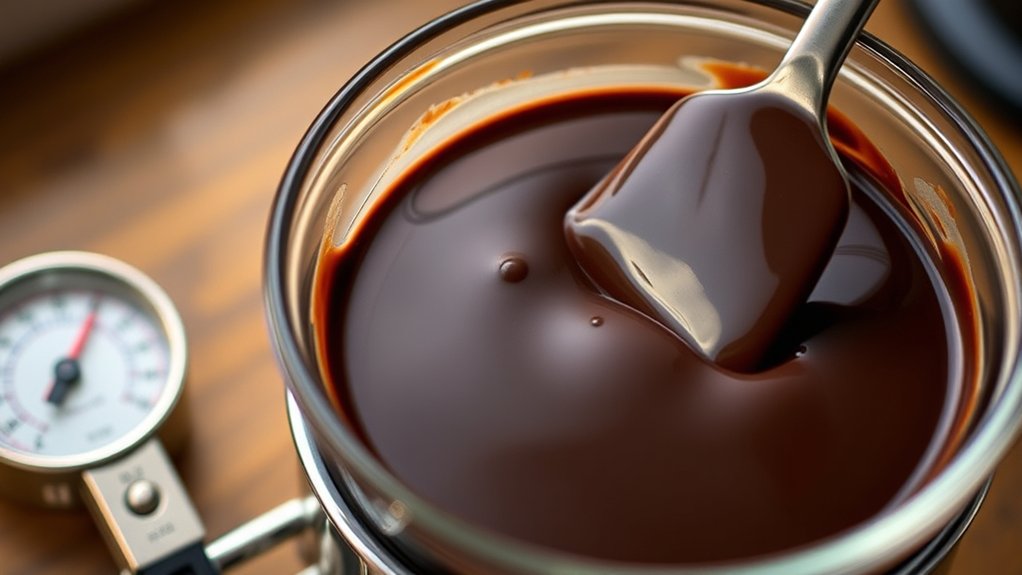
To tell when candy chocolate is ready to melt, look for a smooth, shiny appearance and a silky, flowing texture. Use a thermometer to guarantee it reaches the ideal temperature—around 104°F to 113°F—without overheating.
When properly melted, it will be free of lumps and have a glossy finish that reflects light. Avoid seizing or burning by stirring gently and controlling the heat.
If you want to master perfect melting tips, keep going for more details.
Key Takeaways
- Use a thermometer to check that the chocolate reaches the right temperature, usually between 104°F and 113°F.
- Look for a smooth, glossy, and flowing appearance, which shows it’s properly melted.
- Make sure there are no lumps, streaks, or dull spots in the chocolate.
- Gently stir and watch if the chocolate stays shiny and even without seizing.
- When cooled, the chocolate should set quickly and evenly, with a firm, glossy finish.
How to Recognize When Your Chocolate Is Ready to Melt
Knowing when your chocolate is ready to melt is key to getting that smooth, glossy finish you want. The trick is to pay close attention to how it looks and feels.
Start by checking the color. Good-quality chocolate will have a richer, more vibrant hue. As it warms, it should soften gradually without turning greasy or grainy.
You want it to become smooth and shiny. That’s a sign the cocoa butter is melting properly. If you see streaks or a dull surface, it’s not quite ready yet.
Use gentle heat because overheating can ruin both the flavor and texture. High-quality chocolate is especially sensitive to temperature changes.
When the chocolate starts to lose its solid form and turns fluid and glossy, it’s ready for the next step. Recognizing these signs helps you melt it perfectly without losing any flavor or quality.
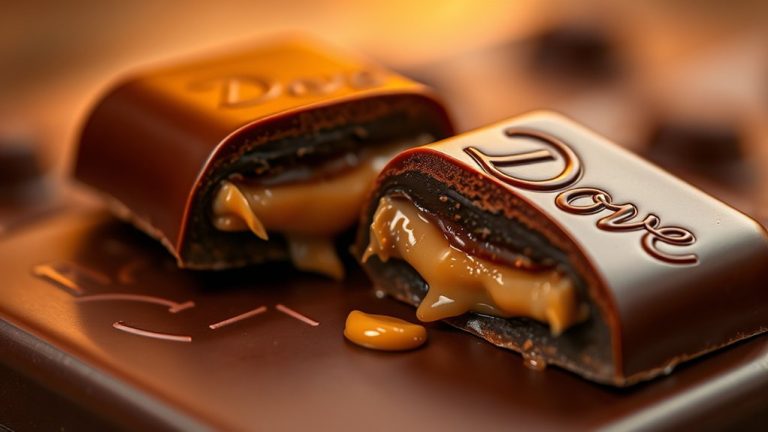
Signs That Your Chocolate Is Properly Melted and Tempered
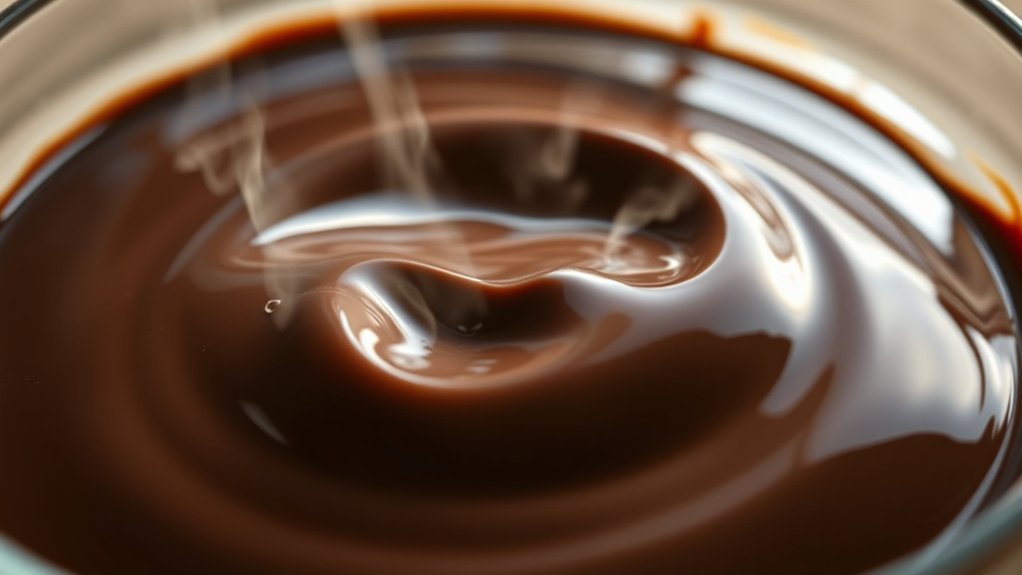
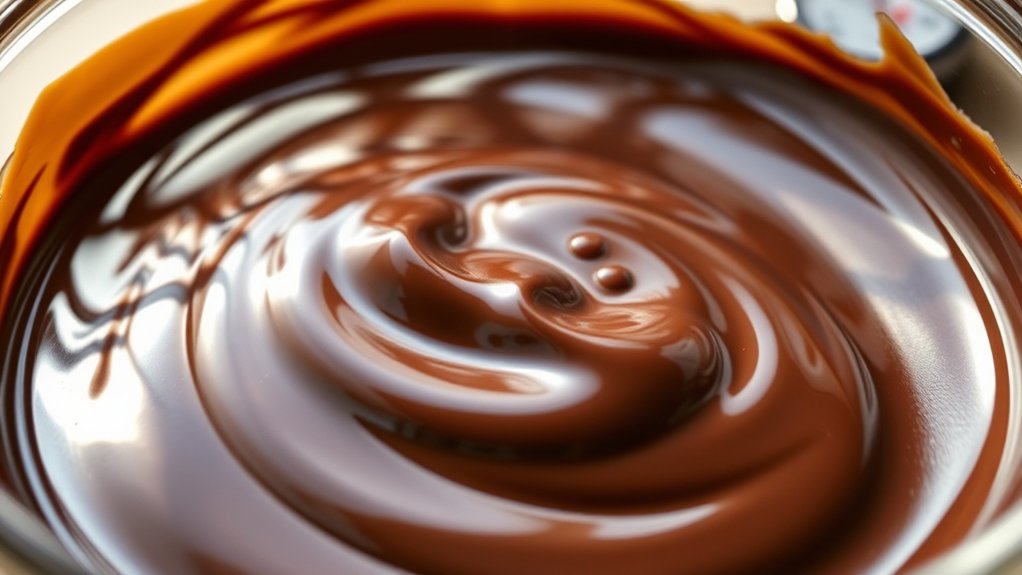
Once your chocolate reaches the right temperature, you’ll notice it becomes smooth, shiny, and fluid without any streaks or lumps. Properly melted and tempered chocolate has a glossy appearance that reflects light, giving it an attractive finish.
When chocolate is properly melted, it’s smooth, shiny, and free of streaks or lumps, with a glossy finish.
You’ll also sense a rich, pure chocolate flavor—any dullness or bitterness indicates it’s not fully tempered. When you dip or spread the chocolate, it should set quickly and evenly, with a firm texture rather than being sticky or greasy.
The packaging design can also be a clue—if you’ve melted chocolate from a high-quality brand, it often features packaging that emphasizes freshness and quality. Furthermore, when properly melted, the chocolate’s consistency is ideal for coating or molding without separation or fats pooling.
These signs confirm your chocolate is correctly melted and tempered, ready to deliver the best flavor and finish for your treats.
How to Check If Your Chocolate Is Melted to the Right Temperature
To make sure your chocolate melts at the right temperature, check it carefully with a reliable method. Use a digital or candy thermometer to get an accurate reading.
For most candies, aim for a melting point between 104°F (40°C) and 113°F (45°C). This range keeps the flavor rich and smooth without overheating.
When the thermometer hits around 115°F (46°C), your chocolate is close to perfect for dipping or pouring. For dark chocolate, keep it slightly cooler at about 110°F (43°C) to preserve its deep flavor.
Milk and white chocolates need even lower temperatures to avoid burning or seizing. If your chocolate smells burnt or looks dull and thick, it’s probably overheated.
Checking the temperature carefully helps you melt chocolate just right. It keeps the flavor intact and makes sure it’s good for your candy recipes.
Common Signs That Your Chocolate Has Overheated or Seized
If your melted chocolate suddenly becomes lumpy or grainy, it’s a clear sign that it has overheated or seized. This change affects the chocolate flavor, making it less smooth and more bitter. You might also notice the texture turning thick and difficult to stir.
Overheating can cause the chocolate to lose its glossy appearance, which impacts the overall presentation, especially if your packaging design relies on a sleek finish. Be alert for these signs:
- Grainy or gritty texture
- Loss of shine and glossiness
- Thick, almost paste-like consistency
- Unpleasant, burnt smell
- Chocolate that refuses to melt smoothly
Seized chocolate is often caused by moisture or excessive heat, and it can’t be fixed easily. Recognizing these signs helps you prevent ruining your chocolate, ensuring it stays flavorful and has the right texture for your recipes.
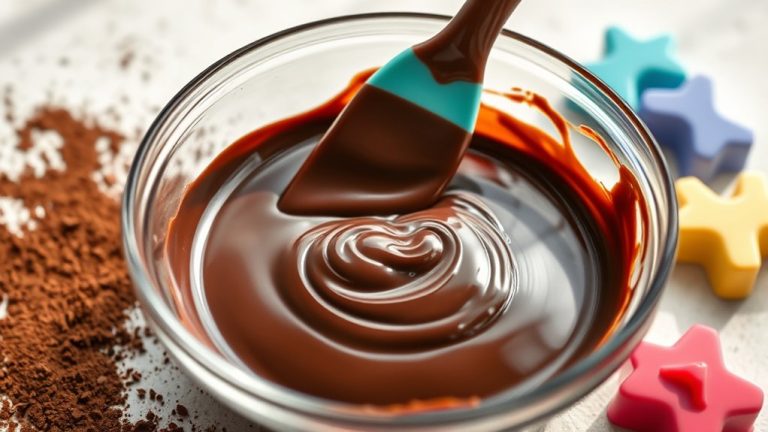
Visual Cues to Know When Your Chocolate Is Perfectly Melted
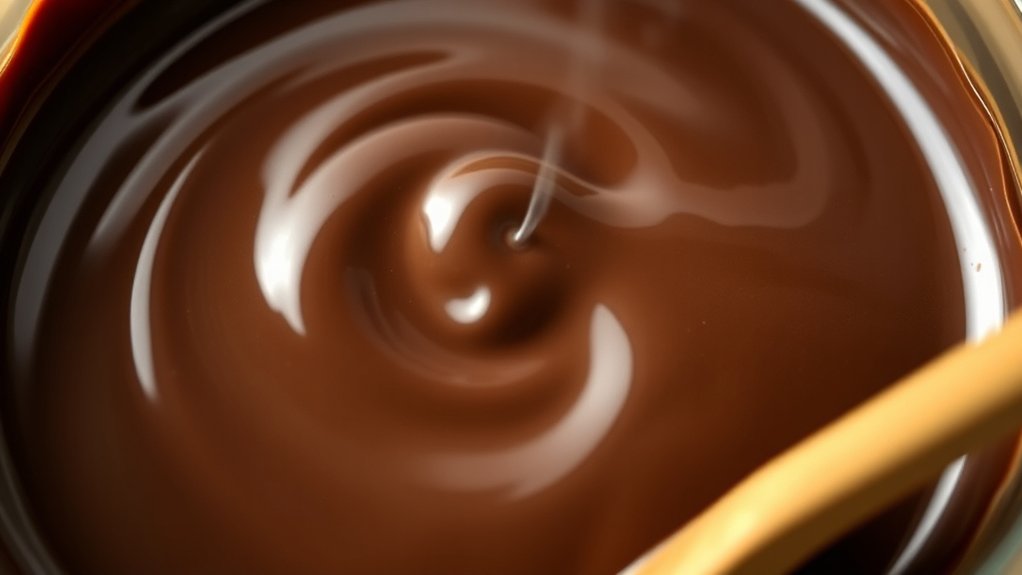
When your chocolate reaches the right temperature, it will show clear visual cues that it’s perfectly melted. You’ll notice a smooth, glossy surface with a uniform, fluid look, which means it’s at the ideal consistency.
The chocolate will have lost its grainy or clumpy appearance, and you should see a slight sheen that reflects light. This shiny, velvety finish means the flavor has fully developed and it’s ready to use.
If you see small, unmelted bits or streaks, it’s a sign it needs a little more gentle heat. The transition from solid to liquid should be seamless, with no lumps or separation.
These visual cues are your best signs that your chocolate is ready to incorporate into your recipe. They’ll help ensure a smooth candy texture and rich, satisfying flavor.
Why Gentle, Consistent Heat Matters When Melting Chocolate
Maintaining gentle, consistent heat while melting chocolate guarantees it reaches that smooth, glossy state without becoming grainy or burned. This careful approach preserves the chocolate’s delicate flavor and prevents the melting temperature from exceeding safe limits. When the heat is too high or uneven, you risk altering the chocolate’s flavor and ruining its texture, making it difficult to work with.
Gentle, even heat preserves chocolate’s flavor and glossy texture, preventing burning, seizing, or graininess.
Consistent warmth ensures a controlled melting process, resulting in a silky finish perfect for coating or baking. Remember, patience is key. Using low heat or a double boiler helps regulate temperature and prevents overheating.
Stirring frequently distributes heat evenly, avoiding hot spots. By staying attentive to temperature and heat distribution, you’ll maintain the chocolate’s original flavor and achieve a beautifully melted consistency.
- Prevents chocolate from burning or seizing
- Keeps the chocolate flavor intact
- Ensures even melting temperature
- Maintains smooth, glossy texture
- Reduces risk of graininess
Troubleshooting: What to Do If Your Chocolate Isn’t Melting Properly
If your chocolate isn’t melting smoothly, first take a quick look at the quality. Sometimes, old or poor-quality chocolate just doesn’t melt well, no matter what you do. So, it’s worth making sure you’re starting with good, fresh chocolate.
Next, double-check how you’re melting it. The best way is to use gentle heat, like a double boiler, rather than applying direct high heat. High heat can cause the chocolate to seize or burn, making it harder to get that smooth, velvety texture. Adjust your method if needed, and you should see better results!
Check Chocolate Quality
Sometimes, chocolate refuses to melt smoothly because its quality isn’t up to par. Poor-quality chocolate can have inconsistent melting, a dull appearance, or a waxy texture. To troubleshoot, check the chocolate’s quality first.
Fresh, high-quality chocolate has a richer flavor and a smooth texture, which melts more evenly. Low-quality or old chocolate may contain additives that hinder melting or cause clumping.
Consider these points:
- Check the ingredient list for cocoa content and minimal additives.
- Smell the chocolate for freshness and aroma.
- Look for a glossy finish and smooth texture.
- Avoid chocolate with a dull or grainy appearance.
- Use chocolate with high cocoa butter content for better melting and flavor.
Ensuring the ingredients are fresh and the chocolate has good flavor makes melting easier and results in a smoother finish.
Use Proper Melting Method
When your chocolate isn’t melting smoothly, choosing the right method can make all the difference. The best approach depends on whether you’re dipping, coating, or baking. A double boiler offers gentle heat, which helps preserve the flavor and prevents scorching.
Alternatively, microwave melting is quick but needs careful attention. Use low power settings and stir often to avoid burning the chocolate. Check the table below to find the best method for your needs:
| Method | Tips |
|---|---|
| Double boiler | Heat gently, avoid water contact, stir frequently |
| Microwave | Use short bursts, stir between, low power |
| Direct heat | Usually not recommended, risk of burning |
| Slow stove top | Use low heat, keep stirring constantly |
| No heat | For melting chocolate chips only, avoid high heat |
Proper melting keeps your chocolate flavorful and smooth. Store it correctly to prevent issues later on.
Tips for Achieving a Smooth, Shiny Melted Chocolate
Want that smooth, shiny melted chocolate? It’s all about using the right tools—think a double boiler or a microwave-safe bowl. These help control the heat so your chocolate melts evenly without burning.
And don’t forget, keeping the temperature steady is key. If it gets too hot too fast, your chocolate can seize up or scorch. So, take your time and stir gently and often. This way, you get that perfectly glossy, silky finish that just melts in your mouth.
Use Proper Melting Tools
Using the right tools is key to getting smooth, shiny melted chocolate. The equipment you choose affects the flavor and melting temperature, helping the chocolate melt evenly without seizing.
A heatproof bowl over a double boiler provides gentle, consistent heat that prevents overheating. Silicone spatulas are great for stirring smoothly, avoiding air bubbles and streaks.
A thermometer is helpful to keep an eye on the temperature, making sure the chocolate doesn’t scorch. Avoid metal utensils since they can conduct heat unevenly.
Choose a bowl that’s large enough to prevent spills and make stirring easier. Using proper tools keeps the chocolate’s quality, flavor, and shine intact, making the melting process more effective and consistent.
Maintain Correct Temperature
Keeping the right temperature while melting chocolate guarantees it remains smooth, shiny, and easy to work with. Use a thermometer to monitor the temperature closely and avoid overheating, which can cause seizing or burning.
Maintaining the correct temperature also ensures your chocolate’s flavor stays rich and balanced. When melting, opt for gentle heat methods like double boiling or microwaving in short bursts, stirring frequently.
Proper packaging tips, like covering your melted chocolate or keeping it in a warm, stable environment, help prevent temperature fluctuations that could cause dullness or streaks.
Consistent temperature control results in a glossy finish, making your chocolates look professional and appealing. Staying vigilant about temperature is key to achieving that perfect, velvety texture every time.
Stir Gently and Often
Gently stirring your chocolate as it melts is key to getting that smooth, shiny finish. Keep the motion gentle and steady to help distribute heat evenly and prevent burning.
Frequent stirring also helps keep the chocolate’s rich flavor intact and avoids temperature spikes that can cause seizing or graininess. Use a spatula or spoon to gently move the chocolate around, especially near the edges.
Remember to keep the heat low to prevent overheating, which can ruin the texture. Proper storage keeps your chocolate fresh and makes melting smoother, too.
Stirring often promotes even heat distribution and creates a sleek, glossy surface perfect for dipping, coating, or decorating. Staying attentive during this process ensures your chocolate melts beautifully and is ready for your culinary creations.
Best Methods for Melting Candy Chocolate: Microwave and Double Boiler
When melting candy chocolate, choosing the right method ensures smooth, glossy results without burning or seizing. The two best techniques are microwave melting and double boiler.
The microwave method is quick and easy. Just heat in short bursts, stirring often to avoid uneven heating. It’s important to understand how melting works—raising the temperature gradually keeps the chocolate flavorful and prevents burning.
A double boiler uses gentle, indirect heat, which is perfect for controlling temperature carefully. Place chopped chocolate in a heatproof bowl over simmering water and stir frequently. This method helps prevent overheating and keeps the chocolate smooth and tasty.
Both techniques need attention to temperature. Too much heat can cause the chocolate to seize or burn, ruining the process. Patience and gentle heat are key to getting perfectly melted candy chocolate ready for your recipes.
Final Checks to Ensure Your Melted Chocolate Is Ready for Use
Before using your melted chocolate, do a few quick checks to make sure it’s ready. First, look for a smooth, glossy consistency—lumps mean it needs a bit more stirring or gentle reheating. It should flow easily without being too runny, which shows it’s at the right temperature for dipping or coating.
Next, taste and consider flavor pairing. Your chocolate should taste rich and balanced. If it tastes bland or bitter, you might want to add a touch of flavoring or give it a gentle stir to mix in any added ingredients. Also, check that it’s cooled to the right temperature for your project; too hot and it might melt or burn, too cool and it won’t coat evenly.
Finally, keep some tips in mind for storage. Store any leftover melted chocolate in an airtight container, and reheat gently if needed. Remember to stir thoroughly before using it again. These checks help ensure your chocolate is perfect for your recipe.
Frequently Asked Questions
Can You Over-Melt Candy Chocolate and Still Use It?
Yes, you can over-melt candy chocolate, but it might ruin the texture. When you over-melt, the chocolate becomes thick and grainy instead of smooth.
Keep an eye on the melting temperature because exceeding it can cause the chocolate to seize or burn.
If you do overheat it, you might try to fix it by adding a bit of vegetable oil or shortening.
For the best results, melt your chocolate carefully and at the right temperature.
How Long Can Melted Candy Chocolate Stay Usable?
Melted candy chocolate stays usable for about 1 to 2 hours at room temperature, but it’s best to use it sooner for the best texture. Proper storage and gentle melting help keep its quality.
If it cools and hardens, you can re-melt it. Just be careful not to overheat, as that can burn it or change the texture. Always cover melted chocolate to prevent it from drying out or absorbing moisture.
Does the Type of Chocolate Affect Melting Times?
Yes, the type of chocolate affects melting times because different chocolates have varying textures and melting points. For example, couverture chocolate melts faster due to its higher cocoa butter content.
Solid or dark chocolates may take longer to melt because of their composition. Pay attention to the texture and melting temperature of your chocolate, as these factors influence how quickly it becomes smooth and workable.
Adjust your heating method accordingly for the best melting results. This way, you’ll get a perfect, smooth consistency every time.
Can You Reuse Leftover Melted Chocolate?
Reusing leftovers of melted chocolate isn’t just possible, it’s essential if you want to maximize your culinary genius!
As long as you store it properly in an airtight container, your chocolate can stay fresh and luscious for future creations.
Keep in mind, reusing chocolate might affect its texture or flavor slightly, but with proper storage, you can reheat and reuse it without sacrificing quality.
This saves you time and effort, making your baking process more efficient and enjoyable.
What Are Alternative Methods for Melting Candy Chocolate?
You can melt candy chocolate using a microwave or a double boiler. For the microwave, heat it in short bursts, stirring in between to prevent overheating.
With a double boiler, place a heatproof bowl over simmering water and stir constantly. Different types of candy, like coating chocolates or melts, might need slight adjustments in melting time.
Always check that your chocolate looks smooth, glossy, and shiny before using.
Conclusion
Knowing when your candy chocolate is perfectly melted is key to achieving smooth, glossy results. Properly melted chocolate not only looks great but also sets beautifully, making your desserts stand out.
Did you know that properly tempered chocolate has a shine and firmness that can boost your desserts’ appeal? Paying attention to visual cues and temperature can help you get there.
By watching for the right color, gloss, and consistency, you’ll avoid common mishaps like seizing or overheating. These signs let you know it’s ready to use.
Mastering these tips guarantees your treats turn out flawless every time. Keep practicing, and you’ll gain confidence creating stunning confections with candy chocolate.