Step-By-Step to Make Chocolate Covered Strawberries With Candy Melts
Many people love the idea of making delicious treats at home but often find it tricky to get that perfect chocolate coating on strawberries. You’re not alone—achieving that smooth, shiny finish can be a bit of a challenge.
Luckily, with a little guidance, you can create beautiful, mouthwatering chocolate-covered strawberries using candy melts.
To make chocolate-covered strawberries with candy melts, first choose ripe, firm berries with vibrant color and fresh stems. Refrigerate them for 30 minutes, then melt the candy melts slowly in short bursts, stirring frequently until smooth.
Hold the strawberries by the stems, dip and swirl for an even coating, then place on parchment to set. Cool in the fridge for 15-30 minutes.
For tips on decorating and troubleshooting, keep exploring for all the details.
Key Takeaways
- Select fresh, firm strawberries with green stems. Refrigerate for 30 minutes before dipping to keep them cold and firm.
- Melt the candy melts in short bursts, stirring often until smooth and glossy. This makes dipping easier.
- Hold each strawberry by the stem, dip it into the melted candy, then gently shake off any excess coating.
- Place the dipped strawberries on parchment paper and refrigerate for 15 to 30 minutes to let the chocolate set.
- For a finishing touch, decorate your strawberries with drizzles, sprinkles, or edible gold to make them look festive and polished.
How to Choose Ripe, Fresh Strawberries for Dipping
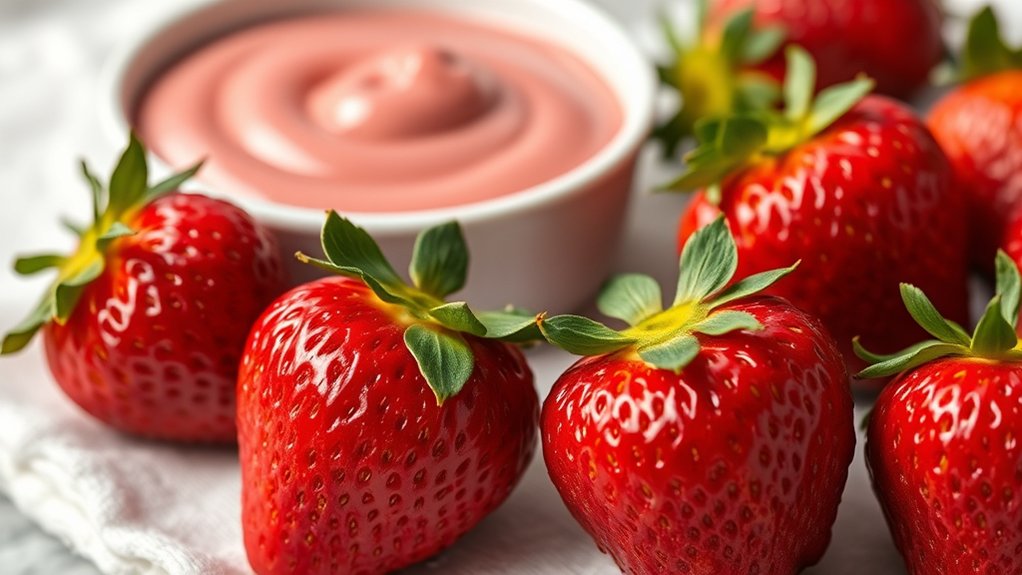
How can you guarantee you’re selecting the best strawberries for dipping? The key is to focus on strawberry freshness and ripe selection. Start by examining the berries’ appearance: look for bright, vibrant color without any dull or white patches.
Fresh strawberries should feel firm but not hard, indicating ripeness without being overripe. Gently squeeze the berries; if they yield slightly but hold their shape, they’re perfect for dipping.
Avoid strawberries with mold, bruises, or excessive softness, as these signals of poor freshness can ruin your treat. Check the stems; green, fresh-looking leaves suggest the berries were picked recently and are still at their peak.
What Are the Best Candy Melts for Chocolate Coating?
When you’re picking out candy melts for coating your strawberries, it’s a good idea to think about the flavor options. Do you want classic vanilla, rich chocolate, or maybe something fun like red velvet or caramel? Picking the right flavor can really tie your whole look together and match your theme perfectly.
And of course, you’ll want melts that melt smoothly and coat your strawberries evenly. Nobody wants clumpy or streaky coating, right? A good quality candy melt will give you that nice, professional finish. Plus, consider the texture and finish you prefer—some like that shiny, sleek look, while others might go for a more rustic, matte vibe. It all depends on what you’re going for!
Flavor Variety Options
Choosing the right candy melts can make all the difference in creating delicious, visually appealing chocolate-covered strawberries. When exploring flavor variety options, think about how different melts complement your strawberry choices and boost your chocolate pairing.
For example, you might go with white candy melts, which are perfect for customizing with food coloring or drizzle effects. Dark chocolate melts are great for a rich, intense flavor that pairs well with bold strawberry varieties.
You can also try fruity or seasonal flavored melts like raspberry or vanilla. These add unique taste twists that make your presentation stand out. Experimenting with these options lets you create fun, personalized treats with a variety of flavor profiles and visual appeal.
Melting and Coating Ease
Selecting the right candy melts can make your chocolate coating process much smoother and more successful. Look for high-quality melts that melt evenly and smoothly, making coating easier without clumping or burning.
For best results, choose candy melts designed specifically for coating. They tend to have a better chocolate pairing, creating a glossy finish and firm set. When melting, use short bursts in the microwave or a double boiler, stirring frequently.
Proper storage tips are essential. Keep candy melts in an airtight container in a cool, dry place to maintain their consistency and prevent blooming or hardening. This guarantees they melt easily when you’re ready to coat strawberries, giving you a professional-looking finish with less hassle.
Texture and Finish
The key to getting a smooth, glossy finish on your strawberries is using candy melts with the right texture. The best candy melts melt evenly and create a uniform coating that enhances the chocolate flavor and adds a nice touch of refinement.
Look for melts that melt smoothly without lumps or streaks—that’s how you get a professional-looking finish. Once set, they should have a shiny, glossy appearance that makes your strawberries look super tempting.
You also want melts that offer a firm but tender bite, balancing the rich chocolate flavor with satisfying texture. Choosing high-quality candy melts designed for coating will make your strawberries look amazing and taste delicious, with the perfect mix of flavor and texture.
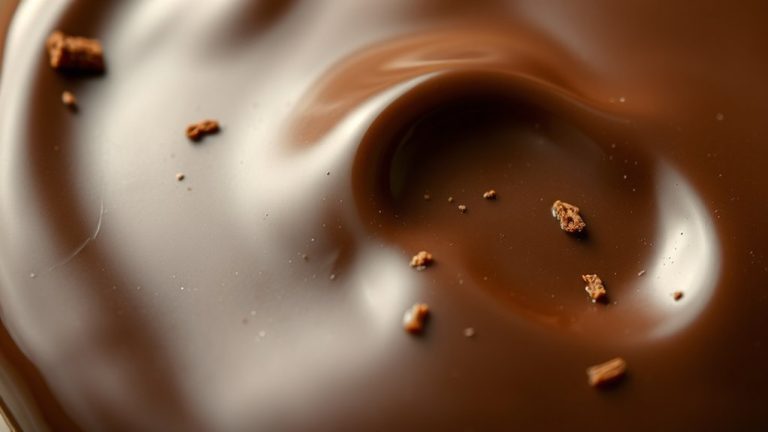
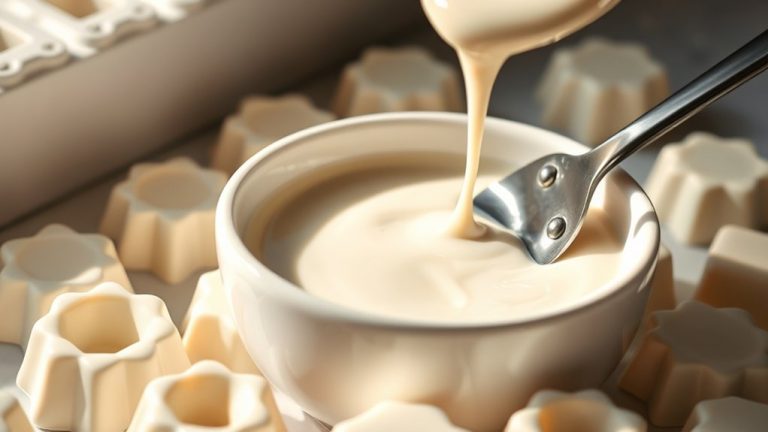
How to Melt Candy Melts Safely and Achieve a Smooth Finish
Want your candy melts to turn out nice and smooth? The trick is to melt them gently and keep stirring. If you’re using a microwave, do it in short bursts—about 15-20 seconds at a time—so they don’t overheat or burn. Just give them a good stir each time, and you’ll see them melt into a silky, glossy consistency.
If you prefer a bit more control, a double boiler is the way to go. It heats the candy melts slowly and evenly, reducing the risk of burning. Just place a heatproof bowl over a pot of simmering water, and stir constantly until everything’s melted and smooth. Once you’ve got that perfect consistency, you’re all set to dip your strawberries and create a beautiful, shiny coating.
Proper Melting Techniques
Ensuring your candy melts melt smoothly is essential for creating glossy, professional-looking chocolate-covered strawberries. To do this, follow these proper melting techniques:
- Use a microwave or double boiler, melting in short, 15-20 second bursts. Stir between each burst to prevent overheating.
- Keep the heat low to preserve the chocolate flavor and avoid scorching, which can make the chocolate grainy.
- Choose high-quality candy melts and select fresh, ripe fruit to get the best coating and flavor contrast.
Maintaining a smooth melt helps the chocolate stick beautifully to your fruit and gives a shiny finish. Proper temperature control prevents issues like seizing or blooming, so your strawberries look flawless and taste delicious.
Achieving Smooth Texture
Proper melting techniques set the foundation for a smooth, glossy coating, but achieving that perfect finish also depends on how you handle the melted candy melts. To get the ideal chocolate consistency, melt the candy melts slowly and evenly, avoiding overheating. Use short bursts in the microwave or a double boiler, stirring frequently to prevent lumps or seizing.
If the candy melts are too thick, add small amounts of vegetable oil or shortening to loosen the texture. Consistently stirring helps maintain a smooth, shiny appearance, which is essential for a professional look.
When candy melting, patience is key—don’t rush the process. Achieving a silky, smooth texture ensures your strawberries are coated beautifully and taste delicious.
How Do You Dip Strawberries Without Making a Mess?
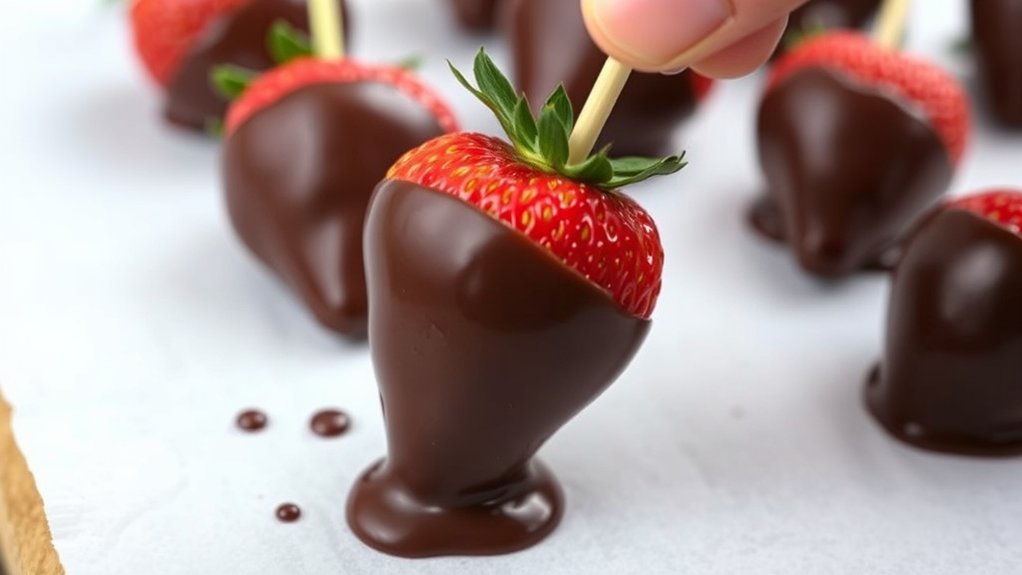
Dipping strawberries without making a mess can be easy if you follow a few simple steps. Start by choosing ripe, firm strawberries with a smooth surface, which helps with even coating. Before dipping, refrigerate them for about 30 minutes; cold fruit reduces melting and drips.
Choose ripe, firm strawberries and chill before dipping for neater, smoother coatings.
To keep things tidy, try these tips: Use a tall, narrow glass filled with melted candy melts to make dipping easier and control drips. Hold the strawberry by the stem, gently dip it, and swirl for an even coat.
Place the dipped strawberries on parchment paper or a silicone mat. This prevents sticking and makes cleanup a lot simpler. For the best flavor pairing, pick strawberries that complement the candy melts.
After dipping, store your strawberries in an airtight container in the fridge. Following proper storage tips will keep them fresh and help prevent messes.
Tips for Getting a Perfect, Even Chocolate Coating
Achieving a smooth, even chocolate coating on your strawberries is all about preparation and technique. Start by thoroughly drying your strawberries to prevent excess moisture, which can cause streaks or uneven coverage.
When choosing candy melts, go for flavors that complement your fruit pairing—like classic milk, dark, or white chocolate, or even flavored varieties for a fun twist. Use a microwave-safe bowl to melt the candy melts in short bursts, stirring after each to keep it smooth.
Dip the strawberries one at a time, holding them by the stem and swirling gently to cover evenly. If needed, use a spoon to help spread the chocolate for a more uniform coat.
Tap off excess chocolate by gently shaking or flicking the strawberry. Keeping the chocolate at a consistent temperature helps avoid thick or thin spots, making sure your strawberries are coated perfectly every time.
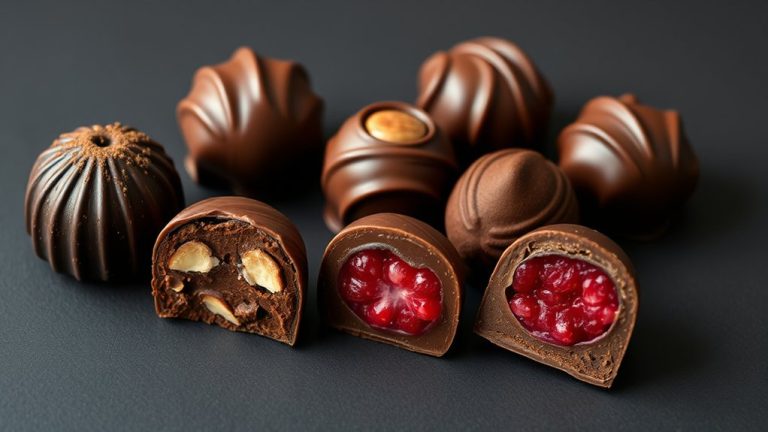
Creative Ideas to Decorate Your Chocolate-Covered Strawberries
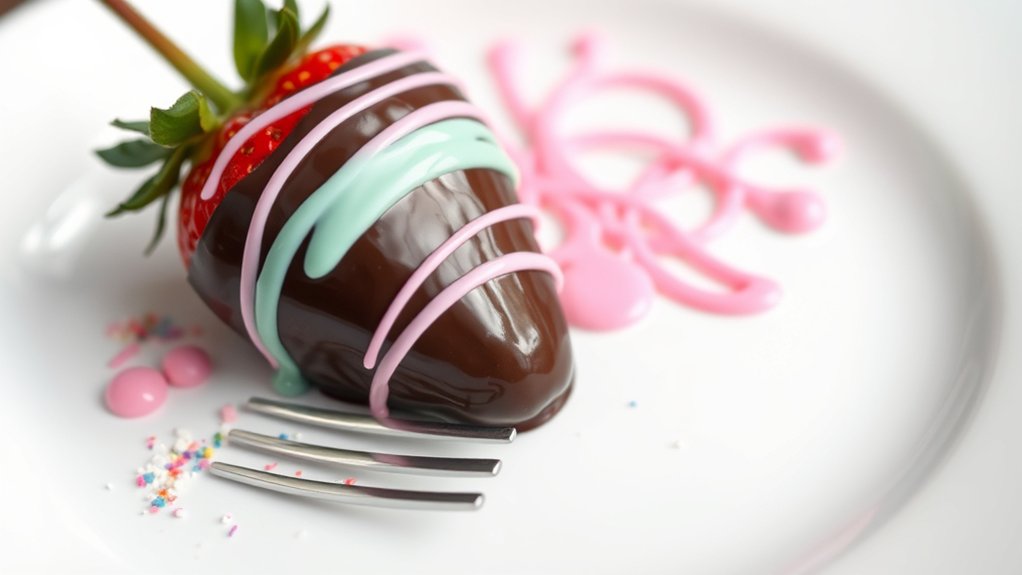
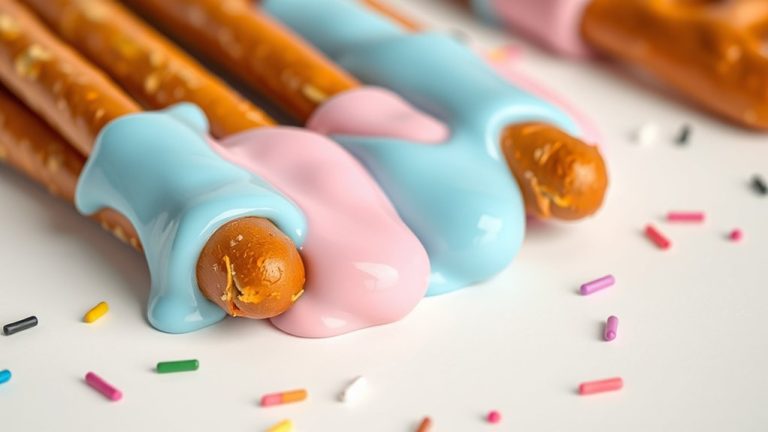
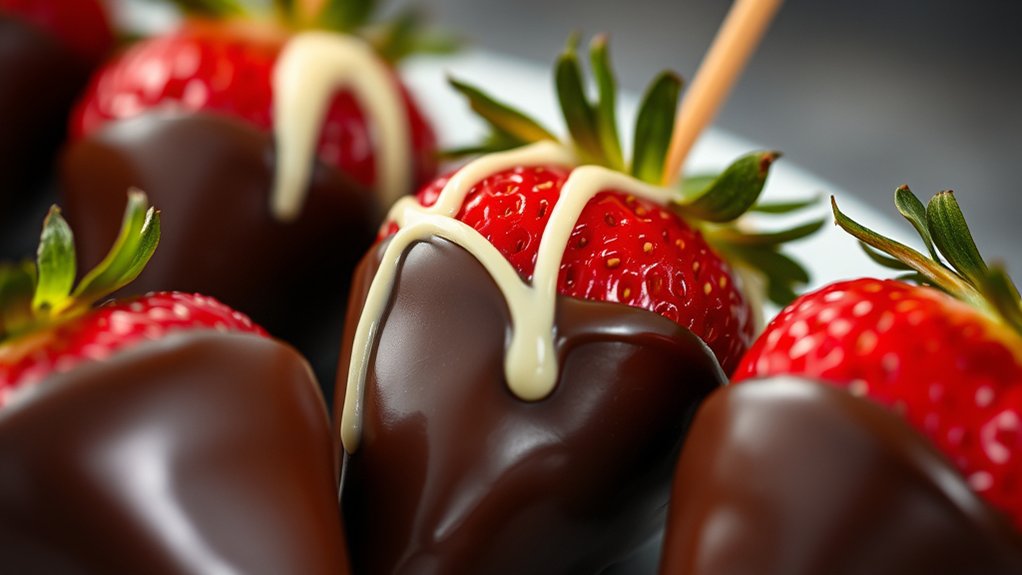
You can really make your strawberries pop with some simple, eye-catching decorations. For example, try drizzling white chocolate over the dark coating—that little contrast looks so pretty and adds a touch of elegance.
If you want to have some fun, sprinkle on some colorful sprinkles or tiny edible gems. It’s a playful way to make your treats more vibrant and appealing. And if you’re aiming for a more sophisticated look, a touch of edible gold leaf can turn your strawberries into a real showstopper.
These little touches will not only make your chocolate-covered strawberries look amazing but also impress everyone who bites into them!
Drizzle With White Chocolate
Adding a white chocolate drizzle is a simple yet elegant way to elevate your chocolate-covered strawberries. It creates a beautiful contrast and makes your presentation look more polished.
To get the best results, consider these tips: First, choose the right white chocolate. Look for high-quality candy melts or baking white chocolate for smooth drizzling.
Next, perfect your technique. Use a piping bag or a plastic sandwich bag with a tiny tip cut off, and gently drizzle in a back-and-forth motion.
Pair wisely by selecting strawberry varieties that complement the chocolate. Whether sweet or tart, these options help balance the flavors perfectly.
A white drizzle adds visual appeal and sophistication, making your strawberries suitable for any occasion. Feel free to experiment with different strawberry varieties to find your favorite flavor combination.
Add Colorful Sprinkles
Once you’ve perfected your white chocolate drizzle, it’s time to make your strawberries really pop with colorful sprinkles. They add a fun touch and instantly boost your dessert’s visual appeal.
Pick sprinkles that match your fruit pairing—bright colors go great with strawberries, blueberries, or kiwi. This creates a vibrant, eye-catching display that’s sure to impress.
For seasonal decorations, choose sprinkles in holiday themes or colors—red and green for Christmas, pastel shades for Easter, or orange and black for Halloween.
Gently press the sprinkles onto the still-wet chocolate so they stick well. This quick step turns your strawberries into festive treats perfect for any occasion.
With different sprinkles, your chocolate-covered strawberries can match the mood and season, making them more fun and memorable.
Use Edible Gold Leaf
Edible gold leaf instantly elevates your chocolate-covered strawberries, turning them into stunning, luxurious treats. To add gold as decorative accents, handle it carefully with tweezers or a brush.
Start by choosing small, delicate pieces of gold leaf for precise application. Lightly brush the strawberry with a little water or edible adhesive to help the gold stick smoothly.
Gently lay the edible gold leaf onto the strawberry, pressing lightly to secure it. This simple technique adds a touch of elegance and sophistication, perfect for special occasions.
How to Set and Cool Your Strawberries for the Best Look
Ever wonder how to guarantee your strawberries look perfect once coated? The secret is in how you set and cool them.
After dipping, place the strawberries on a parchment-lined tray. This keeps them from sticking and helps maintain their shape.
Place dipped strawberries on parchment to prevent sticking and keep their perfect shape.
To keep the chocolate glossy and smooth, don’t rush the cooling process. Chill the strawberries in the fridge for about 15-30 minutes.
But don’t leave them too long, as excess cooling can cause condensation and affect the fruit’s freshness. A quick cool-down helps the chocolate set evenly.
For the best look, keep the strawberries upright. If you want a shiny finish, lightly brush them with warm chocolate before cooling.
Proper setting and cooling not only make them look great but also help the fruit stay fresh longer.
This step ensures your chocolate-covered strawberries are both beautiful and delicious.
What to Do When Your Chocolate Cracks or Sticks?
Sometimes, despite careful cooling, your chocolate coating may crack or stick to the parchment. This usually happens because of the chocolate texture or candy consistency not being just right. To fix cracks, try re-melting the chocolate gently and stirring until smooth, then re-dip your strawberries.
If the chocolate sticks, it’s often because it cooled too quickly or wasn’t spread evenly. Here are some tips:
- Adjust the Temperature: Warm the chocolate slightly to improve its texture, making it more fluid and less prone to cracking.
- Control Cooling: Cool your strawberries in a cooler, more controlled environment to prevent rapid temperature changes.
- Improve Application: Use a spatula or fork to gently smooth or recoat, ensuring even coverage and avoiding thick layers that can crack as they set.
Flavor and Decoration Variations for Your Strawberries
Adding flavor and decorative touches can turn your chocolate-covered strawberries from simple treats into stunning desserts. You can try pairing them with fruits like blueberries, raspberries, or slices of kiwi to add vibrant colors and complementary flavors.
Elevate your chocolate-covered strawberries with vibrant fruits and eye-catching decorations for stunning, flavorful desserts.
Drizzle melted white candy melts over your strawberries for a marbled look or dip them in crushed nuts, sprinkles, or shredded coconut for extra texture. Seasonal decorations can also really elevate your presentation.
Think edible gold for special occasions or holiday-themed sprinkles during festivities. You can also use colored candy melts to match the season or event, like red and green for Christmas or pastel shades for Easter.
For extra flavor, consider adding a splash of vanilla or a dash of cinnamon to the melted candy. These variations let you customize your strawberries, making them perfect for any celebration or just to impress your guests.
How to Store and Serve Your Homemade Chocolate-Covered Strawberries
To keep your homemade chocolate-covered strawberries fresh and tasty, proper storage is key. First, make sure they’re completely dry before storing to prevent mold. Place the strawberries in an airtight container lined with parchment paper to avoid sticking and damage. For the best results, store them in the fridge at 35-40°F to keep both the candy melts and fruit fresh.
Here are some handy storage tips:
- Keep strawberries in a single layer so they don’t get crushed or smudged.
- Pair them with other berries or grapes to boost presentation and flavor when serving later.
- For the best taste and texture, enjoy them within 24-48 hours, since the candy coating can soften over time.
When you’re ready to serve, take them out of the fridge about 10-15 minutes beforehand. This helps them reach room temperature, which enhances their flavor and appearance.
Frequently Asked Questions
Can I Use White Chocolate Instead of Candy Melts?
Yes, you can use white chocolate instead of candy melts. White chocolate alternatives work well, but keep in mind that candy melts have a different composition, offering a smoother, more vibrant coating and easier melting process.
When comparing candy melts to white chocolate, expect slight differences in texture and flavor. To get the best results, melt the white chocolate carefully and add a bit of shortening or coconut oil for a glossy finish.
How Long Do Chocolate-Covered Strawberries Stay Fresh?
Think of your strawberries as fleeting moments of love; they stay fresh for about 24-48 hours. To keep them at their best, store in an airtight container in the fridge.
Freshness tips include waiting to dip until just before serving and avoiding humidity. If stored properly, your chocolate-covered strawberries will stay flavorful and look great longer.
This makes your sweet gesture truly memorable.
What’s the Best Way to Remove Strawberries After Dipping?
To remove strawberries after dipping, gently lift each one using tongs or a fork, making sure not to squeeze them so they don’t get damaged. Choose firm, fresh strawberries with dry, smooth surfaces for easier dipping and removal.
Use steady, controlled dipping techniques to coat the strawberries evenly. Then, lift them carefully to keep the chocolate looking smooth and intact. After dipping, let any excess chocolate drip off naturally.
Place the strawberries on parchment paper after dipping, so they stay looking great and don’t stick. This will help keep their shape and ensure they look appealing once the chocolate sets.
Can I Prepare Strawberries Ahead of Time?
Yes, you can prepare strawberries ahead of time. Wash and thoroughly dry them to prevent sogginess, then store them in an airtight container lined with paper towels.
For the best flavor, consider adding a drizzle of white chocolate or a sprinkle of crushed nuts right before serving. Keep them refrigerated until you’re ready to dip, but don’t store them too long to keep them fresh.
This helps prevent the candy melts from melting prematurely and keeps your strawberries tasting great.
How Do I Prevent Chocolate From Blooming or Developing a Gray Film?
To prevent chocolate bloom and guarantee smooth coating, focus on proper chocolate tempering. Melt the candy melts slowly and cool them to the right temperature to stabilize the cocoa butter crystals.
Avoid moisture and temperature fluctuations, as they cause bloom. Store your strawberries in a cool, dry place, and handle them carefully to keep the chocolate looking glossy and fresh.
This helps prevent a gray film from forming on the surface. Keeping things steady and dry is key to maintaining that beautiful, shiny finish.
Conclusion
Now you’re ready to create stunning, chocolate-covered strawberries that look as sweet as they taste. With a little patience and the right techniques, you’ll turn simple berries into edible works of art—like a painter with a palette of candy melts.
Remember, the key is to have fun and experiment with flavors and decorations. Don’t be afraid to get creative and try different designs or toppings.
Soon, your strawberries will be the star of any occasion, shining brightly like gems on a dessert tray. Making chocolate-covered strawberries with candy melts is easier than you think and always a crowd-pleaser.