6 Simple Steps to Make Chocolate-Covered Apples With Candy Melts
Many people want to make delicious chocolate-covered apples with candy melts but feel overwhelmed by the process. If you’re worried about getting that perfect shiny coating or decorating them just right, you’re not alone.
Luckily, making these tasty treats is easier than you think with a few simple steps.
To make chocolate-covered apples with candy melts, start by preparing your apples—wash, dry, and insert sticks for easy dipping. Melt your candy melts until smooth and glossy, adding a bit of oil if needed.
Dip each apple into the melted coating, letting excess drip off, then place on parchment.
Decorate with sprinkles or drizzles, then let them set in a cool spot.
For tips on perfecting your treats, keep going to learn more about troubleshooting and finishing touches.
Key Takeaways
- Select firm, dry apples and insert sticks for easy dipping.
- Melt candy melts in short intervals, stirring until smooth. Thin with oil if needed.
- Dip apples into melted candy, twisting gently to get an even coat. Let excess drip off.
- Decorate with sprinkles, drizzles, or toppings before the coating sets.
- Place on a cooling rack and refrigerate briefly to set. Then, store in a cool, dry place.
Gather Supplies and Prepare Your Apples
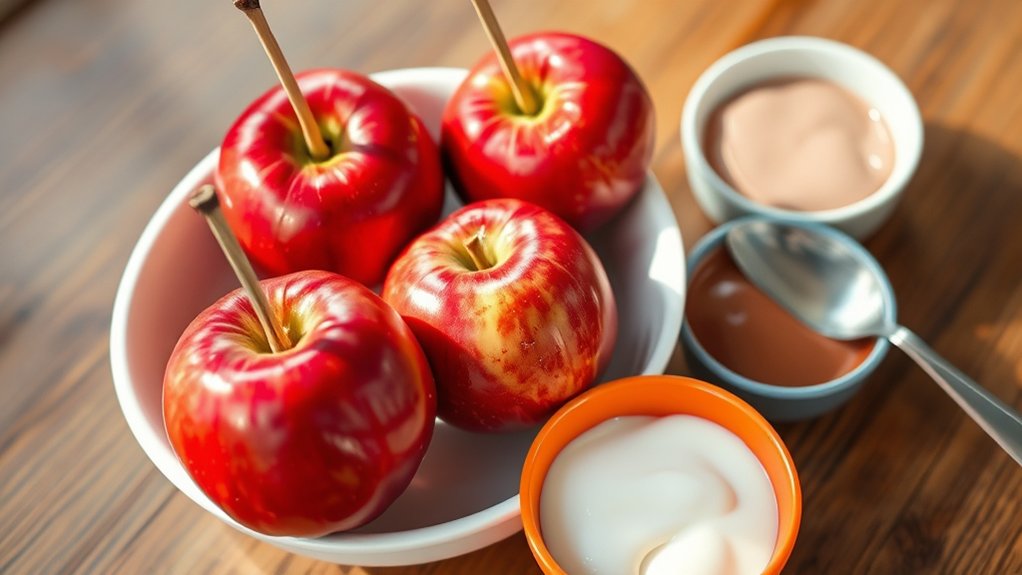
Have you gathered all the supplies you need? Your first step is choosing the right apple. Opt for firm, crisp apples like Fuji, Gala, or Granny Smith. The apple selection is key because a sturdy apple holds the candy coating well without breaking.
Choose firm, crisp apples like Fuji, Gala, or Granny Smith for the best candy coating experience.
Before you start, wash your apples thoroughly to remove any dirt or wax. Wax removal is essential for the chocolate to stick properly. To do this, wash them with warm water and a bit of lemon juice or vinegar, then dry completely.
Insert a stick or skewer into the stem end for easy dipping. Prepare a clean workspace with paper towels or parchment paper for setting the apples afterward. Double-check that you have all supplies: apples, skewers, wax remover solution, and a clean cloth.
Once your apples are prepped and wax-free, you’re ready to move on to melting your candy melts.
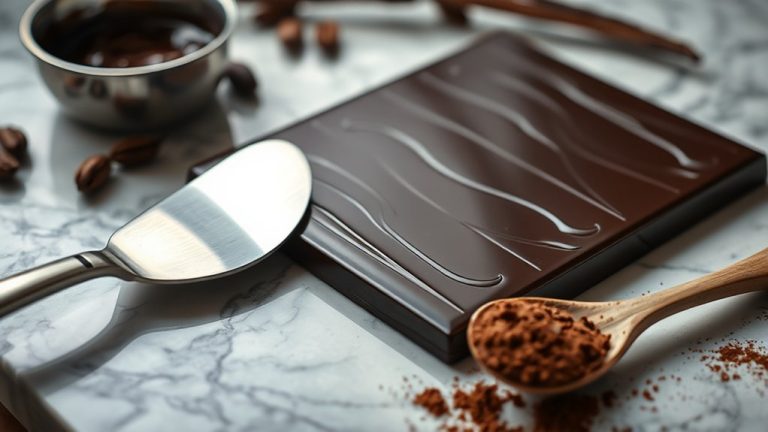
Melt Candy Melts to a Smooth, Glossy Finish
To achieve a smooth, glossy finish on your chocolate-covered apples, you need to melt the candy melts properly. Use a microwave-safe bowl and melt the candy melts in short 20-30 second intervals, stirring well after each. This prevents overheating and guarantees a silky consistency.
If you prefer, melt them using a double boiler for more control. The key is to reach a smooth, fluid texture without lumps or clumps. Once melted, you can add a small amount of shortening or vegetable oil to improve the shine and ease of dipping.
When selecting candy melt colors, consider your flavor pairings—bright pinks and reds for fruity or sweet themes, or metallic shades for elegance. Stir thoroughly to blend colors evenly.
Achieving a glossy finish depends on proper melting and maintaining a smooth, fluid consistency, which makes your apples look professionally coated and irresistibly appealing.
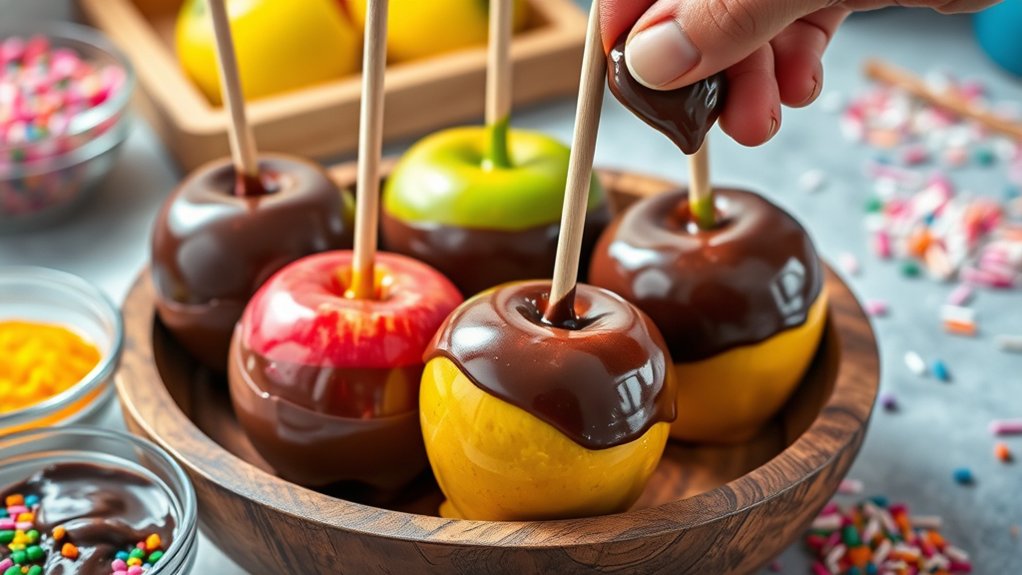
Dip Apples and Achieve a Perfect Coating
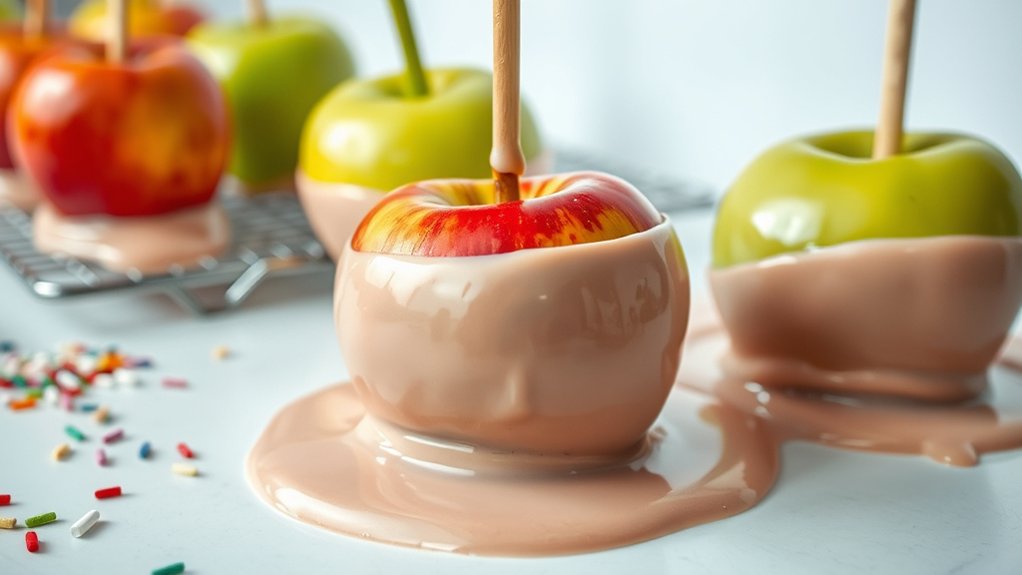
Once your candy melts are perfectly smooth and glossy, it’s time to bring your apples into the coating process. Hold each apple by the stem and dip it into the melted candy, using a gentle twisting motion to ensure an even coat.
Dip apples into smooth, glossy candy melts with a gentle twist for an even, tempting coating.
Let any excess drip off before placing the apple on a parchment-lined tray. For a more appealing look, consider pairing tart apples with sweet, milk chocolate melts or choosing crisp, firm apples for a sturdier coating.
To add flavor, try mixing in a splash of vanilla or a pinch of cinnamon into your melted candy. For a vibrant appearance, use colored candy melts or drizzle contrasting colors over the coated apples.
Achieving a smooth, even coating takes patience, but with careful dipping and attention to detail, your candy apples will look tempting and taste delicious.
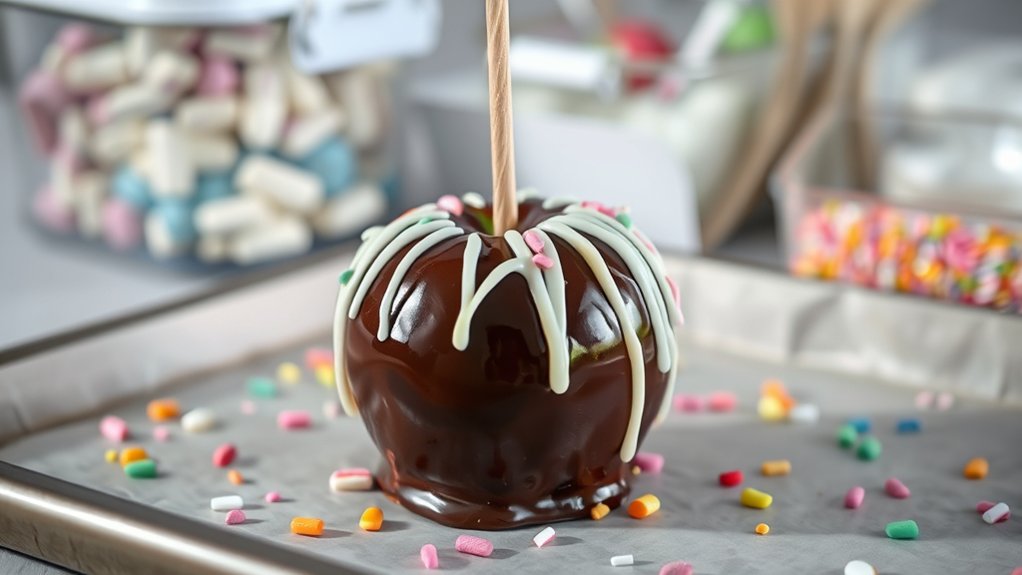
Decorate and Personalize Your Candy Apples
Now’s the fun part—time to get creative and make your candy apples truly your own. You can go wild with toppings like sprinkles, drizzles, or even edible glitter to add a little extra sparkle. And if you want to get really personalized, try using different colored candy melts to create unique designs or patterns.
These simple tricks are perfect for giving each apple a special touch, making them great for any occasion—whether it’s a party, a gift, or just a sweet treat for yourself!
Creative Decoration Ideas
Creative decoration ideas can turn your simple candy apples into eye-catching treats that reflect your personal style. Start by choosing festive themes like Halloween, Christmas, or birthdays to guide your decorations.
Use bold color combinations to make your apples pop. Think red and white for holidays or pastel shades for spring celebrations. Drizzle contrasting melts over the base layer for a stylish, marbled effect or add sprinkles, edible glitter, and candies for extra flair.
You can also use small candies or nuts to create patterns or faces, making each apple unique. The key is to experiment with colors and textures that match your chosen theme, turning ordinary treats into memorable, decorated masterpieces.
Personal Touch Techniques
Adding personal touches to your candy apples makes each one special and memorable. You can customize flavor variations by drizzling white chocolate, adding sprinkles, or inserting small candies for a distinctive twist.
Consider dipping part of the apple in different candy melts for contrasting colors and flavors. Using packaging ideas like clear cellophane wraps, decorative ribbons, or personalized tags boosts the presentation and makes your treats feel extra special.
You might also include edible decorations like crushed cookies, nuts, or edible glitter to reflect individual tastes. Personalizing your candy apples not only enhances their visual appeal but also creates thoughtful gifts or party favors.
The more you experiment with flavor variations and packaging ideas, the more uniquely yours each apple will feel, leaving a lasting impression.
Set Your Candy Apples and Store Them Properly
Once you’ve coated and decorated your candy apples, let them cool completely in a cool, dry spot. It’s best to give them some time to set so they stay looking perfect!
When you’re ready to store them, pop them into an airtight container and keep them at room temperature. Just make sure to keep them away from humidity and direct sunlight — moisture can make the candy coating soften or even melt. So, a cool, dry place is your best bet to keep those apples looking delicious!
Proper Cooling Techniques
To guarantee your candy apples set properly and stay fresh, it’s important to cool and store them the right way. After coating, place your apples on a cooling rack to prevent sticking and let excess candy melts drip off.
For quick setting, refrigerate the apples. Just make sure to chill them evenly to avoid condensation and moisture buildup.
Use this quick guide to help you out:
| Step | Technique | Tips |
|---|---|---|
| Cooling rack | Raise apples for even cooling | Avoid trapping moisture |
| Refrigerator | Chilling for a firm set | Don’t leave too long to prevent sweating |
| Ambient room | Final setting at room temperature | Keep away from humidity |
| Storage | Store in a cool, dry place | Use airtight containers |
Following these steps will keep your apples perfect and delicious.
Optimal Storage Conditions
Ensuring your candy apples stay fresh and delicious depends on setting the right storage conditions. You need to maintain temperature consistency so the chocolate doesn’t melt or crack.
Store the apples in a cool, dry place away from direct sunlight and heat sources. Humidity control is also essential since excess moisture can make the chocolate sticky or cause spots.
Keep the apples in an airtight container or loosely covered with plastic wrap to protect them from moisture while allowing some airflow. Avoid refrigerating unless absolutely necessary, as sudden temperature changes can affect their texture and appearance.
Avoiding Moisture Contact
Moisture is your candy apple’s biggest enemy because it can cause the chocolate to become sticky, develop spots, or even peel away from the apple. To prevent this, make sure your apples and workspace are thoroughly dry before dipping.
Wipe the apples with a paper towel to remove any residual moisture and keep the surface dry. Avoid placing apples in humid environments or refrigerating them immediately after coating, as condensation can form on the surface.
When setting and storing your candy apples, use a dry, cool area away from humidity. Wrapping them loosely in cellophane or storing them in a breathable container helps maintain surface dryness.
Properly managing moisture contact guarantees your chocolate coating stays smooth, shiny, and intact.
Troubleshoot Common Candy Apple Problems
Are your candy apples not turning out as expected? If the chocolate flavor isn’t as rich or the coating isn’t smooth, don’t worry. First, check your candy melts—they can seize if overheated or mixed too vigorously. Use low heat and stir gently to prevent this.
The type of apple also matters. Tart or overly juicy apples can cause issues with coating adhesion. Opt for firm, sweet apples like Fuji or Gala for better results.
If your candy coating is too thick or clumpy, try adding a small amount of vegetable oil or Paramount Crystals to thin it out. For uneven coating, make sure your apples are completely dry and at room temperature before dipping.
Troubleshooting these common problems can help you get a shiny, smooth chocolate layer with a consistent flavor. With a few tweaks, your candy apples will look and taste perfect.
Frequently Asked Questions
Can I Use Other Types of Chocolate Besides Candy Melts?
Yes, you can use different types of chocolate instead of candy melts. Melting chocolates, dark or milk chocolate, or even white chocolate are good options if you want a different flavor.
Just keep in mind that different candy coatings melt and set in their own way. You might need to adjust melting times or add a little shortening or oil to get the right consistency.
Trying out various chocolates is a great way to customize your apples for the perfect taste and texture.
How Long Do Homemade Candy Apples Last Before Spoiling?
Your homemade candy apples usually last about 1 to 2 days at room temperature before they start spoiling.
If you store them properly in the fridge, they can last up to a week. Keep them in an airtight container or wrap them tightly with plastic wrap for the best shelf life.
Try to avoid direct sunlight and humidity, as these can cause the candy coating to soften or spoil faster.
What Are Some Alternative Toppings for Decorating Apples?
You can try fruity toppings like crushed berries, thin apple slices, or chopped dried fruits to add flavor and color.
Edible decorations such as sprinkles, chocolate shavings, or colorful drizzle also make your apples more appealing.
These options not only improve the look but also give a variety of textures and tastes, making your apple treats more fun and festive.
Feel free to experiment with different combinations to suit your style!
Is It Necessary to Refrigerate Candy Apples After Making?
Think of your candy apple as a delicate treasure that needs safeguarding. You don’t always have to refrigerate it, but storing it in the fridge helps keep it fresh and prevents the chocolate from melting or bleeding.
Candy apple storage in the fridge is recommended if you’re not eating it right away. Whether you need to refrigerate depends on your environment; in warm weather, it’s a must to prevent spoilage.
Refrigeration helps ensure your sweet masterpiece stays perfect, especially when it’s hot outside. It’s all about keeping your candy apple looking and tasting its best.
Can I Make Candy Apples in Advance for Parties?
Yes, you can make candy apples in advance for parties. It’s best to prepare them a day ahead and store them in the fridge to keep them fresh.
Wrap each apple in plastic wrap or place them in an airtight container to prevent moisture and help them stay crisp. This way, your candy apples will stay delicious and ready when your guests arrive.
Conclusion
Now that you know the steps, the fun is in making your chocolate-covered apples with candy melts. Gather your supplies, melt the candy melts carefully, and dip your apples with love.
Decorate creatively to make each apple special. Set your treats aside to cool and harden, and enjoy the artistic process.
Cherish the experience and celebrate your homemade candy apples. Whether you’re making them for a party or as a gift, they’ll surely delight and impress.
So, get started, enjoy every step, and share your delicious chocolate-covered apples with those you love.